Our drawing of the typical offset food smokers, which come in a variety of sizes! Study our “Match Your Cooker” list for wood use.
For those that have followed us for years, you know we are proud that almost from the start of our Company, we were committed to providing a guide for equipment to cooking wood product match. We refer to our guide affectionately as “Match Your Cooker”.
In this article, we are covering our recommendations for smoker equipment; these are cookers that are dedicated for use as a smoker, usually hot smoking at that. As there are always new equipment lines and models released, our plan is to provide regular updates. We also encourage you to send us a message when you don’t see a manufacturer or model listed so we can add this to our listing.
For now, we introduce you to our wood master’s guide to SmokinLicious®cooking woods for specific smokers.
American Barbecue Systems model: “All Star”, “The Pit-Boss”, “The Bar-Be-Cube”
Backwoods Smoker model: “Party”, “G2 Party”, “The Fatboy”, “G2 Fatboy”, “The Pro Junior”, “The Piglet”, “Piglet Plus”, “The Competition Hog”, “The Pro-Competition Hog”, “The Whole Hog”
Dr. Smoke- When it comes to the performance of your food smokers, we have a ton of helpful info that will make your unit work superbly to flavor food. Feel free to tap into our “Match Your Cooker” wood master’s guide on our website.
For those that have followed us for years, you know we are proud that almost from the start of our Company, we were committed to providing a guide for equipment to culinary wood product match. We refer to our guide affectionately as “Match Your Cooker”.
In this article, we are covering our recommendations for ceramic and komado style grilling equipment; these are grills that are made from ceramic, clay, terracotta or crushed lava rock that allow the grill to reach extremely high temperatures – usually at or above 750°F! They are also capable of using charcoal and wood either independently or in combination.
As there are always new equipment lines and models released, our plan is to provide regular updates on this listing. We also encourage you to send us a message when you don’t see a manufacturer or model listed to ensure it is added to the list (email drsmoke@smokinlicious.com).
For now, we introduce you to our wood master’s guide to SmokinLicious® culinary woods for ceramic and komado grills.
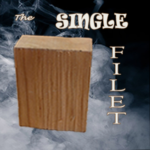
Single Filet Wood Chunks for Ceramic Smokers & Grills
We hope you view this guide as a helpful resource for selecting the perfect culinary wood for your equipment. As always, our Wood Guide Team is ready to answer your additional questions and further assist you with the perfect grilling and smoking experience!
* Although considered a komado grill, this brand is not made with any ceramic, clay, terracotta, or crushed stone.
** This brand is only designed for use with wood chips and includes a patented smokin’ chip feeder.
Ceramic smokers & grills are very popular. For more reading on how these units can best work with wood as a food flavoring element, check out these articles:
Smokinlicious® recommends “must have” gas grill tools
GAS GRILL TOOLS
There is no question that LP/Gas grills have changed tremendously over the past 10 years and now include some features standard that for many years, were options. Then there is the development of dual or multi-fuel options on a grill so you can have one unit that performs as a gas grill, charcoal grill, wood grill, and even electric or pellet grill, all in one unit.
Today, I’m focusing on the standard LP/Gas grill, independent of any other fuel source. This guide will focus on the basic tools that will provide for a better grilling experience and make you more efficient at the grill.
GAS GRILL TOOLS THAT YOU MUST HAVE:
Tool #1
I’m starting with a grill brush since most of us have the habit of thinking about cleaning off the grill grates when we start the grill for cooking, not when we finish. This tool is to ensure clean up the residual food bits and grease left from your previous grilled foods.
Now I’m aware of the controversy over the use of metal bristles but most of these brushes are made well. Simple inspection of the brush bristles each time you use it will allow you to identify if the bristles have come loose and have the potential to be transported to your foods. I prefer a brush with metal bristles, with a long handle to keep my arm away from the heat, as often you want to clean the grill when it’s hot. Remember, most of these brushes are under $10 so think about purchasing one a couple times per season to ensure the bristles stay put.
Tool #2
There are times when the grill grates and lid will become super coated in grease and pieces of food. You’ll need to break out the cleaning agents to ensure these surfaces are ready to go for the next grilling event. Two of my favorites are CLR BBQ Grill Cleaner and Mr. Clean MagicEraser. As a non-toxic, non-flammable, biodegradable product, CLR BBQ Grill Cleaner is not something you have to leave on for hours at a time. It quickly breaks through the issues and allows you to wipe clean to an almost new state. Keep in mind, the CLR brand also makes a stainless steel cleaner for the outside as well.
Tool #3
Long-handled tongs. Your standard tong length for the traditional kitchen just won’t work at the grill, as you need to keep some arm distance from the hot grill surfaces. I like the 20-inch length with silicone grips as well as silicone tips, as silicone can tolerate extremely high heat. If you grill multiple food items at the same time, think about purchasing tongs with different colored tips and/or handles as that will ensure use of one color for a specific food so there’s no transfer of flavors.
Tool #4
Like the tongs, a must have is long-handled spatula for those food items that need to be flipped. I prefer one that is made of solid steel and has a bit of a beveling to the edge. Again, the longer the handle the better for keeping away from high heat.
Tool #5
An easy to read, digital thermometer. It is a must when you grill or smoke. Look for one that has a longer probe for when your grilling larger roasts and thicker cuts of meats and poultry. Be sure the readout is easy to see and if you grill a lot at night, get one that has a back-lite to see more clearly. If you cook a lot of different animal proteins at the same time, try to have a thermometer dedicated to each food so you don’t cross-contaminate while bacteria may still be an issue. There are assorted colors available making it easy to dedicate one to red meat, pork, poultry, and fish. Most of the digital thermometers on the market today are under $18 with even more under $10.
Tool #6
If you’ve always been a person that cooks directly on the grill grates and only does the standard fare – hamburgers, sausage, chicken, perhaps ribs – you need to get out of that rut and learn to do more with your grill. Start by investing in one piece of quality cast iron. Able to withstand intense heat, cast iron can take you from the average griller to someone with skill. Now, you can enjoy recipes normally done on the indoor stove outside in the fresh air, with your cast iron skillet. Remember, there’s a whole line of cast iron cookware so as you expand your skills, you can add to your outdoor cookware.
Tool #7
Although I am a fan of the standard steam table disposable foil pan, any size, shape foil pan will do. These are perfect for use as a drip pan to prevent render juices from spiking flames and as water pans for a two-zone cooking set up. I won’t deny, that I also use these to cook in especially fragile items like fruit and specific vegetables. You certainly can invest in a grill pan but clean up becomes a snap with the disposable pan.
Tool #8
Although the smoker box was originally intended for use with wood chips on the grill, I always use small wood chunks in mine. I prefer a box made from high-grade stainless steel and one that has a hinged lid. My smoker box holds three Double Filet Wood Chunks from SmokinLicious® perfectly and provides for extended smoke vapor as compared with wood chips. Used directly on the grill grate or set under the grill grate on the heat shield, it produces smoke for hours. Although you can place wood chunks directly on the heat shields, as I’m known to do myself sometimes, they will become permanently marked from the wood ash and eventually need replacing. The smoker box allows you to avoid this.
There you have it! My TOP TOOLSNEEDED FOR GAS GRILLING for better results and help in extending the life of your investment!
The Smokinlicious® friction log is not only cut to the correct sizing, we also customize the moisture level for optimal smoke generation.
You started your food process by ensuring you were unique in the market. You tested and retested ingredients and procedures for the perfect smoking program. Did you think of everything? What about the wood you use with your friction logs?
Friction Logs- How to Create Balance with Moisture and Wood
Do you know hardwood needs moisture to smolder and produce smoke aerosol? Why? First, friction logs are designed to produce a pre-stage to combustion. That means, no flames or fire. Secondly, this stage occurs at a lower temperature. That means less of the bad components of wood are introduced. Finally, reach the ideal moisture level and you are guaranteed a better product. Clean flavours, perfect colour and great aroma. Our logs bring that to you!
Why Things Go Wrong
Moisture in wood is critical. If you use a wood that is too wet, acrid flavours will form. Wood that is too dry gives no or limited flavour to foods. In short, that’s the reason why dialing in moisture for your friction logs is essential.
Isn’t it time you dial in the moisture level of your friction logs for flavour that makes your foods an experience for the customer?
We know what it takes to gain the perfect essence from the wood. Learn why SmokinLicious® is the perfect partner for your food process and explore the world of hardwood as an ingredient!
Our outdoor kitchen guest blog is authored by Mike Cahil
Mike is part of the Content Marketing team and enjoys applying market insights to provide valuable content on all things real estate. Mike’s dream home would be mid-century modern style near the water.
As days get warmer and summer approaches we’re all looking for more ways to spend time outside. Whether it be biking, running, hiking, or walking we can all agree that being outside is one of the best ways to spend time during the summer. So why not cook outside too? Having an inviting outdoor space that can double as a beautiful kitchen is a great way to be outside and create memories to be cherished for years to come. For that, we reached out to the experts from Yolo to Palm City to provide our readers with a few tips for creating the Ultimate Outdoor Kitchen.
Make it your own Outdoor Kitchen
The trend of outdoor design is experiencing a dramatic shift today. Landscape designers are moving away from traditional masonry-built structures to waterproof cabinets equipped with storage, trash receptacles and even vegetable and herb potting areas providing a whole new experience. Moya Living and Urban Bonfire offer two creative and functional products that bring color and extreme functionality into the design and provide the structure with every ability to create the perfect outdoor kitchen. Whether the homeowner desires a smoker from Kalamazoo, a pizza oven from Lynx, or Versa Powder Cooker from Alfresco, the options are endless in the design creation. Outdoor kitchen design now takes front and center focus when planning a remodeled home and now is simply an extension from the indoor to the outdoor so that every space of the home is utilized. – Annette Reeves
Find a proper grill
The focus of any outdoor kitchen is the grill. At Chicago Outdoor Living we believe a grill’s value shouldn’t be based solely on price. Features such as design, quality of materials, and functionality, combined with price, play an important role in choosing the grill that is right for you. It is also important to be aware of the manufacturer’s warranty. Chicago Outdoor Living carries a variety of high-quality grills to fit everyone’s grilling needs and budget – Chicago Outdoor Living
Our Authors image of cooking burgers
Choose complimentary finishes
Leather finish granite countertops are my go-to countertop surface for outdoor kitchens. It looks matte enough to feel like it belongs outdoors but is cleanable and ages well. – Attainable Form
Utilize misting systems
During sweltering summer days that are hot enough to have you fantasizing about moving to Antarctica, it can be difficult to enjoy your outdoor kitchen while you are feeling sweaty and scorched. With our misting systems that cool the air by up to 30 degrees without getting anyone drenched, you’ll be able to elevate your lifestyle and enjoy your outdoor kitchen in comfort all you want. – Advanced Misting Systems
Incorporate patio heaters
Enjoying your outdoor kitchen can be extremely difficult during winter days that are so cold it feels like you could chip a tooth from shivering. With our outdoor patio heaters that emit radiant heat to keep an area warm, you’ll have your own patio encased in a bubble of warmth, allowing you to enjoy your patio and outdoor kitchen while the neighbors are stuck indoors. – Gas Outdoor Patio Heaters
Storage is key in your Outdoor Kitchen
You can never have enough storage outside. The key is drawers: paper plates, utensils, corn on the cob holders, grill grates…. Keep them at your fingertips and you will be much happier. Drawer cabinets have to be fully enclosed to avoid creatures from crawling in for a vacation. – Cowgirl Q
If you love wood-fired flavors to foods cooked outdoors then be sure to consider wood storage when designing your outdoor kitchen. Pizza ovens, ceramic or clay ovens/smokers, traditional smokers and gas/hybrid grills all allow for the addition of charcoal, charwood, and/or hardwood to bring flavor essence to favorite cuts of protein, vegetables and fruit. Include in your design wood storage that allows for good air circulation to the wood as well as storage placed close to the equipment. Mesh bins or small wood crates work well for smaller pieces of wood that can fit on shelving under the counter or design open shelving in metal, stucco or concrete material that allow larger pieces of wood to remain dry, nonreactive and at the ready. – Smokinlicious
Don’t forget about the island
The best way to start creating your own Ultimate outdoor Kitchen is by getting ideas of different types of islands and kitchens. Researching will help you brainstorm an idea of your own (shape, size, color, components, etc). The next step is to find out where your Island will be placed. After finding a perfect fit, take a few measurements to see how the unit will be laid out. Over the years, KoKoMo has created various Outdoor Kitchen models with all kinds of different designs. A good example is our custom sports bar. This unit is fully stocked with all of our most popular components and accessories. This kitchen has a beautiful white-looking stone that covers the base, with a nice steel-looking tile to go with it. We used a large 15×15 aluminum shade cover with two giant TVs to entertain both sides of the island. – KoKoMo Grills
Keep it comfortable
Outdoor kitchens draw people in, whether it’s your guests gathering to offer help or little ones looking for a snack before the big meal. Make everyone comfortable with our thick, high-density cushions. Bonus tip: all our cushions are covered in water-resistant fabric, making rain and spills the least of your worries. And at the end of the party, if you need a special type of cover for your furniture or grill, we’ve got you covered with custom-made covers! – Classic Accessories
Consult with a pro for the Ultimate Outdoor Kitchen
For homeowners who want to build a fully functional outdoor kitchen area in their homes, I always recommend consulting with a designer, in addition to the outdoor kitchen company themselves. One thing I have learned with my experience in the business, is one layout for a kitchen does not necessarily work for every future buyer of the home — so the key is: versatility and simplicity. Most buyers these days are not so focused on decking, they want to see more grass. So artificial grass is a great alternative to decking, plus easy to maintain. Keep your dining area separate, and not built-in, should someone in the future want to change it, or if you entertain and need a different layout for a specific event. – Jenny Okhovat Homes
Every summer, many people put aside their work, daily stresses and responsibilities and escape on a vacation somewhere far away from reality. It may be a secluded retreat in the mountains, a camping trip with the kids, an arranged tour in another country, an Alaskan cruise, or days relaxing at an exotic beach or resort.
However, with the current pandemic including social distancing and travel restrictions, along with financial constraints for many, those plans may have to be temporarily shelved. But the desire to escape reality – for just a bit – is very much alive. So, with many people remaining in their homes, how can that off-work journey happen? We have some tips for making the best of the situation and creating cherished vacation memories without ever leaving home. It’s called a staycation.
What’s a Staycation?
A staycation is, quite simply, a vacation at home. How realistic, how exciting, or how relaxing you make it is up to you. Theme it up for a more authentic “away-from-home” experience.
What makes a great staycation? Well, that depends on what you consider a vacation. Some people want adventure, while others like relaxing with a drink in their hand. Still others use vacation time to unwind by tackling DIY projects such as renovations. So, what would you enjoy doing if you could craft your own staycation? (Which, by the way, you can.)
Commit To the Best Staycation Ever!
Once you’ve decided to schedule a staycation – whatever it ends up being – commit to it. Mark it on your calendar. Plan for it. Make concrete plans. If you’re working, ask for those days off of work. Don’t just say you’re going to have a vacation and spend the weekend lounging on the sofa, noshing on Cheetos and surfing the internet, unless a week of rest is the staycation you’ve planned.
Whenever you’re going for vacation in your home – especially in these times when so many of us are working from home – try to unplug so your mind’s not on work and responsibilities. Set your work email to the “out of office” setting and write an auto-reply message. Then, don’t check your work emails unless absolutely necessary. Consider NOT telling your boss that you’re vacationing at home. Turn your cell phone off or on silent and set a small window of time each day to check for messages.
Skip the news. The idea is to get away from stress, away from reality. Just concentrate on your vacation experience. The news cycle can wait for a week. Really, it can. This is the time to be good to yourself.
Best Staycation Ever! – Don’t Neglect to Prepare
Prepare for your staycation much like you’d prep for any other vacation. Create your itinerary. Decide what kind of activities you would like to do each day of your vacation. What kind of staycation would you like? Cultural learning, straight-up fun, pampering, relaxing? Write your vacation goals down, and then make a game plan. Don’t want to cook while on vacation? Gather menus from local restaurants that deliver and have them on hand. You could even incorporate different restaurants into the theme of your vacation.
Before your official vacation start time, do all the necessary prep work. Complete all chores in advance. Wash the dishes, dust, pay the bills, scrub the toilets, empty the trash. Do the laundry BEFORE your staycation begins. You don’t really want to be sorting and folding while on vacation, do you?
Best Staycation Ever- Set the Mood for Your Staycation
Many people have saved money in anticipation of an annual vacation to pay for things like hotel rooms, meals, plane tickets and a rental car. Why not channel some of those funds into your at-home vacation paradise?
Create your staycation space – really, truly, set up a space that exudes the theme of your vacation. Move the furniture, change the lighting, order pillows, fairy lights or scented candles – whatever your theme is, run with it. Look at magazines or online trip websites for inspiration. Think about the destination you want. Paradise under the palms? Set up a piña colada or margarita station at home. Roll up the rugs and go barefoot like you’re on the beach. Set up a hammock between backyard trees or on your back porch.
Dreaming of a mountain retreat? Set out pine-scented candles and decorate the room with cottage home decor. Plan for any purchases you’ll need for your staycation. Does your week require some relaxing pillows, aromatherapy candles, a tent or hammock? Dreaming of an overseas vacation? Hit the international foods section of your grocery and stock up on items from that region to set the mood. Planning a spa retreat week? Buy a set of high-thread-count sheets, a couple of luxurious pillows, scented bath salts, essential oils, and a super-soft robe.
To make your staycation ambiance even more realistic, you can make a vacation soundtrack with music that reminds you of that particular place, or perhaps a past favorite vacation that you’d like to recreate. Going to the beach in your mind? Ramp up some Jimmy Buffet music. Missing that trip to Brazil this summer? Make your own compilation of Brazilian favorites including the likes of Roberto Carlos or Anitta. Or queue up some internet music mixes.
Think about your favorite luxury hotel amenities and try to replicate some of those special touches at your own staycation. Love peppermints or chocolates on your pillows? Do it. How about a fruit basket, or a water pitcher of cold spring water infused with the subtle flavor and inviting look of cut fruit? Make it happen. This is all about helping you feel like you’re somewhere else.
Best Staycation Ever- Self-Care Weekend
How about a pampering week, helping you release all the stress that’s built up this year? Consider a self-care “getaway” with a spa day, a YouTube yoga session, or a self-manicure. Start a journal of self-discovery. Draw a warm bubble bath, adding some calming essential oils like lavender or chamomile. Slip into the welcoming suds as you relax your mind and body. Soft music and candles invite you to soak away the stress. Then, wrap yourself up in the soft hug of a luxurious robe. This vacation is all about being good to yourself.
Best Staycation Ever- Retail Therapy Weekend
If you have money saved up that you won’t spend on a vacation this summer and miss shopping, you may want to arrange a retail therapy staycation. Curl up on the sofa with a glass of wine and start online shopping. You could budget what you had already set aside for your anticipated actual vacation, and spend some of that money, or just “window-shop” and dream from the comfort of your favorite recliner.
Best Staycation Ever- Plan Future Vacations
You can’t travel much right now, but the future is wide open. You’ve been staring at your walls for quite a while now, longing to escape. Why not start that escape, at least in your mind? Begin planning your post-pandemic road trip (or plane trip). There’s no time like the present to ponder where you’d like to visit – start with the continent or country, and narrow it down from there. Search online for destinations, hotels and fun activities. Jot them down and start planning for next year.
Look online for interesting destinations and then start searching for places you can stay, like at hotels or bed and breakfast inns. What kind of activities can you participate in while there? Take notes, plan your budget, and work out the details so when it’s time to fly the pandemic coop, you’ll have all your ducks in a row for your next adventure.
Best Staycation Ever- Cook a Fancy Dinner
The internet is filled with how-to-cook videos. Zero in on one and cook that meal and impress your spouse or family. See if you can find fanciful foods that fit into the theme of your staycation. Or, ask your family to pamper you and cook (including doing the dishes.). You can also sign up for delivered meal preparation kits. These kits arrive at your doorstep with all of the ingredients, already prepped, along with step-by-step directions. You’ll feel like a professional chef in no time.
Chill
You may be someone who just needs to chill for a vacation. Vacations don’t always have to be about excitement and activity. Sometimes, you just need peace and quiet to de-stress from life.
Create your zen vacation in a quiet place of your home – make it off limits to the children (perhaps you have someone who can take care of them). Then, unplug your clocks or put them in the closet so you can’t see them. Turn off your phone, put on earphones (if there’s house noise you can’t block out) and just…chill.
Fun for the Whole Family on the Best Staycation Ever
If you’re quarantining with your family and yearning for a vacation, build a staycation with a family-friendly theme or activities. Although you have been in each other’s space for months, there are ways you can spend quality, vacation-esque time as a family and build beautiful bonds.
Best Staycation Ever- Camping Out
Go camping for your staycation – for a night, a week, or somewhere in between – you choose. Set up a tent in the backyard, complete with sleeping bags and camp lights. Don’t forget the mosquito repellent or citronella candles. Pack up snacks in bags for a more authentic experience, and string lights in the trees or at the top of the tent for some extra ambiance.
Snag a couple of bags of ice from the store and fill a cooler with food and drinks to keep with the campout theme. Cook your meals on a grill or have a fire pit if regulations allow. Roast marshmallows or craft s’mores. Tell stories around the fire. Stay up too late and laugh too much.
If your idea of camping is closer to glamping, or you don’t have a backyard, then move things indoors. Set up a tent or have your kids create a tent by hanging sheets and other fabrics in clever ways. Unleash your children’s creativity with tent-making – they know how to make the best tents and forts. Set up your indoor camping ambiance with flashlights and flameless candles for light sources. Eat from paper plates and make s’mores in the microwave. Search for a campfire video to play on your TV.
Have a family costume night or a themed party during your staycation. Challenge your kids to dress up as their favorite movie character, singer, or superhero, using clothes, props and supplies already in your home.
Love watching movies? Build a staycation around that. Have a themed movie marathon. Each family member picks a movie that you all watch, or you could categorize movies, like comedies, animation, action or another genre. Don’t forget the popcorn. Plan ahead and surprise your “movie audience” with their favorite movie theater candy and sodas.
Music or Karaoke Party
Use some of the money you would have spent on lodging, meals, attraction fees and more – and buy a karaoke machine. You may find your family singing until they’re all hoarse and falling down in laughter. Learn a new song on an instrument you play, and hold a “recital” in your living room. If more than one member of your family plays an instrument, work on a performance together.
Virtual Travel and Games
You could also spend the summer vacation money on virtual reality headsets. This marvelous technology is a fantastic way to virtually leave your house and go on vacations together, using 3D travel apps. Want to walk the streets of Paris? Climb mountains in the Himalayas? You’re only a VR headset away.
Backyard Water Game Day for best Staycation ever
Beat the summer heat on your staycation with a day of water games in your backyard. Ask your kids to plan games and gather the necessary accessories like water hoses, kiddie pools, sprinklers, soaking guns, water slides, water balloons (be sure to pick up the broken balloon pieces) and plenty of sunblock. You can go all out renting an inflatable water play set, or you can keep it budget-friendly. Bring on the popsicles and laughter.
Night in for the Parents
Parents may just need a vacation from their kids. Try to set up a cozy, romantic room or patio area for your loved one. Group candles around your backyard. Flameless candles4 are great and there’s no fire hazard. Set up a hammock or pillows or some other way to relax. Chill a bottle of wine, soda or whatever happens to be your favorite beverage. Make up a cheese tray. It can be fancy, or it can be laid-back. Pour a bag of chips into a bowl if that’s your style. Set some mood music, relax and kick back.
Best Staycation Ever- Learning Vacation
Many people love to travel to new locations and learn about culture, architecture, art, languages, food, and more. The opportunity to learn something new during your staycation is limited only by your imagination.
Because of the pandemic, many museums now offer free virtual tours. Spend days in the Louvre, or take an interactive tour of Mark Twain’s house. Visit zoos virtually, or set up Zoom meetings with friends or relatives in different countries so you can practice conversing in a foreign language.
Travel the world for free using your local library card. Libraries have a wealth of e-books available to download from the library’s website onto your own device. Just pick them out and download, prop your feet up and escape into a mystery, thriller, romance, fantasy, or whatever genre you enjoy. Have your favorite beverage and snacks near your reading haven.
Take an online class on cooking, digital art, sewing, or something that intrigues you. This is your staycation. If your goal is to spend more time outdoors, consider starting a new flower or vegetable garden or a compost pile. Set up a rain barrel water collection system, making use of the rainwater rolling off your roof.
You can even make it a learning vacation for your pet. Learn how to teach your pet tricks or a new skill, like sniffing out smells. Or, just chill with your cuddly cat on your lap. For some, that’s a heavenly vacation.
For those who would rather “do” than chill, spend your staycation time learning a new craft. Clear out your schedule and spend that time really digging into whatever it is you want to learn. Use budgeted summer vacation money to order acrylic or oil paints, modeling clay, mosaics or stained glass supplies, whatever strikes your fancy, and learn a new skill you’ll maintain long after your staycation is over.
Renovate a Space in Your Home
For those who need to be active during vacations, think about a renovation vacation. Since you’ve been home so much the last two months, no doubt you’ve zeroed in on a corner or a room of your house that’s begging for an update or a redo. Repaint the kitchen and add a backsplash or replace the flooring. Update your bedroom, adding new curtains or blinds. Turn that depressing basement into a new game room, guest room or home office. Browse among the DIY articles from professionals for inspiration and guidance.
Whatever your stay-at-home vacation fantasy is, try to make it happen. This pandemic won’t last forever, and the vacation you take this summer, at your own home, may just spark some of the best memories ever. Don’t forget to take photos!
Pears, pears, everywhere! Why not try your hand with this easy method for smoked pears Depending on where you’re located, you’ll have at least a few varieties of pears to select from. Rather than just enjoy these as a raw fruit, try something truly unique that will give them a kiss of wood flavoring?
Stovetop smoking is so easy and a great way to still enjoy wood-fired flavorings during the winter months, when you may not want to venture out to the grill or smoker. I’ll be highlighting Bosc pears in today’s technique. To do this technique you will need:
Fresh pears – 4 will likely fill the smoker pan one time
A Chef’s knife, paring knife, and cutting board
A cooling rack
Pears cut in half
PREPARING THE SMOKED PEARS
When I purchased my Bosc pears, I made sure that they were firm to the touch so that I would have some longevity to their use in recipes for a while. Carefully, wash each pear and then pat dry with a paper towel. I then slice each pear in half, removing the stem tip. This will give me a flat surface to smoke and cook my pears since I am using a stovetop grill pan with my process. That will allow me to form some great grill marks on the pears while they cook. The benefit to using halves of pear is I can feature larger pear cuts in a salad or dessert, highlighting the golden smoked color.
Once the pears are halved and the stems removed, I will core out the seeds and hard seed membrane with a small paring knife. Once that step is complete, I start the heat under my stovetop smoking pan.
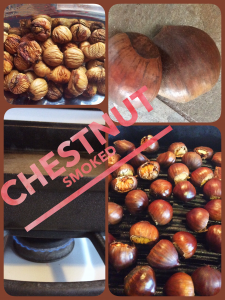
Collage of Smoked Chestnuts go on a Stovetop Smoker
SMOKED CHESTNUTS ON A STOVETOP SMOKER!
Depending on where your located, chestnuts may only be available for a short period each year, usually around the holidays. Mostly pan roasted in the oven, why not do something unique with this prized fruit and smoke them! In addition to the chestnuts, you’ll need a stovetop smoker, purchased or you can make your own with tools likely in your kitchen. You can see our writing on the “The Kitchen Find” which will guide you on what is needed.
about 2 hours of time. Be sure you also have a hood vent where you will be using the stovetop smoker in order to maintain a smoke-free kitchen.
You will find chestnuts available prepackaged or in bulk when in season. Although the packaged product will include a directive to cut an X in the flat surface of each nut, I grew up in a household where we always cut off the stem side. This is the small, dark cap side to the chestnut. The chestnut has a cap and a pointed end giving it a bloated teardrop look. I have found that when smoking, I get better control of the smoke infusion with a fresh cut to one end. Keep in mind, not all the chestnuts purchased will likely be viable as often mold will take hold of some of the chestnuts which you won’t see until you cut into them. As the chestnuts age, they can develop a fuzzy mold on the outside which will tell you not to waste your time cutting that one open! Simply discard!
Generally, chestnuts have a flat side and a rounded side.
To prepare them:
lay the chestnut on the cutting board with the flat side down. Place your knife blade over the small dark cap, and slice off in one motion. This will reveal the chestnut meat inside which will have a yellow-white hue. Once the cap is off, you’ll be able to tell if any mold has set in as it will have a marked gray/black appearance. If any mold is noted, discard the chestnut as it won’t cook tender. If the majority is free of mold, go ahead and keep it for the smoking/cooking process.
To do stovetop smoking, there are 4 parts needed:
a pan to hold the heat and wood chips
a drip pan to prevent rendered fat and juices from entering the wood. Generally, you only need the drip pan when you actually have a food item that will produce juices or fat drippings.
a grill pan
a lid.
Note: Smoked chestnuts will not produce any drippings though they do have a percentage of water that will be released as steam into the lid of the pan. Just be sure when you open the lid that you keep any collected water from dripping back into the cooking grate.
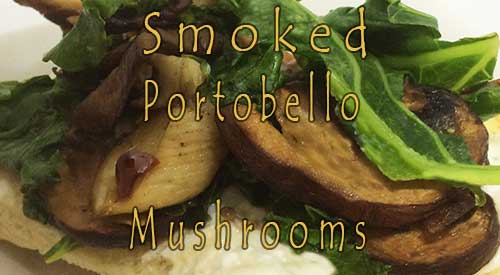
Smoked Portobello Mushrooms enhances the natural flavor of this fungi
What’s Fungi?
This is a group of organisms that include yeasts, molds, mildews and MUSHROOMS! That’s right! Mushrooms are a fungus but a good one.
As a water-rich fungus containing 85-95% water content, mushrooms develop from a nodule which forms the common stem and gill top. There are lots of mushroom types and not all of them are edible. Be sure to stick to mushrooms you purchase in the store and leave the wild ones to the forest animals.
A Healthy Fungus for More Nutrition
One benefit of mushrooms used for grilling and smoking is due to all that water content, they infuse smoke vapor quickly. This gives the mushrooms a deeper flavor that is even more earthy then when they are raw.
Here’s a super easy appetizer or main entrée that features large Portobello caps. Portobello mushrooms are very “meaty” and the larger ones tolerate grilling and wood smoking well. Their large size mean you can easily place them directly on the grill grate but given all the water they will expel, save messing up your grill and use a sheet pan or aluminum foil.
Give this one a try and I’ll bet you’ll start keeping this fungus around in your refrigerator for a quick and easy snack, appetizer or meal.
Smoked Portobello Mushrooms (Serves 8-10)
Ingredients:
12 large Portobello mushrooms
16 ounces Bruschetta or salsa (homemade or store bought)
12-16 ounces of fresh mozzarella
Bunch of fresh basil leaves roughly chopped for garnish
Start by preparing a charcoal or gas grill or smoker to reach a cooking temperature of 250°F. I prefer to use a two-zone or indirect cooking set up which is heat on only one side of my grill. My tray will be placed on the no heat side. Cooking wood preferences are either wood chips or chunks– both will do the trick for you!.
While the equipment is heating, clean the mushrooms well and remove the stems (save the stems for another recipe). Pat the mushrooms dry. Line a sheet pan or cookie sheet with foil, or use a disposable foil pan. Make sure the pan you select will fit on your grill or smoker. Place the mushroom caps on the sheet pan, cap side up. Spoon the Bruschetta or salsa into the mushroom cap, ensuring an even coating on the entire cap. Place thin slices of fresh mozzarella on top of the Bruschetta or salsa filled caps. Place the tray on the grate and cook/smoke for about 25 minutes or until the mushrooms are heated thru and the cheese is golden on top. Remove the tray carefully from the grill once the mushrooms are cooked thru being careful not to spill the rendered water that has accumulated on the tray surface. Chop some fresh basil leaves and sprinkle over the finished mushroom caps. Serve hot.
Thinking about using cedar wood for cooking? 6 reasons to don’t!
6 REASONS TO AVOID CEDAR WOOD FOR COOKING
You love different techniques for cooking and absorb new information like a sponge. In particularly, you love outdoor methods of cooking. One of your favorites is plank cooking on cedar wood. Every time you read a recipe, they all call for use of a cedar plank or other methods to use cedar wood for cooking.
But is cedar really the best choice? More so, is cedar wood for cooking a safe choice?
#1 Softwood Classification Presents a Concern for Using Cedar Wood for Cooking
Cedar wood is not a hardwood. It is a softwood that is from the gymnosperm trees meaning, it is a conifer or cone producing tree. As a rule, softwoods should not be used for cooking as they contain a lot of air and sap which equates to a fast burn and unpleasant flavors. In fact, there are many softwoods that can be toxic if cooked over.
#2 Poor Fire Resistance
During plank cooking, you are using the wood as a vessel to infuse flavor to whatever food is placed on top of the plank. Here’s the concern with cedar – because it is a lower density wood (23 lb./ft³), it has very poor fire resistance. That means, it reaches full combustion much faster than hardwood and will burn as a result. Certainly, that’s not what you’re looking for when you plank cook.
#3 Poreless
Unlike hardwood which contain pores in the cell walls, softwoods like cedar are poreless. They use cell components called tracheids to transport water and nutrients. In addition, the organic compound lignin found in the cell walls, is much lower than in traditional hardwoods used for cooking. Why is this an issue? Lignin is what gives wood fired cooking the distinct flavor and aroma to foods. In using cedar wood for cooking, the average lignin composition is 20%±4 compared to common hardwoods used for wood-fired cooking which average 28%±3.
#4 Plicatic Acid
Cedar contains chemical properties (specifically plicatic acid) that are shown to be a good absorber of odors and moisture. This is one of the key reasons why cedar is a preferred softwood for pest control to keep fleas, ants, mites, moths, and mosquitoes away. When exposed to plicatic acid for lengthy periods of time, a condition known as “cedar asthma” can develop.
Additionally, a regular exposure to the cedar oil found in the wood can result in contact dermatitis or skin irritation, rhinitis, and conjunctivitis.
#5 Animal Toxicity
There are many studies available on how the use of cedar wood chips and shavings have affected animals continually exposed to these products. Most studies show a correlation with liver dysfunction in animals such as rabbits, guinea pigs, and hamsters. In fact, smaller animals, like guinea pigs and hamsters, have a higher incidence of death which may be attributed to plicatic acid exposure. The phenols and aromatic hydrocarbons also have been shown to cause respiratory problems in animals like those listed above.
#6 Not All Cedar Is The Same
Cedar is part of the pine family of trees with native origin in North Africa and Asia. There are no native cedar trees to North America. The red cedar common in the Eastern USA is part of the Juniper family and can be highly toxic if taken internally. Under no circumstances should you ever cook with red cedar from the Eastern states of the USA.
USA cedar trees are referred to as false cedars since there are no native varieties. There are commonly 5 varieties of the false cedars available: Western Red Cedar (common to Southern Alaska, Northern California, and the Rockies), Northern White Cedar (Southeastern Canada, Northeastern quarter of the USA, south into Tennessee, and west into Iowa), Eastern Red (Aromatic) Cedar (Eastern USA), Yellow Cedar (Pacific Northwest from Alaska to British Columbia into Oregon), Spanish Cedar (although Native to South and Central America, it was planted in Florida). Every false cedar has some known health risks with the most common being respiratory due to toxicity of its pollen, oil, or other chemical compound.
Now you’re asking..
“So if there are all these documented health risks, how and why have cedar plank cooking and other methods of cedar wood cooking gain so much popularity?” I suppose the easiest answer is that cedar was used by the earliest settlers in the Pacific Northwest as a means of preserving, storing and cooking the seasonal fish. Think about the limitations of the day: they would be using resources that are available without thought to the items we ponder today like health, future risk, etc. This concept was examined from a different perspective many years later with the desire for flavor, appearance, and functionality.
We often make the mistake of jumping into something full throttle before asking some of the key questions to keep our bodies safe and healthy. Remember, there’s lots of documentation out there stating why you should not cook with softwood yet when it comes to cedar wood cooking, specifically, cedar plank cooking, we don’t seem to carry that issue forward. I don’t think I’ll ever understand why.
We love providing information to our readers and subscribers that is not in the open and letting you weigh the information for your own verdict. All types of questions are welcome and we encourage you to follow and subscribe to our social channels so you don’t miss anything. We look forward to providing you with tips, techniques, recipes, and the science for all things wood-fired cooked.
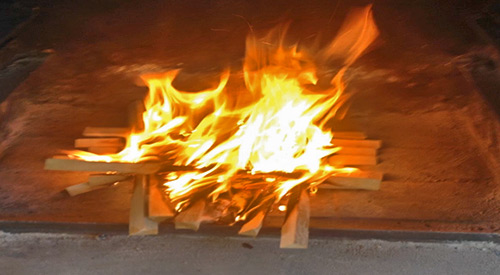
Build an open pit cooking fire for grilling and ember cooking! Is easier than you may think follow our steps below!
OPEN PIT COOKING- BUILDING THE PERFECT FIRE
SmokinLicious® receives a lot of questions about wood-fired cooking and one of the most repetitive concerns the building of the fire for cooking. We’ve developed this series to address how to build the fire by equipment and technique. For Part I, we cover the open pit cooking fire.
Get Organized- Open Pit Cooking
The first step is to know where you will build the fire. Are you planning on using an outdoor fireplace, a fire pit, or will you construct a temporary fire location?
When using an existing fireplace located outdoors, you must ensure that the firebox is clean of previous ash and wood. The same is true for a open pit cooking fire pit. If you will set up a temporary location for the fire, consider what you will use for materials to secure the area. It is never recommended to use your patio, paved driveway or lawn because a hot fire is sure to damage them or, at the very least, mar their appearance (thin charcoal black coating the surface). Using large stones, interlocking bricks, or a metal fire ring work great at securing the area to contain your fire.
Once you’ve decided on the location, you’ll need to collect some supplies to make the cooking safe and fun.
▪ material to contain the fire like stones, bricks or a cast iron/wrought iron ring. You can use an outdoor fireplace or open pit cooking fire pit whether permanent or portable
▪ water, shovel, dirt, and/or fire extinguisher to deal with potential fire spread or wayward embers
▪Smokinlicious® smoking wood chips for quick lighting
▪ small twigs or small pieces of hardwood to create a tepee around the wood chips (we like our Smokinlicious® smoking double or single filet chunks)
▪ larger hardwood pieces to create a 2nd tepee around the first (Smokinlicious®1/4 cut logs work great for that)
▪ rolled newspaper or fire starters
▪ have additional hardwood for producing more coals for cooking as needed
▪ a coal rake, fireplace tongs for moving and relocating wood pieces, spray bottle of water to tame flames near food, instant read thermometer (you can also use a traditional wrought-iron log holder to make the fire – the hot coals will fall through and then you rake them to the cooking side)
The Perfect Fire for Open Pit Cooking
Always take note of the day’s temperature, wind conditions/direction, and conditions of your wood (dry or wet, fresh cut or aged) before you start. You want to be sure you set up and start the fire where the wind direction won’t cause smoke to enter house windows or the dining area. Keep those locations upwind.
In your fire safe area, pile up a few handfuls of hardwood chips (you can use newspaper but I like to try to stay with wood in its natural state). Make a small tepee around the wood chips using small wood pieces (our single filet wood chunks work great) or twigs. Make a second tepee of larger wood pieces around the first one. You’ll see that you’re graduating from small wood pieces to larger as you build but you’re also ensuring good oxygen pockets to help feed the fire to the next level. This is what ensures even combustion and even coals. Now, light the wood chips at the center and allow everything to ignite. Don’t add any additional wood until you see the outside wood ablaze.
Fire for Fuel, Coals for Open Pit Cooking
The purpose of your shovel other than as protector of wayward fire, is to take those hot coals and move them to the cooking area. Remember, the fire area is not where you are going to cook. That location is nearby but not with the flames. You should never cook over direct flame as it will overcarbonize the foods and result in bitter tastes.
Ideally, you want to cook over coals that have a white colored ash over them. Now, here’s how to determine temperature of those coals: hold your hand over the coals the distance your foods will be. If you can only hold your hand for a count of 2 seconds before you need to pull it away, that is high heat. 3-4 seconds is medium-high, 5-6 seconds is medium and 7-8 seconds is low heat.
Bring on the Food!
Once your coals are at the perfect temperature for the foods you want to cook, it’s all about cooking! Remember, you can set up different heat areas to cook different foods. That’s what makes the experience with wood cooking, specifically with coals, so exhilarating.
We hope this article was full information you didn’t know. Leave us a comment and subscribe so you don’t miss anything concerning wood fired cooking, flavors, and the science behind the fire.
More Related reading on “What Wood for Smoking” and other great smoking and grilling tips and techniques
This article was born from a question which was recently forwarded to SmokinLicious® to answer. “Why salt choices are necessary in food despite adding different ingredients even for sweet dish need(ing) salt”.
I realized just how important salt is to the style of cooking known as barbecue.
Salt Choices- Why the Need to Salt?
Salt is a mineral found in crystalline form that is used as a seasoning for food. Simply put, salt brings out the flavor or natural essence of food. Salt choices draw out the natural juices in raw meat and dissolves with the liquid forming a brine that gets reabsorbed by the meat. This results in the meat’s ability to hold on to more of its own natural juices during cooking.
Salt Choices- Types
Over the past 5 years, salt choices have become a very hot commodity in the food industry. There are hundreds of kinds of salts but for simplicity sake, I will discuss those that are commonly found in grocery and food specialty stores.
Table Salt:
Decades ago, this was simply known as iodized salt. This is the most refined salt that is known to have a metallic taste due to the grinding process and high-heat process to produce it. It is almost pure sodium chloride and has the highest per-granule sodium content of all salts. When used in cooking, the cook generally will use too much due to this refined grind size. I recommend you never cook with standard table salt.
Sea Salt:
This salt type is made by the evaporation of seawater which results in the retainment of natural micronutrients. Unlike table salt which uses a high-heat process, sea salt provides minerals of iodine, magnesium, calcium, potassium and bromide. There are many different grind levels in sea salt and each of those, affect the taste, color, and mouthfeel of the salt itself.
Kosher Salt:
Known for its ability to distribute evenly on the surface of food, kosher salt is harvested by mining dried up ocean and sea beds. It has a much coarser grind than table salt, which is considered flaky (For cooks, it is reliable, consistent, inexpensive, and pure).
Finishing Salt:
Just as the name implies, this type of salt is used only when a dish is finished, for instance, sliced tomato with mozzarella and basil, grilled to perfection steak, and even watermelon. Therefore, it is considered a very light tasting salt.
Tamari and Soy Sauce:
I am including tamari and soy sauce as these are very common substitutes for salts in sauces used for barbecue. Sometimes, soy sauce is used in addition to salt or garlic and onion salt for these items, making them much higher in overall sodium content. On average tamari has 700mg sodium per serving while soy sauce comes in at a whopping 1000mg per serving.
Salt Choices in Relation to BBQ Rubs & Seasonings
Hopefully, you’ve learned how to read an ingredient list on any label. The first ingredients listed make up the largest amount of the contents, while the last few ingredients make up the least. I looked at five (5) popular BBQ rubs and seasonings sold on Amazon.com to see what ingredients made up the bulk of these items and where salt rated on the ingredient list. Here are my findings:
As you can see, salt is a primary ingredient of commercially marketed rubs/seasonings for barbecue. Therefore, I always recommend that you give some consideration to making your own rub or seasoning. When produced in large quantity, you can keep these in the refrigerator for up to a month in an air tight container. Best of all, you’ll have the peace of mind knowing you can control the level of sodium in your meal.
We hope you found this article informative and valuable. We’d love your comments! Don’t forget to subscribe to and follow us so you don’t miss a thing. We’ll continue to bring you tips, techniques, recipes, and the science behind all things wood-fired!
More Related reading on “What Wood for Smoking” and other great smoking and grilling tips and techniques
As a billion-dollar business, selling grills is likely not going away any time soon. In fact, sales are gaining strength thanks to COVID-19 which forced many to find ways to keep cooking and eating interesting while forced to stay out of restaurants.
When asked, most people say they grill or barbeque for flavor. If that is the case, then why are some of the most common practices the ones causing the most variation in the taste of your grilled foods?
Here are the top 12 grilling mistakes you should avoid.
#1 Skipping Preheat of the Grill
It does not matter if you prefer to use a gas grill or a charcoal unit, you need to preheat the grill before adding food. Why? It is the only way to avoid having your foods stick to the grill grate. When you allow the metal to heat to a very hot level, the protein in meats cannot form a bond with the metal grate. Plan about 5 minutes preheat time for charcoal grills and 15 minutes for gas units.
#2 Cooking on an Unclean Grill
Yeah, I know. The grill is located outside so you think it does not need the same care and cleaning as your kitchen equipment indoors. Wrong! Leftover food particles, grease, smoke tar and creosote can build up on various parts of the grill and cause changes in food flavors as well as make the food stick. Plus, a grease trap that has never been emptied can ignite which will ruin your planned grill day! Get in the habit of scraping the grill grate after preheating and lightly scrub the cooled down grill including the lid area, with steel wool and water. The lid likes to hold on to carbonized grease which becomes flaky and falls off onto your foods if left in place.
The handheld food smoker allows you to smoke fresh corn indoors! It’s so easy and so tasty!
SMOKE FRESH CORN INDOORS
Listen to our blog
Corn is one of those vegetables that has an extended season to allow you to do all kinds of recipes and techniques. Given that there are times when you frankly don’t have a lot of time to stand over a grill to do whole ears of corn, I’m giving you an easy technique to add smoke flavor using a handheld food smoker. Then, I’ll give you a recipe for a spicy butter to coat the corn in to bring out the best in this seasonal vegetable. I’ll also provide some flavoring pairing that works great for other butter topping recipes. Go visit your favorite corn seller and pick up some fresh corn.
Smoke Fresh Corn Indoors- Easy Corn Prep
I’ve purchased 6 ears of corn and have boiled them in water until tender, which is the most traditional way of cooking corn. I allow them to cool enough to handle, then using a sharp knife, I stand the ear of corn on its wide end and cut the kernels from the cob into a disposable foil pan. If you cook the corn and then refrigerate it prior to removing the kernels, know that the kernels will not come off individually but as one long strand. Don’t worry about reducing these strands as when we add the butter topping, it will break down the kernels. Next, I’ll be taking the fresh kernels to the smoke using the Breville-PolyScience The Smoking Gun Pro Smoke Infuser which is a cold smoke application anyone can do!
Smoke Fresh Corn Indoors- Cold Smoke Infusion
If you’re familiar with The Smoking Gun™ note that the version I’m using was a collaboration between Breville and PolyScience, the originator of the concept, and designed specifically for commercial use. It is manufactured from heavier materials and can stand independently while you work the smoke vapor production.
I’ve gathered together my pan of previously cooked corn kernels, the handheld food smoke infuser, SmokinLicious® Minuto® wood chips in size #8, a lighter, a plastic food bag, and a cable tie. After sliding my corn pan into the plastic bag, I place a pinch or two of the wood chips in the unit’s bowl, extend the smoking tube into the plastic bag, then pinch off the end of the bag around the tube, and lite the chips.
Tasting Notes: You may select any hardwood microchip for the smoking but do note that this infuser produces a lot of smoke vapor. I tend to recommend using light to medium boldness levels of hardwood: Ash, Maple, Cherry.
After placing the corn pan in the plastic bag and lighting the chips with the handheld food infuser, I synch the bag’s end tightly around the tubing. This allows me to trap all the smoke vapor in the bag and surround the corn. Once filled – the bag will expand – I turn off the smoker, remove the tubing, and attach a cable tie to the bag’s end. I prefer to wait until the smoke vapor has dissipated from the bag. That’s when I cut the tie and remove the corn tray from the bag. Time to take this to the kitchen and make a spicy butter for the fresh, smoked corn.
Spicy Butter and More Recipes
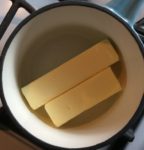
Time to share my recipe for a spicy butter that works perfectly with the sweetness of the corn.
First, melt 1-1/2 sticks of butter over medium heat. Add 2 tablespoons chili-garlic sauce, 2 tablespoons Chipotle Chili pepper, 2 tablespoons lime or lemon juice, and 1 tablespoon Hoisin sauce. Whisk together, then remove from heat. This will be poured directly over the smoked corn and reheated until warmed through. Serve immediately.
There are so many options for corn that it depends if you want a spicy flavor, sweet, savory, or citrus. In addition to the spicy butter recipe I provided, here are some other flavor combinations that work just as well:
Truffle Butter: garlic, butter, truffle oil, salt & pepper
Sundried Tomato Butter: butter, chopped sundried tomato, basil, parsley and a sprinkle of Parmesan
No matter what combination you prefer, adding another flavor level through smoke vapor will make this corn season one to remember and enjoy! Remember with this kitchen Handheld smoke method for fresh corn can be finished quickly without lighting a grill!
Our Grilled Peaches for the perfect salad addition with sweet onion, Tomatoes, and fresh herbs!
GRILLED PEACH SALAD- THE PERFECT SALAD!
Listen to our blog
If you’ve been a follower of our recipes and techniques for a while, then you’re aware of our preference to grill, smoke, coal cook, and ember fire in-season produce. Peaches are no exception and with our Grilled Peach Salad, get your taste buds ready for a real treat!
I’ve got my two quarts of fresh peaches and a plan to grill these on the charcoal grill using charwood coals. Then I’ll use my luscious smoked peaches in a salad that features two additional seasonal ingredients – tomato and shallots.
Get your chimney starter of charwood or charcoal and meet me at the grill for this quick technique and grilled peach salad recipe.
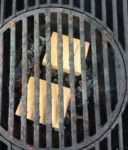
Whenever you use the charcoal grill, it’s always best to get it lit about 30 minutes ahead of cooking. I’m using a kettle-style grill made by Stôk that has a removable center grate for an assortment of inserts. I won’t be using any inserts for this cook as my peaches for the grilled peach salad recipe will stay in a disposable foil pan for easy cooking and removal.
Start by placing charcoal or charwood in a chimney starter. Place a Firestarter in the charcoal area of the grill and place the filled chimney starter over the starter. Lite the Firestarter and allow to remain in place until all the charwood has ignited and started to reduce to hot coals. While that’s burning, let’s prepare the peaches. Be sure you have a couple of wood chunks available to add to the coals when we are ready to grill. I like to use the single filet wood chunk size from SmokinLicious®.
Tasting Notes: there are differences in charcoal so be sure to use a natural charcoal or charwood product rather than briquets as briquets will produce more heat than you need.
Perfect Peach Bites
With our charcoal grill going, it’s time to start on the peaches. There are a few ways to remove the skin from peaches including placing them in hot water for a few minutes then removing and placing in a bowl of ice water. The skins will just peel off. I’m an old school so I use a sharp paring knife and just remove the skin.
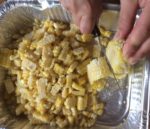
Once the skin is removed, it’s time to cut the peach into bite-size pieces. You can easily cut around the pit and cut those slices into pieces. Place all the pieces in a foil pan in an even layer.
Tasting Notes: Try to purchase peaches that have some firmness to them if you don’t plan to grill them right away. The peaches should have no bruising and have a slight give when touched. Too soft and those peaches won’t hold their shape when exposed to the grill’s heat.
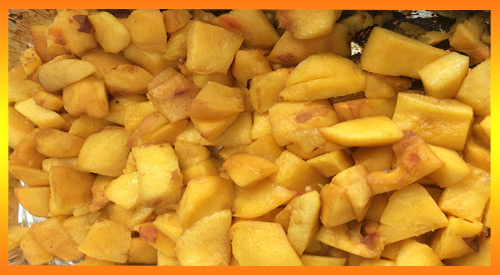
Smoking Process for the Perfect Grilled Peach Salad
With the peaches prepared, time to take them to the grill. Pour the chimney of hot coals into the grill’s charcoal area and add the wood chunks. Add the pan of prepared peaches and placed the lid on the grill. Be sure the outtake vent on the lid is ½ way open. The intake vent at the charcoal area should be ¼ way open. Now allow smoking for 15 minutes prior to checking. Remember, we want to add smoke without reducing the peaches to a puree.
Tasting Notes: Since peaches contain 89% water, they take in the smoke vapor extremely well. Keep that in mind when you select both the charcoal and wood. Remember, oak based charcoal tends to burn hot and has a stronger undertone to fruit.
Final Salad Prep- Grilled Peaches for the perfect salad addition!
While the peaches are absorbing all that great smoke flavor, return to the kitchen and prepare the remaining ingredients for our salad. You’ll need:
1 lb. tomatoes cut into 1/2’” pieces; or if using cherry or grape tomato, halved
3 tablespoons extra virgin olive oil, plus additional for final drizzle
2 tablespoons rice vinegar
½ teaspoon lemon zest
1 tablespoon lemon juice
1 shallot, sliced thin
fresh mint leaves torn
salt and pepper
I start by slicing my tomatoes in half, then add a teaspoon of salt to them while sitting in a colander so I can render some of the water. While the tomatoes sit, I start slicing the shallot into thin strips. At this point, you’ll want to check the peaches. They should be close to or ready to remove from the grill. I like to place them in the refrigerator for about 10 minutes to cool them down for the salad. While that’s happening, let’s prepare the vinaigrette.
I prefer to mix all the vinaigrette ingredients in a measuring cup so I can easily pour it to the salad right before serving, to keep the tomato and peach from getting too soggy. Start with the extra virgin olive oil and add the rice vinegar. Next, the lemon zest, lemon juice, salt, and fresh pepper. Whisk it all together and set aside while you combine the salad ingredients.
Tasting Notes: you can substitute cider vinegar for the rice vinegar and any color of tomato will do though I lean toward the reds and purples to give a color contrast from the orange peach.
Smoked peaches go into the serving bowl first, following by the tomatoes, and shallots. Pour the vinaigrette over the salad within an hour of serving and top with the torn mint leaves. A perfect balance of sweet, tart, smoky, and refreshing. An easy method and recipe you can have in 60 minutes. I love peaches so try our grilled peaches for the perfect salad addition for your next dish to pass! You will tantalize the guest taste buds!


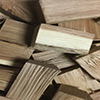 small twigs or small pieces of hardwood to create a tepee around the wood chips (we like our Smokinlicious® smoking
 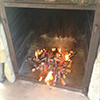 In your fire safe area, pile up a few handfuls of hardwood chips (you can use newspaper but I like to try to stay with wood in its natural state). Make a small tepee around the wood chips using small wood pieces (our single filet wood chunks work great) or twigs. Make a second tepee of larger wood pieces around the first one. You’ll see that you’re graduating from small wood pieces to larger as you build but you’re also ensuring good oxygen pockets to help feed the fire to the next level. This is what ensures even combustion and even coals. Now, light the wood chips at the center and allow everything to ignite. Don’t add any additional wood until you see the outside wood ablaze.
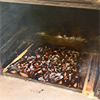 Once your coals are at the perfect temperature for the foods you want to cook, it’s all about cooking! Remember, you can set up different heat areas to cook different foods. That’s what makes the experience with wood cooking, specifically with coals, so exhilarating.
 Salt is a mineral found in crystalline form that is used as a seasoning for food. Simply put, salt brings out the flavor or natural essence of food. Salt choices draw out the natural juices in raw meat and dissolves with the liquid forming a brine that gets reabsorbed by the meat. This results in the meat’s ability to hold on to more of its own natural juices during cooking.
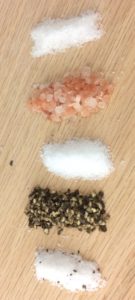 Table Salt: