Don't ruin your experience by making simple smoking & grilling mistakes!

Don’t ruin your experience by making simple smoking & grilling mistakes!

10 THINGS YOU DO THAT RUIN YOUR SMOKING & GRILLING EXPERIENCE Click To Tweet

Listen to the audio of this blog

#smokinlicious

We’ve all had those moments when the food comes off the smoker or grill and we wonder, What went wrong??

Sometimes the event is so bad you want to swear off outdoor cooking for good because of committing common smoking & grilling mistakes. I’m here to ask you to step away from the ledge and think about whether you do any of the following things. The more items on the list you engage in, the more likely you can benefit from my suggestions.

SMOKING & GRILLING MISTAKES:

#1 Resting Meat

This tends to be the common practice for roasts and steaks/chops. You’ve managed to get a nice crisp skin to the roast or steak and then you let it sit or rest, thinking it will make the outcome juicier. You end up with a soft skin, a wet outside, and waxy fat. These are meat cuts that don’t require resting. In fact, they will rest enough on your dinner plate so they are best served hot of the grill or smoker, without a rest period.

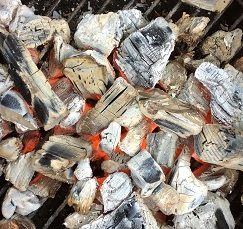
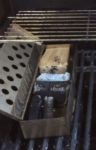
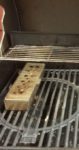
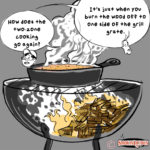
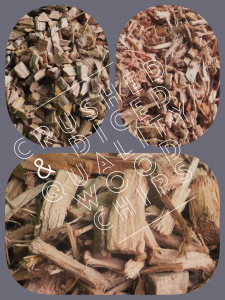
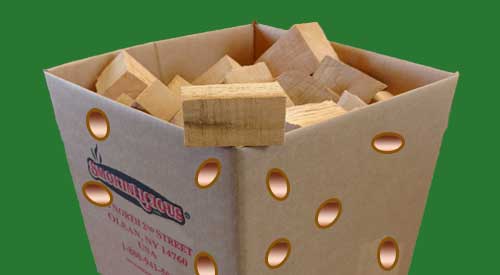
#2 Using Too Much Wood

You know that charcoal and gas are the fuels used to reach and maintain temperature while you’re cooking, and that hardwood is what flavors your food. You want to ensure there is adequate smoke flavor so you add 10 pieces of wood chunks to the hot coals when you start cooking. Then after the first hour, you add another 6 pieces of wood. STOP! That is way too much and simply put, a waste of a tree. On average it takes just 6 ounces of wood to start flavoring meat. My rule of thumb is to add 3-4 wood pieces for a full chimney of charcoal plus a couple of pounds of unlit. Only when those pieces are fully combusted (black and ashy) do I add a couple more pieces. Depending on what and how long I’m cooking, I may only use 6 pieces total.

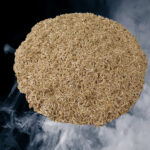
#3 You Soaked Your Smoking/Grilling Wood

I know this is one of the biggest controversies out there when it comes to smoking with wood. To soak or not. I take the stand that you should never soak the wood as adding water will only fluctuate your cooking temperature and take more energy away from the fire to steam the water from the wood. Remember, the wood cannot start to combust until the excess water has been vaporized. Work with a wood that has at least 20% moisture for the best flavor.

#4 Room Temperature Meat

It is well documented that when you want to attract smoke vapor from burning wood, colder temperatures are like a magnet. Don’t take the meat out of the refrigerator until right before you’re ready to place it on the grill. In addition to attracting smoke vapor, colder temperature meats will warm up faster in your equipment than if you left them out on the kitchen counter.

#5 Searing to Lock in Juices

This is the one item even well-known restaurants can get wrong. Searing meats before finish cooking does not lock in the juices. What it does do is brown the outside of the meat and firm up the outer surface, giving a distinct pleasant flavor. The meat fibers do not get sealed by this method or produce any additional juiciness to the meat.

#6 Marinating Overnight or Longer

As marinades tend to contain oil and meat is made up mostly of water, the two tend to compete against each other. Here’s the thing with marinades. Marinating for long periods of time do not allow the marinade to penetrate any deeper than if you marinate for just one hour. In fact, you have an increased risk of breaking down the meat fibers too far with a marinade, producing a soggy outer layer. Stick to short marinade times and understand most of that flavor will penetrate only to the outside layer.

#7 Don’t Trim the Fat Cap

Just like meat being made up of mostly water, fat is made up of oil. Again, water and oil don’t mix. Leaving a fat cap on meat only allows it to melt and drip into the equipment you’re using. This can produce some additional flavors to the meat but allow too many drippings into the fire area, and you’ll cause flare ups that will deposit soot onto your meat. Don’t forget, most of us have a habit of trimming fat off meat before we consume it.

#8 It’s Done When There’s No Pink Meat

(more…)

Our coals showing their hot glow and ready for direct wood ember cooking!

Our coals showing their hot glow and ready for direct wood ember cooking!

THE GLOW OF WOOD EMBER COOKING!

So what exactly is wood ember cooking and why is it suddenly gaining attention as a method of cooking? Well, first, it’s most certainly not a new cooking concept. Cooking over a fire and hot coals have been around for thousands of years. Recently, some Chefs and well-known restaurants have taken to returning to this method of cooking because they know where great flavor can come from and they know how to manage the heat from hot wood embers.

An ember is a glowing, hot coal made of greatly heated wood, coal or other carbon-based material that remain after a fire. The heat radiated from hot embers can be as hot as the fire which created them. You can see this first hand, by placing new wood pieces on hot embers and watching a full fire develop. An ember is usually formed when a fire has only partially burnt a piece of fuel and there is still usable chemical energy in that piece of fuel. It continues to stay hot and does not lose its thermal energy quickly because combustion is still happening at a low level. The small yellow, orange, and red lights are often seen among the embers are actually combustions. There just is not enough combustion happening at one time to create a flame. Once the embers are completely ‘burned through’, they are not carbon as is commonly believed (carbon burns, and is not normally left behind), but rather various other oxidized minerals like calcium and phosphorus. At that point, they are commonly called ashes. But why cook on the embers versus over a live fire? Because embers radiate a more constant form of heat, as opposed to an open fire which is constantly changing along with the heat it radiates (think water trapped within the wood and you’ll understand why there is heat fluctuation).

Ember cooking techniques include placing thickly skinned food items directly into the embers (i.e. garlic, onion, peppers, eggplant, steaks, etc.), placing a cast iron skillet into the embers that can hold any food items from vegetables, meats, poultry, fish – really anything. The results produced from this method are super moist, super flavorful, and the aromas are exceptional.

Peppers being cooked over wood embers

Sweet Peppers over direct wood ember cooking


Dr. Smoke- You don't need a flashy grill, a simple fireplace with enough room, just like Asado, you can do direct wood ember cooking.

Dr. Smoke- You don’t need a flashy grill, a simple fireplace with enough room, just like Asado, you can do direct wood ember cooking


Our Old Hibachi Wood Grill after the spring cleaning

Our Old Hibachi Wood Grill after the spring cleaning

DOING THE HIBACHI WOOD GRILL WAY! Click To Tweet

Everyone starts their grilling career on this convenient, inexpensive, small piece of equipment. But do we do it correctly? Let’s review the basics.


First, this is for grilling over an open fire; it needs high heat to cook. It has a low (height) fire pan and generally no hood or lid. Great high heat cooker/grill – not a smoker.

Lesson #1 Hibachi Wood Grill:-plan what you cook properly!

Now, let’s review how to set up the fire. The region that gave the hibachi its popularity is the Far East which has access to a type of charcoal called “bichiton”. This is a very dense, heavy charcoal made from oak that is direct fired to a high carbonization level. This charcoal produces an extremely high heat; 3-4 times the heat level of an American charcoal!

Can’t locate “bichiton” charcoal or don’t want the expense if you find it? Well, you can use SmokinLious® products to get close to the results. Let’s begin with charcoal – North America produces lump charcoal pieces that are too large for the small Hibachi. So take 2-3 pieces(depending on size), put them in a small paper bag (lunch bag size) and press with your hands to break them into smaller “thumb” size pieces (or you can use a meat mallet). Then pour into the firebox. If the firebox is not full –repeat until you fill it. If you don’t have a small torch available, put some paper under the charcoal, then ignite. Or, you can place the original charcoal pieces in small paper bags, then break the pieces apart, and place the bag in the firebox for lighting.

SmokinLicious® wood chips are crushed from the center of hardwood

Once the charcoal burns down (gray in color), start adding Grande Sapore® wood chips as this will provide for immediate heat and eventually, some flavoring to the food. Once the charcoal/chip combo’s flames settle down, you can begin cooking! Remember, hibachis are traditionally used for thin meats so adjust your cook time to what you’re cooking.

What I like about hibachi cooking is the ease of adding more wood chips when more fuel is needed!

Once you master the fire set up, you will enjoy some wonderful food and some really fun cooking the Hibachi way. Think Korean BBQ! Yum!

(more…)

The SmokinLicious® culinary crew's two-zone cooking method set up to smoke Fava Beans on the Gas grill with Wood chunks!

The SmokinLicious® culinary crew’s two-zone cooking method set up to smoke Fava Beans on the Gas grill with Wood chunks!

WHY TWO-ZONE COOKING METHOD LET’S YOU WALK AWAY FROM THE GRILL

listen to our blog

listen to our blog


We all know that the key to easy and successful outdoor cooking is to control the temperature. I also believe that outdoor cooking should not hold you hostage at the grill. That’s why everyone should learn the two-zone cooking method for grilling.

Let’s cover what type of cooking you can do by this method, why it’s so successful, and how to set up the zones.

Two Zone Cooking Method- Why it is Best

 smoker box and single filet wood chunks


Two-zone cooking can be done on any type of grill no matter the fuel source. What is two-zone cooking? Using the fuel source on only half the grill while the other half holds the food. Although you may use the unlit side of the grill for most of the cooking, you have the benefit of finishing crispy skins of items or quick cooking thinner cuts of meats on the direct heat side.

Two-zone cooking is also called direct and indirect cooking. The indirect side uses indirect convection heat to cook the food which means the heat generated by the lit side radiates into the material of the equipment and produces heat (convection heat) on the unlit side. The direct side produces the heat within the unit and can be used when quick cooking is needed or when a food that has been cooked on the indirect side needs crisping, additional coloring, or some char.

Two Zone Cooking Method- The Set Up

setting up the smoker box on the grill

The primary reason you want to set up two-zone cooking is most of the grill cooking does not require direct heat. When you consistently cook foods, especially meats, over direct heat, you easily can have dried, stiff, flavorless results. This is due to the components of meat reacting at different temperatures that with direct cooking occur too fast to react.

I will tell you that you need a grilling area that is large enough to establish two zones. I judge the space needed with a rectangular, disposable foil pan. If the pan can fit on half the grill area without issue, then you have plenty of room for a two-zone setup. When using a gas grill, this means lighting the burners on one half of the grill. If you don’t have an even number of burners, then decide how many are to be turned on and how many left off. With a charcoal grill, placing the hot coals on only half the charcoal area. On an electric unit, if you can manipulate the heating element, isolate the element to one side of the unit. The temperature that works ideally for two-zone cooking is 225°F. Of course, I always add wood chunks to give a smoky flavor to the foods. Remember, the hardwood goes on the direct side of the grill or lit burner or hot coals.

Chef Bert & Tom explaining the two zone cooking method

#chefbertandtom

Note that you can also use a water pan using two zones. This can be placed on either side of the grill depending on when you need the direct heat side. Keep in mind, when doing meats, it’s great to place a pan under the meat with vegetables (onions, potatoes, celery, peppers, etc.) and a small amount of liquid that can collect the meat renderings. You can also place pans of beans to catch those drippings. Anything is fair game.

For those times when you don’t want to add any additional foods, you can simply lay a thin foil pan under the grill grate of the indirect side or a sheet of foil. That will collect any fat drippings.

Cook Anything!

Smoking Tomatoes on the gas grill with the two-zone cooking method


Since radiant heat is what you are cooking with when foods are placed on the indirect side, you can cook anything. I love doing tarts and cakes via this method, especially during the hot months when you don’t want to lite your indoor oven. In fact, those are the times that I cook an entire meal using a two-zone setup.

You can also cook multiple items using both direct and indirect heat. A long cooking meat goes on the indirect side, is cooked to temperature and held there, while a side dish is cooked on direct heat. Don’t forget, if the cookware you use is high heat tolerant, you can use cookware as well. This is how I can make cakes, tarts, and bread on the grill. You need to view this equipment like an oven as that is essentially what it is!

Two Zone Cooking Method- Use Like an Oven & Walk Away

I’m going, to be honest. Although it’s true that you can produce more moist foods using a two-zone method the real reason I love this method of cooking is I can walk away from the grill. This is particularly true when using a gas grill which holds the temperature steady, which for me, is 250°F for long cook meats and regular baking temperatures for all my cookies, cakes, tarts, bread. Remember, charcoal grills will still require you to refuel so the temperature can fluctuate more if you’re not careful. Keeping an extra chimney starter of charcoal going will solve that issue.

What is a two zone fire? You may ask…

A two zone fire is also called two-zone cooking method can be used to grill or smoke any type of food on any grill (smoker, gas, charcoal, wood-fired or electric)! Setting up a two-zone cooking method is very easy- have a hotter side on one half of the grill and a lower or no setting on the other half. A two zone fire gives the cook or chef “a stylized or finessed” way to grill without ruining great food flavors by over cooking. It is especially the best way to cook meats and vegetables. Keep in mind that grills radiate and transfer heat, so it’s really not necessary to crank up every burner or heat source to a temp equivalent to the Sun! It’s as simple as that!

As a final note, even though two-zone cooking allows you more time away from the grill, you still need a good digital thermometer to monitor the temperature of the food. Invest in an easy read one and you’ll really enjoy this new way of grilling and smoking.

SmokinLicious products used in this blog:

Wood Chunks- Double & Single FiletVisit our store to buy products

More Related reading on great smoking and grilling tips and techniques

More Related reading on #twozonecooking method and other food items to prepare

Additional reading:

-EASY GRILL ROASTED TOMATOES

-ODE TO THE GRILLED FAVA BEAN

-WOOD ROASTED ONIONS TO DIE FOR!


Dr. Smoke- The two-zone cooking method on the gas grill is a great time saver for the busy Chef trying to prepare other parts of the meal menu!

Dr. Smoke- The two-zone cooking method on the gas grill is a great time saver for the busy Chef trying to prepare other parts of the meal menu!

Our preparation of smoked herbs, from picking, smoking and grinding to make smoked herb dust. Adding great flavor to dishes.

Our preparation of smoked herbs, from picking, smoking and grinding to make smoked herb dust. Adding great flavor to dishes.

SMOKED HERBS FLAVORS WITH SMOKED HERB DUST

Listen to the audio of this blog

Don’t make the mistake of thinking fresh herbs are to be used in dishes as, well, fresh only. Although you may have dried your fresh herb harvest before, we are bringing another alternative to you, smoked herbs.

We hot smoke the fresh herbs on the grill then turn them into a dust for use in all types of dishes. The smoking process will bring a depth of flavor that you’ve likely never experienced before. Go to the herb garden and pick your favorite varieties and let’s get making smoked herb dust!

Smoke Vapor Infusion

Fresh herbs on the grill using a grilling cage

One thing about this smoked herb technique is you can do the smoke infusion by a variety of equipment methods.

For those with a gas grill, add wood chunks either directly to the heat shields on one side of the grill or add wood chunks to a metal smoker box that can be placed on the heat shields or the grill grate. For charcoal grill owners, light your charcoal and allow to reduce to hot coals only. Add a piece or two of hardwood chunks or a handful of hardwood chips to the hot coals. If possible, push the hot coals to one side of the grill. For both grill types, you want to use a two-zone cooking method so the herbs don’t catch fire.

For those that don’t own grilling equipment or who simply don’t want to bother lighting up the grill, you can use a handheld food smoker. Simply place micro wood chips in the bowl of the unit, place the herbs in a storage bag with the tubing of the smoker unit, cinch the end of the bag around the tubing, and light the chips. I like to leave the smoke in the bag for maximum smoke vapor infusion.

I used both my gas grill and charcoal grill for the smoke process by placing my herbs in a vegetable basket and grilling with the herbs on the unlit side of the grill. Within the first 5 minutes, you’ll see how the herbs lose moisture and begin the drying stage.

Tasting Notes: I find the handheld food smoker will produce the boldest smoke flavor to the herbs. The intensity of flavor rated from lightest to boldest based on equipment would be a gas grill, electric smoker, pellet smoker, charcoal grill, handheld food smoker.

Grinding Process

smoked herbs in the food processor for reduction into smoked herbs dust

Once the herbs have charred and dried, it’s time to remove them from the grill and bring them to the food processor. I have a mini processor that only has two settings: chop and grind. I prefer to use this appliance to bring the smoked herbs to dust level but a spice grinder works just as well.

First, remove all the herb leaves from the stems and place a small quantity in the food processor bowl. You can remove the leaves by placing the entire herb sprig in a colander and pressing the leaves through to parchment paper. Secure the lid and grind until you get as fine a dust as the appliance will allow. Both the appliance and the herb will determine how fine the herb dust will get. As you will see, basil dust becomes finer than oregano. This technique will work for just about any herb you can grow or locate at the market. Store the herb dust in glass or metal jars for up to a year.

Tasting Notes: Smoked herbs are much stronger in flavor than the standard dried herb. Adjust the amount used in recipes as needed. It is often best to start with less, taste, and then add more as needed.

So Many Uses

finished herb bottles of smoked Basil and Smoked oregano

Experimentation is key when it comes to #herbdust. Most often, herbs will be applied to meats and poultry, perhaps rice and pasta dishes, but there are so many more foods that are good pairings for herb dust. Let’s take parsley as an example. Commonly used with fish and beef, parsley is a great pairing for sweet items as well. This includes banana and cream. It’s important that you look beyond the traditional side dishes and entrees and explore the sweet side of what herbs can offer. By doing so, you’re sure to find endless combinations that will tickle your palate and give you more pleasing menu experiences.

The Culinary Crew wants you to know …

… that the two-zone method is certainly a practice that you will want to master and prioritize in your wood cooking toolkit, especially when grilling and smoking delicate fresh consumables like herbs. Not only will two-zone cooking avoid those acrid tastes associated with flare ups, it will infuse your food items with a nice balance of wood smoke flavoring.

SmokinLicious® products used in this blog:

Wood Chunks- Double & Single Filet

Wood Chips- Minuto & Piccolo

More Related reading on smoked herbs and other great grillable flavoring ideas

More Related reading on smoked #herbs and other great grillable flavoring idea

Additional reading:

-WHY TWO-ZONE COOKING METHOD LET’S YOU WALK AWAY FROM THE GRILL

-STOVE TOP SMOKED CHIVES

-PAN COOK ZUCCHINI ON THE GRILL WITH WOOD FLAVOR

Dr. Smoke- Our process to prepare the smoked herbs is easily done on our gas grill with our double or single filet wood chunks!

Dr. Smoke- Our process to prepare the smoked herbs is easily done on our gas grill with our double or single filet wood chunks!

<strong>As Fall approaches think about the storage of cooking wood.</strong>

As Fall approaches think about the storage of cooking wood.

Donna from our culinary staff

Posted By Donna G


Listen to the audio of this blog

It seems every year as we approach the Fall, weather predictions are made on how severe the winter will be. This includes predictions on subzero cold in our area of the Northeast USA. In preparation for whatever Mother Nature brings our way, we thought this would be a good time to remind you about the storage and maintenance of your cooking wood products. Storage of wood is necessary to keep the flavor essence at its best which makes your foods taste great!

(more…)

Listen to the audio of this blog

CRUSHED OR DICED WOOD CHIPS? Click To Tweet

You see the options all the time. Crushed or diced tomatoes? Every chef knows when and why you choose one over the other. Did you know the same concept is true for wood chips?

At SmokinLicious®, the only true cooking wood Company, we produce our wood chips in the same manner as tomato processors! We crush the wood for our Grande Sapore® chips – these pieces produce a unique flavor because of their shape just like crushed tomatoes give a deeper flavor to recipes! These chips are meant to last and work with other ingredients for full flavor balance. We also offer our “diced” option of predetermined wood slices to produce our Minuto® and Piccolo® chips for smoldering on heat plates, cast iron, and flavor bars. Just as diced tomatoes give a fresh-from-the-garden taste, diced wood chips likewise produce a different, often more intense fresh wood flavoring.

SmokinLicious® only manufacturers cooking woods. That is our primary and only business. We know hardwoods for cooking, all types of wood-fired methods. And we know wood flavoring – how to get the best clean flavors from the select hardwoods ideal for cooking!

See for yourself why we are a superior product with a superior outcome. Enjoy the benefits of the knowledge of our flavorists and get the options you are looking for. Made the SmokinLicious® way!

Dr. Smoke- there is a smoking difference between crushed or diced wood chips

Dr. Smoke- there is a smoking difference between crushed or diced wood chips

Our Culinary Team wants you know

… that the crushing and dicing method of our making of culinary wood chips is strikingly similar in concept to how grapes are processed in the phases of wine making? For example, the Ripasso method of Italian wine production starts out with crushed, partially dried grapes and proceeds on to fermentation with the leftover skins. Both Ripasso produced wine and our crushed or diced wood chips offer distinctive flavor, body and personality in a class of their own!Our process is very similar to making wine from grapes

Our drawing of the typical offset smoker, which come in a variety of sizes! Study our Smokers list

Our drawing of the typical offset food smokers, which come in a variety of sizes! Study our “Match Your Cooker” list for wood use.

Listen to the audio of this blog

For those that have followed us for years, you know we are proud that almost from the start of our Company, we were committed to providing a guide for equipment to cooking wood product match. We refer to our guide affectionately as “Match Your Cooker”.

In this article, we are covering our recommendations for smoker equipment; these are cookers that are dedicated for use as a smoker, usually hot smoking at that. As there are always new equipment lines and models released, our plan is to provide regular updates. We also encourage you to send us a message when you don’t see a manufacturer or model listed so we can add this to our listing.

For now, we introduce you to our wood master’s guide to SmokinLicious® cooking woods for specific smokers.

Barrel Smoker Logs for Food Smokers

Smokinlicious Full cut log

The following Smokers list equipment/models would be suitable for the SmokinLicious® Barrel Smoker Log/ Full Cut Log:

BBQ Pits By Klose model: Commercial Indoor & Outdoor Pits; Mobile Cookers and Catering Rigs

Bubba Grills models: T3 Steam, 250 Gallon R, 250 Gallon Ribbox, 500 Gallon R, Hog/Shoulder Box, Custom Grills

Cookers and Grills.com model: Mobile Units, Hog Cookers, Pig Roasters

Horizon Smokers model: Trailer Smokers

Jambo Pits model: J-3 and J-5 Models

Kingfisher Kooker’s model: Commercial Rotisserie Cookers, Commercial Grill

Lang BBQ Smokers model: Competitive and Commercial Smokers

M Grills model: M1, M36, M48

Meadow Creek® BBQ model: Barbecue Smoker and Barbecue Smoker Trailer

Myron Mixon Smokers models: H2O Water Smoker, Gravity Feeds, H2O Rotisserie Water Smoker, Trailers

Ole Hickory Pits model: Convecture™ Tri Ovens

Peoria Cookers model: Mobile Units

Southern Pride BBQ Pits & Smokers model: Gas and Mobile Smokers

¼ Cut Wood Logs for Food Smokers

Image of our quarter cut log

The following Smokers list equipment/models would be suitable for the SmokinLicious® ¼ Cut Wood Log:

American Barbecue Systems model: “The Judge”, “The Smokehouse 6042”

Backwoods Smoker: “The Gladiator”

BBQ Pits By Klose: Combination Smokers and Grills

Karubecue model KBQ C-60 BBQ Smoker Pit

Lang BBQ Smokers model: Competitive and Commercial Smokers

Ole Hickory Pits model: Convecture™ Tri Ovens

Pitmaker model: BBQ Edge Smoker

The Good-One Smokers model: The Pitboss

Tucker Cooker Co.


Unfileted Wood Blocks for Food Smokers

image of the SmokinLicious® Block!

The following Smoker list equipment/models would be suitable for the SmokinLicious® Unfileted Wood Block:

BBQ Pits By Klose: Combination Smokers and Grills

Big Poppa® Smokers models: cabinet smokers

Bubba Grills models: Super Cooker, Deck Grills, Custom Grills

Cookers and Grills.com model: Mobile Units, Hog Cookers, Pig Roasters, Backyard Chef & Patio Smoker Grills

Meadow Creek® BBQ

Pitmaker model: Hitman 48, Short Sniper, Long Rifle Sniper, Magnum Sniper Smoker

The Good-One Smokers model: The Open Range, The Heritage, The Marshall, The Pitboss

Tucker Cooker Co.

Yoder Smokers

Single Filet Wood Chunks for Food Smokers

SmokinLicious® Single Filet wood chunk

The following Smokers list equipment/models would be suitable for the SmokinLicious® Single Filet Wood Chunks:

American Barbecue Systems model: “All Star”, “The Pit-Boss”, “The Bar-Be-Cube”

Backwoods Smoker model: “Party”, “G2 Party”, “The Fatboy”, “G2 Fatboy”, “The Pro Junior”, “The Piglet”, “Piglet Plus”, “The Competition Hog”, “The Pro-Competition Hog”, “The Whole Hog”

Big Poppa® Smokers models: all drum smokers

Bubba Grills models: Deck Grills

Char-Broil model: Highland Offset Smoker, Longhorn Offset Smoker, Longhorn Reverse Flow Offset Smoker

Cookers and Grills.com model: Charcoal/Wood Smoker Grills

Pitmaker models: Hitman 20×32, Custom Smokers

Smoke Hollow Charcoal/Gas Grill

Stump’s Smoker models: The Baby, The XL Baby, The Junior, The Classic, The Stretch, The Monster, Platinum 4, Platinum 6, Reverse Flow models

The Good-One Smokers model: The Patio Jr.

Double Filet Wood Chunks for Food Smokers

SmokinLicious® Double Filet Wood Chunk

The following Smokers list equipment/models would be suitable for the SmokinLicious® Double Filet Wood Chunks:

American Barbecue Systems model: “All Star”, “The Pit-Boss”, “The Bar-Be-Cube”

Backwoods Smoker model: “Chubby 3400”, “Chubby”, “G2 Chubby”

Best Choice Products model: 43” Outdoor Vertical Smoker

Brinkman models: Trailmaster 57” Vertical Smoker, Roadmaster, All-In-One Gas & Charcoal Smoker, Grill & Fryer, Smoke ‘N Pit

Broil King model: Smoke Offset, Smoke Grill, Smoke Vertical

Cabela’s 7 in 1 Cooker/Smoker

Char-Broil model: Vertical Charcoal, American Gourmet Offset Smokers, Offset Smokers, Bullet Smokers, Silver Smoker

Char-Griller Grills & Smokers models: Smokin’ Champ™ 1624 Charcoal Grill, Smokin’ Outlaw 3724 Charcoal Grill, Smokin’ Pro™ E1224, Competition Pro™ 8125 Charcoal Grill, Texas Trio

Cookshack model: SmartSmoker Commercial Smoker & Smoker Oven, Smokette Electric Smokers, SuperSmoker Electric Smoker, AmeriQue Electric Smoker

Cuisinart model: COS-244 Vertical 36” Propane Smoker, COS-118 Vertical 18” Charcoal Smoker

Dyna-Glo models: DG01176BDC-D Off-Set Smoker, DGX7080BDC-D 36” Vertical Smoker, Signature Series Vertical Smoker, DGX376BCS-D Compact Charcoal Bullet Smoker

Masterbuilt models: 7 in 1 Smoker and Grill, Dual Fuel Smoker

Master Forge Charcoal Smoker/Griller

Meco (Americana) Charcoal Combo Water Smoker

Pitmaker model: BBQ Safe Smoker

Red Box Smoker

Smokin-It®

Southern Country Models: 2 in 1 Water Smoker and Charcoal Grill, 5025 Stainless Steel Charcoal Water Smoker

Stump’s Smoker models: The Mini Stumpster, The Stumpster

Texas Pit Crafters models: PM 500S BI, PM 500U BI, PM 500 U S/S BI, PM 535U BI Smoker, PM 550S BI, PM 550 Smoker with Enclosed Front Load Firebox, PM 550 Upright Smoker/Pit with Enclosed Firebox


Grande Sapore® Wood Chips for Food Smokers

SmokinLicious® Grande Sapore® wood chips

The following Smokers list equipment/models would be suitable for the SmokinLicious® Grande Sapore® Wood Chips:

Alto-Shaam model: Smoker Ovens

Broil King model: Smoke Offset, Smoke Grill, Smoke Vertical

Camp Chef model: Smoke Vault Smoker

Char-Broil model: Vertical Electric & Propane

Dyna-Glo model: DGU732BDE-D 30″ Digital Electric Smoker

Napoleon model: Apollo AS200K, Apollo AS300K

Pit Barrel®: any model

Minuto® Wood Chips for Food Smokers

The following Smokers list equipment/models would be suitable for the SmokinLicious® Minuto® Wood Chips:

Alto-Shaam model: Smoker Ovens

Bastra

Camp Chef model: Smoke Vault Smoker

Char-Broil model: Vertical Electric Smokers, Deluxe Digital Electric Smoker, Analog Electric Smoker, Simple Smoker

Dyna-Glo model: DGU732BDE-D 30″ Digital Electric Smoker

Fessmann

Hakka Electric Stainless Steel BBQ Smoker

Kerres

Koch Smokehouse

Landmann model: 26” Smoky Mountain Electric Smoker

Smoke Hollow model: 44” Two Door Propane Gas Smoker, 38” Propane Gas Smoker

Smokehouse Products model: Little Chief Front Load Smoker

SmokinTex model: 1100 Pro Series Electric Smoker


Piccolo® Wood Chips for Food Smokers

SmokinLicious® Piccolo® wood chips

The following Smoker list equipment/models would be suitable for the SmokinLicious® Piccolo® Wood Chips:

AFOS

Alto-Shaam model: Smoker Ovens

Arcos

Camp Chef model: Smoke Vault Smoker

Jugema

Koch Smokehouse

Lambda

Maurer-Atmos

Ness

Schroter

Spomasz Wroclaw

Vemag

Voss

Smokin’ Dust® for Food Smokers

Our smokin Dust products

The following Smokers list equipment/models would be suitable for the SmokinLicious® Smokin’ Dust®

Alto-Shaam model: Smoker Ovens


SmokinLicious® products used in this blog:

Smoker Logs

Wood Blocks

Wood Chunks- Double & Single Filet

Wood Chips- Grande Sapore®, Minuto®, Piccolo®

Smokin’ Dust

More Related reading on this subject- More Related reading on this subject of cooking & Grilling with wood

For related reading on food smokers and other wood-fired grilling equipment, check out these articles:


-“MATCH YOUR COOKER” – CERAMIC AND KAMADO GRILL: THE WOOD MASTER’S GUIDE

-WOOD BURNING PIZZA OVENS: THE WOOD MASTER’S GUIDE

-TEMPERATURE CONTROL IS ALL IN THE AIR FLOW

-THE WATER PAN EXPLAINED FOR GRILLING & SMOKING


Dr. Smoke- we provide the wood chip moisture readings on all our packages as guidance for the chef to gauge the amount of smoke output to their tasting needs.

Dr. Smoke- When it comes to the performance of your food smokers, we have a ton of helpful info that will make your unit work superbly to flavor food. Feel free to tap into our “Match Your Cooker” wood master’s guide on our website.


Our recap of Smoking-Grilling Wood Selling Terms

The listing of wood selling terms

WOOD SELLING TERMS DEMYSTIFIED

listen to our blog


Package labeling. It is the key to drawing attention to a product, to reduce interest in other similar products, and to make someone buy a specific product. Let’s be honest. Not everything printed on a label necessarily provides ALL the information. Use certain words and an “implied” thought will occur.

When it comes to packaging wood for smoking and grilling purposes, there are a lot of terms floating out there that certainly can be deceiving. Let’s see if I can provide clarity on what specific terms and wording mean when it comes to purchasing wood for cooking, smoking, and grilling. SMOKING-GRILLING WOOD SELLING TERMS

WOOD SELLING TERMS:

100% Natural

The intended meaning of 100% natural implies that it has not been touched by human hands. As such, with wood, this would refer to the fact that a tree is a plant designed by nature and other than cutting the tree down, it is not modified in any way.

However, we do know that trees, like flowers, can be manipulated when it comes to their genetics. Genetically modified trees are quite common in the growth of orchard woods, especially those seeking to develop dwarf varieties or specific blossom colors or hybrids. Keep in mind, genetically modified trees will have a reduction in the lignin compound which is responsible for the flavor the wood gives when it burns and gives off smoke vapor.

Currently, it is not legal to genetically modify forest trees but there is a lot of allowances when it comes to plantation and orchard/nursery trees, which often have chemicals applied to make up for the weak lignin which makes the wood susceptible to decay and pest infestation.

Kiln-Dried

Wood that is dried in a closed chamber in which the temperature and relative humidity of the circulated air can be controlled is called “kiln drying”. There are three types of Kiln Drying methods: low-temperature drying which is below 130° F, conventional electric dehumidification drying, and conventional steam-heated drying which have temperatures up to 180° F.

For the most part, when a smoking or grilling wood product lists “kiln-dried” on the packaging, it does not state the type of method being employed. Also, many that use this term do so without providing any information on what compliance record keeping is in place to attest that they are doing what they say.

There is one company who states that they adhere to the protocol designed by the United States Department of Agriculture (USDA) but quote a core temperature and length in minutes of the heating process that is not the standard written by the USDA. Their compliance agreement is provided by the state in which the business is located, which may have a different standard in place than the USDA.

Air-Dried

The process of drying green wood by exposure to prevailing natural atmospheric conditions outdoors or in an unheated shed is known as air drying. There are three dominate Air Drying methods: open yard, shed, and forced-air shed. The first is not held in high regard as the wood is exposed to all the elements making it the longest method of depleting moisture content from the wood. The second has the addition of a roof covering to maintain a precipitation-free environment, while the third option is mostly used by traditional lumber companies as it produces quicker results meaning products can be sold quicker.

Here’s the issue when you see “Air-Dried” on package labeling of grilling and smoking woods: you don’t know what method is used and no one is saying how long the wood was air-dried for. You don’t know how old the wood is, what method of air drying was employed, how long it took to “dry” it, and you likely won’t know what moisture content is left in the wood. Remember, dry out a piece of wood too far, and it is simply firewood designed for heat output only.

Naturally Cured

This is another term that floats out on the packaging that implies it is different from air drying techniques. It is not different.

Naturally curing wood means the wood is stacked in a manner that allows air to flow around the wood pieces usually in an outdoor setting. It may be left exposed, covered with a tarp or have a roof structure overhead. Naturally curing wood for fireplace use is recommend for 365 days but there is no benchmark for the timing used to dry the wood for the use of smoking or grilling. Some suppliers will use moisture levels of 20-30% as their benchmark but 10% is a large variable in moisture when it comes to wood.

Here is the biggest challenge with a natural curing method: dry the wood too quickly and you will find cracks, splitting, honeycombing, and/or warping. Dry too slowly and the wood will stain and suffer decay. Remember, decay attracts pests as that is what they feed on. SMOKING-GRILLING WOOD SELLING TERMS

Selecting

I won’t lie to you – there are a lot of choices out there for wood. How do you go about selecting from the limited information on the packaging?

Some decisions you’ll have to make on your own: do you want to cook with bark or do you find that bark indeed fluctuates the temperature of your equipment too much? Do you want to use a kiln-dried product even if you don’t know what temperature and for how long that product was heated? Would you want to use a product that hasn’t had any heat application applied to it meaning there may be pests, larvae, mold, and spores that haven’t been eliminated by a heat process? Do you want to use a product from a supplier that provides no information on the moisture of the wood? Do you want to go with a “natural”, “air dried” product that may have been exposed to anything that could access the wood: animal feces and urine, insects, chemical contaminants from the ground or another source?

In the end, I think the selection can be easy by simply looking at the wood for purity and cleanliness, looking at the packaging for evidence of air exchange meaning its likely not completely dried out and looking at the packaging information for claims that don’t seem to match the product that is packaged inside.

Most of all, you should be able to gain valuable information from any supplier’s website on the wood they are selling to you. If not, be cautious that they may not know anything about the manufacturing process of the wood and/or what is needed in wood to qualify it as cooking ingredient. We hope that our discussion of smoking & Grilling Wood Selling Terms adds clarity to your selection process.


Purchase products:

Wood Chunks- Double & Single Filet

Wood Chips- Grande Sapore®, Minuto®, Piccolo®

More Related reading on "What Wood for Smoking" and other great smoking and grilling tips and techniques

More Related reading on “What Wood for Smoking” and other great smoking and grilling tips and techniques

Additional reading:

-COOKING WITH WOOD YOU SHOULDN’T HAVE TO THINK ABOUT YOUR SAFETY

-Is It Fresh? Here’s Why You Need to Know

-WHAT WOOD TO USE FOR SMOKING: A PRIMER

-HOT TREND MAY NOT BE THE SAFEST BET

SMOKING-GRILLING WOOD SELLING TERMS

Dr. Smoke- SMOKING-GRILLING WOOD SELLING TERMS

Dr. Smoke- SMOKING-GRILLING WOOD SELLING TERMS


Smoker wood storage summer or as the winter months approach, you should pop some holes in the box to circulated the air!

Smoker wood storage summer or as the winter months approach, you should pop some holes in the box to circulated the air!

Smoker wood storage for chips or chunks Click To Tweet

Listen to the audio of this blog

SmokinLicious® has the luxury of manufacturing every wood product we offer for sale. That means, our moisture rich wood is ready to use immediately. We certainly are not firewood as we work only with the heartwood of the hardwood trees and need proper storage to maintain our clean, fresh state. Plus, we want you to have a pleasant outcome to smoking your foods which is a direct result of the moisture level.

It’s Serious Business- Smoker Wood Storage!

We take wood storage seriously! Which is why when you purchase our products, you’ll receive a card educating you on the best storage containers and conditions. Simply put, any container that encourages air flow is ideal. We have found that some plastic containers can actual cause mold spores which is why materials made from wood, cardboard or metal are preferred. If you should encounter wood that has begun to develop evidence of mold, you may follow these steps to sanitize the wood for cooking:

1. Dilute 1 part white vinegar to 3 parts water (or 1.5 ounces of white vinegar to 3 gallons of water). Be sure the wood is completely submerged in the vinegar mixture.


2. Let the wood soak in the solution for a minimum of 2 minutes.


3. Remove the wood from the vinegar mixture and allow to air dry.


4. Store the wood as recommended above.


Prevent Sunburn

Just like your skin, wood can get too much sun and become sunburned, especially given we are bark-free product. It is best to select a location for storage that is away from direct sunlight. A cool, dry location is ideal. If you select a garage or basement area, be sure you don’t place any cardboard container directly on the cement surface or moisture will be drawn in through the carton to the wood and could result in appearance and aroma changes. If you do see the outside of the wood turn a bit gray, that likely is the result of some sun exposure.

Temperature and Humidity for Smoker Wood Storage

As a last point, keep temperature and humidity in mind when you select a storage location. Since our hardwoods are native to New York State, they are accustom to certain conditions including 4 seasons. Wood can be stressed especially when traveling in a truck to your location. Be sure to follow our directive sticker on the carton advising to get the carton open immediately upon delivery. Air is crucial to your wood remaining in the great condition it is in when we packaged it.

For those wanting to know if refrigeration is an option, our study shows refrigeration certainly doesn’t hurt the wood but you do need to rotate any unused wood periodically to prevent mold potential. Freezing the wood is not suggested. When you plan to use the wood for wood-fired cooking, be sure to remove the wood from a cold location and allow to come to room temperature in order to prevent a lengthy time waiting for combustion to take hold which is what produces smoke vapor.

More Related reading on this subject- More Related reading on this subject of cooking & Grilling with wood

More Related reading on smoker More


Products

Dr. Smoke- Smoker Wood Storage is an important part of your grilling practices! Follow our advice to get the most out of your wood purchase

Dr. Smoke- Smoker Wood Storage is an important part of your grilling practices! Follow our advice to get the most out of your wood purchase