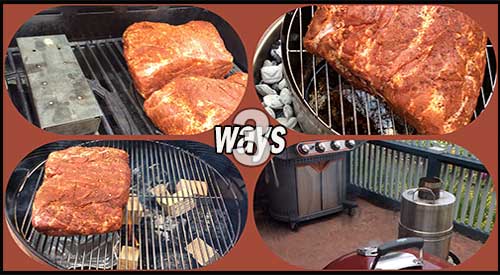
Our three ways of smoking Boston Butt offer great wood smoke flavor!

Our three ways of smoking Boston Butt offers great wood smoke flavor!

3 METHODS OF SMOKING BOSTON BUTT Click To Tweet

Listen to the audio of this blog
This certainly is a clear example of how anyone can produce authentic barbecue on the equipment they have even if it’s not a traditional smoker.

3 Methods of Smoking Boston Butt-

It should come as no surprise that majority of grill owners invest in a gas grill for their outdoor cooking with over 80% of these owners investing in multiple accessories for that grill. Often, many of these grill owners will venture to make an additional purchase of a second type of grill like a charcoal or pellet grill/smoker, in order to be able to cook more barbecue or smoked food options.

My intent is to demonstrate to you that you can produce authentic flavors, colors, textures, and aromas of favorite barbecue proteins with a variety of equipment, all outfitted with hardwood for the authentic wood flavoring.

I’ll be taking Boston butt to a traditional gas grill, a kettle charcoal grill, and a convection-style grill to demonstrate just how easy it is to cook this popular animal protein while giving you a bit of education on how these units are different when hardwood is incorporated.

Set Up Similarities and Differences for Smoking Boston Butt

When it comes to setting up the grills for smoking, there are some obvious differences. First, let me name the equipment brands I’ve included and the intended set up of each for cooking and smoking the Boston Butt cuts, all of which approximate 8 lbs.

Our Boston Butt (s) on the Stok Gas Grill with accompanying Smoker boxes

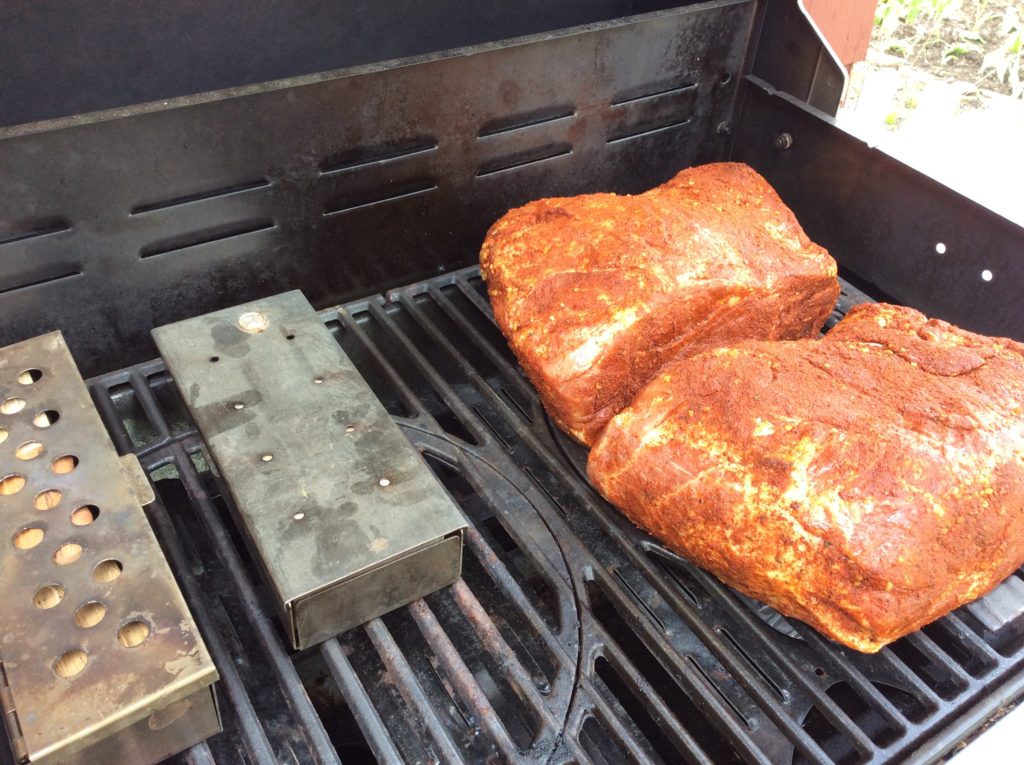
The Stôk Quattro 4-Burner Grill:

If you are not familiar with this grill, it is equipped with an insert system to allow you to use a standard grilling grate, a griddle, grill basket, vegetable tray, pizza stone, Dutch oven, Wok, and other inserts that easily pop in and out of the cast iron grates. Despite this feature, you can do traditional smoking using wood chunks without the need for the smoker/infuser insert.

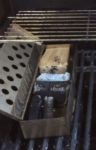
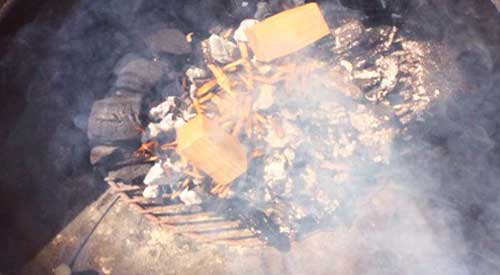
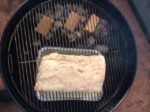
Whenever I smoke on a traditional gas grill, I always set up a two-zone cooking method. This means, on my 4-burner Stôk, I will ignite just two of the burners on one side. You can either place wood chunks directly on the heat shields of the unit or use a metal smoker box. My Boston butt will cook on the unlit side of the grill with a metal smoker box containing 3 wood chunks on the hot side. I’ve also included a second smoker box to make it easier to swap out the first when the wood becomes completed charred. My temperature is 225°F for the actual cooking.
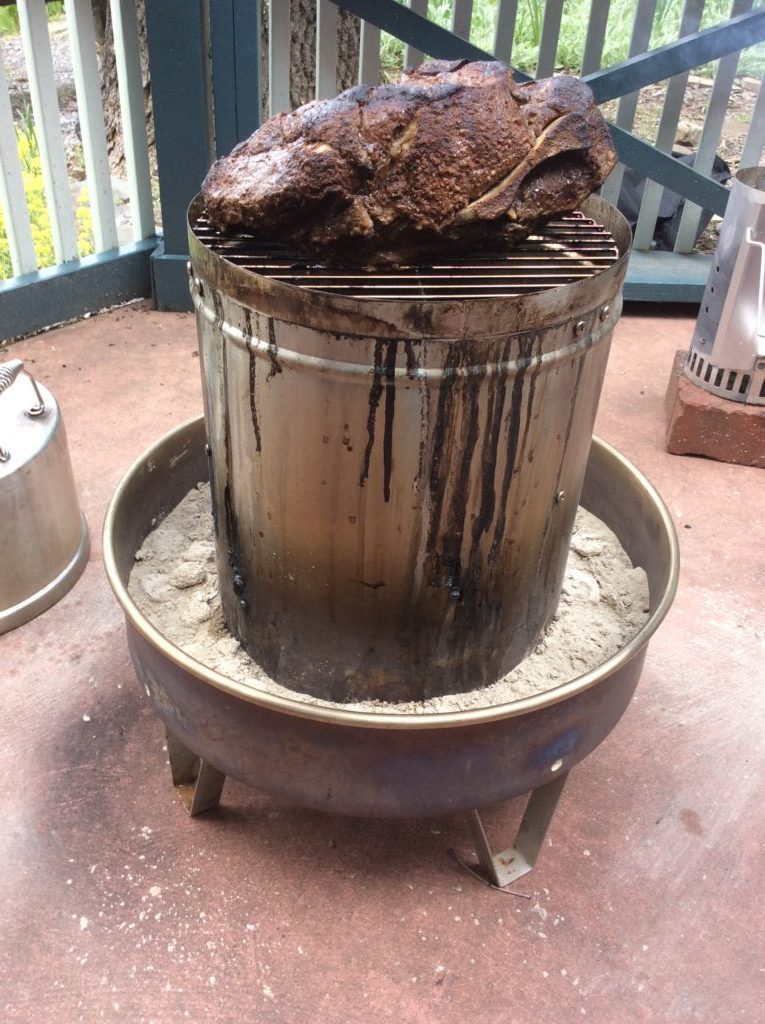
Our Boston Butt on the Orion Cooker with Minuto® wood chips in the inner ring

Orion Cooker:

This is an outdoor convection unit that uses briquets for the heat and Minuto® Wood Chips placed around the drip/water pan for the wood flavoring. This unit will be the fastest to cook the Boston Butt, with an anticipated timing of 4-1/2 hours total. This is a direct cooking method that uses the radiated heat of the stainless-steel body to trap and circulate the heat for faster cooking time.

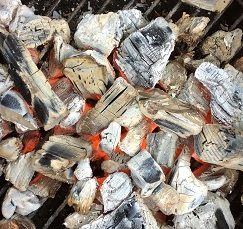
There is no ability to replenish the wood chips with this unit due to the high heat level. About 15 lbs. of briquet and 4 ounces of Orion Custom Wood Chips is all that is needed to smoke, plus some water in the water/drip pan for a moist outcome.

Our Boston Butt on the Weber® kettle Grill with double filet wood chunks

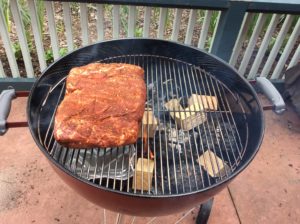
Weber® Kettle 22” Charcoal Grill:

Likely one of the most popular charcoal grills, the Weber® kettle provides for the opportunity to cook with charcoal and hardwood. I’ll be setting up my grill using a two-zone method; charcoal/wood on half the fire area and the meat placed on the indirect side.

Due to the length of time Boston butt takes to cook, you likely will need to replenish the charcoal for maintenance of heat level. I prefer to maintain a temperature around 250° F.

For similarities: both the Weber® and the Stôk grill were set up with a two-zone cooking method. Both included use of the SmokinLicious® double filet wood chunk. The length of cooking time between the charcoal unit and the gas unit are very similar, taking close to 10 hours.

For differences: temperature maintenance is easier with the gas and convection units. The charcoal unit requires much more supervision to ensure that the fuel (charcoal) is replenished prior to the temperature of the grill decreasing significantly. You are also able to check on the meat’s coloring and evenness of cooking with the charcoal and gas units while the convection unit is generally left alone until closer to the recommended cooking times. Though you can check on the doneness of the meat at any point with the convection unit, generally there is no need to do anything but wait.

Regarding cooking variations, let’s discuss color, bark formation, moisture of the meat.

Barbecue By All Methods

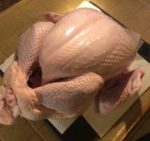
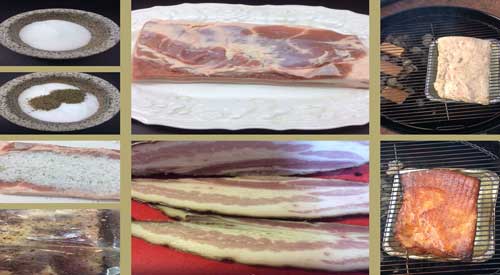
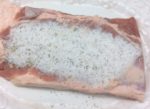
With all four of the Boston Butt (s) prepared in the same manner – excess fat trimmed to ¼-inch or less, a dry rub applied on all sides, and marinated for 24 hours – this is a fair comparison of how each grilling and smoking method produces the barbecue results commonly looked for.

Bark:

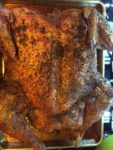
Without question, bark or the outer crust that develops from exposure to a lower temperature, long cook time, and smoke vapor infusion was greatest on the Boston butt cooked on the Weber® Kettle 22” Charcoal Grill. The gas grill produces the least amount of bark which is dominate on the outer edges and top surface.

Color:

The darkest coloring to the bark and the most obvious smoke ring was on the meat cooked on the charcoal grill. The Orion Cooker produced a brown hue to the meat’s exterior while the meat cooked on the gas grill retained a red hue that was indicative of the dry rub color. Charcoal grills will produce a black hued coloring due to two combustible materials: charcoal or charred wood and hardwood.

Moisture:

The meat that produced the greatest amount of rendered juice was from the charcoal cooking method. Second, the convection grill method followed by the gas grill. However, the greatest internal moisture level was obtained from the indirect cooking method on the gas grill, followed by the charcoal method and lastly the convection method.

Final Notes:

What we’ve set out to accomplish with this multi cook segment is to prove that no matter what equipment you have, you can produce authentic flavor, aroma and texture to Boston butt. This can be invaluable for those times when you may not have a lot of time to supervise the smoker or grill but still want authentic barbecue. Or, when you must make a lot of meat meaning you must use all the equipment options you have available.

All four Boston Butt (s) one done on charcoal with the Weber, another in the Orion with wood chips and two on the gas grill with wood chunks- the coloring is not much different!

From a taste perspective, our sampling group indicated that the strongest smoked flavor was from the charcoal unit, followed by the convection grill and lastly, the gas grill. Keep this information in mind when you’re cooking for others, as boldness of the smoke flavor can be controlled not only by the amount of time exposed to the smoke vapor, but also with the equipment used for the cooking and the amount and type of hardwood used in the process.

This certainly is a clear example of how anyone can produce authentic barbecue on the equipment they have even if it’s not a traditional smoker.

Making you an informed consumer through valuable articles like this one. Leave us a comment and follow us or subscribe for more great recipes, techniques, tips, and the science behind the flavor. That’s SmokinLicious®.

SmokinLicious® Products used in these techniques:

Wood Chunks- Double & Single Filet

Wood Chips- Minuto®

More related reading on how Smokinlicious® reduces the risks of Microbial bacteria in our wood products
More related reading on smoking Boston Butt & other Grilling tips and technique see our directory on previous blogs!

More blogs you may enjoy:

-Charwood Grilled Salmon Fillets for a Hint of Smoky Flavor

-GRILLED LAMB

-GIVE ME THAT BEEF BRISKET!

-ROSEMARY INFUSED SMOKED BEEF SHANKS FROM THE GRILL

Dr. Smoke- We used three different methods for smoking Boston Butt! All turned out fabulous & tasty!

Dr. Smoke- We used three different methods for smoking Boston Butt! All turned out fabulous & tasty!

Sugar Maple for smoking is an excellent choice to bring out sweetness!

Sugar Maple for smoking is an excellent choice to bring out sweetness!

Sugar maple for smoking, sweetness not sour! Click To Tweet

Listen to the audio of this blog

There is no question, North Americans love maple trees! Although we don’t have as many as the continent of Asia, we sure have a good share with some 12 varieties available. Plus, the Sugar Maple tree is the official tree of New York State!

Maple is a very popular hardwood for wood-fired cooking, especially hot smoking. We are blessed at SmokinLicious® to have in our harvest Sweet Sugar Maple hardwood. This extremely versatile wood can be used to smoke everything from eggs to brisket. It is a very even tempered wood so it works with spicy rubs as well as fruity sauces.

(more…)

Smokey Hungarian Peppers on our kettle Grill!

Smokey Hungarian Peppers on our kettle Grill!

Let's Do Smokey Hungarian Peppers on the Kettle Grill! Click To Tweet

Listen to the audio of this blog


I love growing Hungarian wax peppers in my garden and then harvesting for recipes and freezing for future recipes. Hungarian wax pepper come in different levels of heat depending on the variety chosen. Mine are a hot variety but work perfectly for mixing with other creamy flavors to produce some great condiments and sauces. I will introduce you to two versions of my Smoked Hungarian Pepper Spread in our recipe blog which will post soon.

(more…)

Our nicely grill marked avocado halves look yummy after we did our wood grilled avocado technique explained in this blog.

Wood grilled avocado is a fun way to add different flavor to this wonderful fruit.

WOOD FIRED GRILLED AVOCADO

To our blog kiwifruit gets smoky

Oh, the wonderful, healthy, creamy, flavorful avocado. With more potassium than a banana and 18 amino acids for daily intake, you can’t go wrong with this single seed fruit.

Did you ever think to grill this fabulous fruit with a little wood to give it even more flavor? We’ll show you just how easy grilled avocado can be on the gas grill using wood chunks for your smoke infusion.

Grilled Avocado with a Wood Fired Touch

Regardless of the brand of gas grill you have, you can add wood chunks to the grill for wood fired flavor. My grill has heat shields over the burners so I use that area to add one small wood chunk under the grill grate, directly on the heat shield. No, you won’t damage your grill, as the wood combusts to ash and basically blows away.

One chunk is all it will take to get great flavor into the avocados. I keep the burner that the wood chunk is located on set to medium as well as the burner next to that one on medium. Since I have 4 burners, 2 are on and 2 are off.

Once the grill is to 300° F, this technique will take less than 20 minutes.

Simple Preparation for Wood Fired Grilled Avocado

The only preparation needed for the avocados is to cut them in half and remove the seed. The avocados are placed flesh side down on the grate only on the side with the burners off. The heat captured within the grill will spread throughout the grilling area and cook the avocado while adding wood smoke vapor. Note, it’s important that you don’t attempt to move the avocados for at least 10 minutes otherwise you will find the avocado flesh will stick to the grate and you’ll lose much of the fruit’s flesh. Wait until some of the fat renders and chars making removal so simple.

Grilled Avocado- Prep To Finish In Less Than 20 Minutes

In less than 20 minutes you will have wonderfully wood flavored, charred flesh avocados ready for your favorite recipes. Think of using this fruit in smoothies, dips, on salads, as a creamy ingredient for sauces – remember, avocado can be used to substitute the amount of butter used in most recipes. We will take some of our avocado and make a wood fired guacamole first. Our recipe will post soon so stay tuned and don’t’ forget to send us your pics of wood fired avocado.

Did you get motivated to fire up the grill with wood? Send us a comment or your avocado fired pics and don’t forget to subscribe. Bringing you fun, innovative tips, techniques and recipes on all wood fired methods for foods, beverages, spices, herbs and so much more.

More Related reading on "What Wood for Smoking" and other great smoking and grilling tips and techniques

More Related reading on “What Wood for Smoking” and other great smoking and grilling tips and techniques

Be sure to check out:

-The Top 10 Vegetables To Cook In Hot Embers

-HOW TO TURN YOUR LP/GAS GRILL INTO A SMOKER

-STEPPING UP RADISH SALAD WITH A WOOD-FIRED FLARE

Purchase products:

Wood Chunks- Double and Single Filet

Dr Smoke- "For a great smoky flavor try a wood fired grilled avocado."

Dr Smoke- “For a great smoky flavor try a wood fired grilled avocado.”

Fresh Fava Beans with Butter ready to become Grilled Fava Bean with a smoky flare!

Fresh Fava Beans with Butter ready to become Grilled Fava Bean with a smoky flare!

ODE TO GRILLED FAVA BEANS

listen to our blog


I love when the ideal weather comes around when at the same time there are so many options for fresh produce either at the Farmer’s Market or local grocery store. I tend to lean toward my grill and smoker for most of my cooking when the weather turns hot and steamy.

Beans are one of those vegetables that are spectacular on the grill but they get even better when you add a few wood chunks. I’ll show you how to prepare Fava Beans for the grill and give you my easy, fool-proof technique for incorporating wood chunks for flavor.

Grilled Fava Beans- The Grill Set Up

Before preparing the Fava beans, get the gas grill heated by turning on only half the grills’ burners which will be the side that radiates out the heat and holds the smoker box. For the smoker box, I’m using a stainless-steel model that has a hinged lid. I place 3 double filet wood chunks from SmokinLicious® in the box in a combination of woods. I’m using hickory, white oak and sugar maple to give me a great smoke balance to the beans. This will ensure I don’t overpower with the smoke vapor. By placing the smoker box with chunks on the grill grate as it preheats, it will be smoking by the time you have the beans ready.

Simple Bean Prep for Grilled Fava Beans

There is little to do with the Fava beans before they go on the grill. Wash them to start to make sure all the dirt and debris is removed. Pat dry with a paper towel and then move them to the cutting board. Remove any leaves and cut just the stem end to remove the stem. Place in a disposable foil pan, spread out evenly, and add roughly 6 tablespoons of butter to the beans, as well as salt and fresh ground pepper. That’s it. Leave the bean pods intact as they are going to act like a miniature steamer to cook the beans and ensure they don’t become over smoked.

The Grill Act

With the grill heated and the wood chunks smoking in the smoker box, place the pan of beans on the unlit side of the grill and close the cover. Check that your grill temperature steadies out at about 375°F. If lower, simply increase the heat setting on the active burners. Too high, decrease the heat setting. Leave the beans untouched for about 30 minutes. Return to the grill, stir the beans and check the wood chunks. If the chunks are still emitting smoke, close the grill lid and leave for an additional 10 minutes or so, or until fork tender. Remove the pan from the grill and allow to cool for about 10 minutes.

Grilled Fava Beans- Buttery, Smoky Finish

finished Fava beans with the smoky appearance to the outside podsAfter the beans have cooled enough to be handled, take each pod and push the beans out one end into a bowl. You may keep the empty pods to use for making broth or for puree in a sauce or smoothie. These Fava beans are now ready for you to enjoy as is or use in your favorite recipe. Now, I’m taking my Fava beans and making a dip with goat cheese, lemon and tarragon.


Purchase products:

Wood Chunks- Double Filet

More Related reading on "What Wood for Smoking" and other great smoking and grilling tips and techniques

More Related reading on “What Wood for Smoking” and other great smoking and grilling tips and techniques

Additional reading:

-STEPPING UP RADISH SALAD WITH A WOOD-FIRED FLARE

-WOOD GRILLING AVOCADO

-INFUSING WOOD SMOKE INTO BRUSSELS SPROUTS

You Can take your fresh Fava Beans and put them on the Grill with wood chunks to do a "Grilled Fava Beans" for your favorite dip or condiment!

You Can take your fresh Fava Beans and put them on the Grill with wood chunks to do a “Grilled Fava Beans” for your favorite dip or condiment!

The ways to use wood chunks on gas grill!

The ways to use wood chunks on gas grill!

Try wood chunks on gas grill for a natural taste! Click To Tweet

Listen to the audio of this blog

This is the year! You made a promise to yourself, family and friends that this outdoor cooking season, you were going to bring more flavor to meals cooked on the grill by incorporating smoking wood and grilling wood. All you need to know is, what are the options for setting up the grill for this type of cooking without purchasing a smoker?


We have the answer and lots of options to utilize your existing equipment!

LP/Gas Grills of All Types

There is a great deal of variation in LP/Gas Grilling equipment in terms of grilling surface space, the number of burners, BTU rating, etc. Know up front, that this will play into how frequently you need to replenish grilling or smoking wood or even to monitor the foods being smoked on the grill. Essentially, these tips will work on any brand/model that you may own.

How To Add Wood Chunks on Gas Grill

Heat diffusers are commonly found on newer models of grills. They are made of high heat tolerant metal and cover the actual burners of the unit. Their purpose is to ensure even heat distribution throughout the grill so both radiant and conductive heat is maximized.

Wood Chunks On The Diffusers

If you have a grill model that has heat diffusers (remember, they may go by other names like flavorizer bars, flame tamers, heat plates, burner shields, and heat distributors) then you’re ready to use smoking wood chunks on your unit! Yes, I said smoking chunks. This is by far the easiest method of getting the true smoke flavor to the foods being cooked. Plus, you can set up an indirect method of cooking using smoking chunks.

You will need 3-4 wood chunks sized to fit over your heat diffusers and under the grill grate when setting in place. A 2x2x3-inch size fits most units and these should have some measurable moisture level; at least 20% moisture is ideal meaning you won’t need to presoak the wood. If you have an old grill model before heat diffusers were standard, you can still use smoking wood chunks by placing them in a smoker box. These boxes will generally fit 3-4 chunks of the size referenced above but be sure to use a good quality box. My preference is cast iron. Insert the chunks into the smoker box and leave the lid off!

(more…)

Our collage for makeing Spatchcock Smoked Turkey showing the breast bone removal

Spatchcock Smoked Turkey is perfect for even cooking! Moist and smokey what a delectable combination

Try this Spatchock Smoked Turkey Click To Tweet

Listen to the audio of this blog

Smoked Spatchcock Turkey

Often when faced with cooking a whole turkey, you find the challenge of ensuring every part of the bird is cooked to temperature. This can result in some extra work in ensuring that certain parts that cook faster don’t dry out or burn on the exterior. Think the wings and drumsticks. It’s a lot of work!

I’m going to introduce you to a method of cooking a turkey that will ensure every part cooks at the same rate and to the same doneness level without having to cover specific parts with foil. Spatchcocking a whole turkey meets that goal and by doing the cooking process on the gas grill with hardwood, you get the added benefit of a smoke flavor and oven room for preparing other dishes.

Order up a whole turkey, preferably under 24 lbs., and let’s meet in the kitchen to prepare the bird for smoking.

Does Fresh Make a Difference?

Our Fresh Turkey out of the box ready for us to do Spatchcock Smoked Turkey

#freshturkey

There is no question that I prefer a fresh turkey over frozen as the flavor is simply cleaner and the bird produces super moist meat compared to a frozen turkey. We are fortunate to have within 10 miles of our location, a fresh turkey farm that harvests turkeys once a year, just a couple of days ahead of Thanksgiving. My bird weighed in just under 22lbs. The organs and neck are removed from the cavity and the bird flipped breast side down to expose the backbone. This is where we start our spatchcock process. Get sharp cutting shears ready as we prepare to remove the backbone of our turkey.

Tasting Notes: If fresh whole turkey is not available, you may substitute frozen whole turkey. Just be sure it is completely defrosted and pat dried before starting this recipe.

Flatten and Rub for a Perfect Spatchcock Smoked Turkey

I won’t lie to you. Removing the backbone of a fresh turkey can be a bit of work, but it is so worth it. Start on one side of the backbone, insert sharp kitchen shears, and start to snip away. You’ll draw the shears along the edge of the backbone, releasing the bone from the meat. Done correctly, the spine will come out in one piece.

We have cut and completely removed the breast bone, which will allow us to press down and flatten the turkey

#spatchock

With the backbone removed it’s time for the final preparation to the turkey. Flip the turkey back so the breast is facing up. Time to break the breastbone so the turkey will lay flat on the cooking sheet pan. This will take both hands and a lot of force. Position your hands across the breast and push down with all your force until you hear the breast plate break. Now the turkey should be able to lay flat on a sheet pan equipped with a rack for rendering all the juice and allowing even heat distribution around the entire bird. The rack is key to use so heat distributes evenly. The turkey is now ready for a rub with your favorite seasonings, herbs, and spices.

Using your hands to push down and flatten the Turkey on the cooking sheet allows for an even cook!

#spatchocking

I’m using a simple herb rub that includes fresh sage, oregano, thyme, crushed red pepper, black pepper, marjoram, basil and cumin. I place my ground rub all over the skin of the bird and on the exposed meat side, reaching under the breast skin as well. Now cover with plastic wrap and refrigerate overnight. All this work can be done the night prior to grilling ensuring all that is left to do, is the simple two-zone cooking. Remember, two-zone cooking involves turning only half the burners on and placing a metal smoker box of wood chunks on the hot grate or directly on the heat shield of the hot burners. Be sure you have the box and hardwood at the ready for this step.

With our prepared spatchcock turkey readied, the sheet pan is added to the grill on the no heat side and the lid is closed. I leave this to cook on its own for about two hours before returning to rotate the pan, checking the smoker box of wood chunks I’m using on the lit side of the grill for the great smoke flavor. Remember, the heat from the burners that are lit will radiate throughout the entire grill, grill-roasting the turkey while the heat stimulates the release of the smoke vapor from the wood.

We use our smoker box with Double Filet Wood chunks to add the smoke while doing a two zone cooking method!

#twozonecooking #woodchunks#smokerbox

Tasting Notes: If you prefer, you can cook the turkey directly on the grill grate. Just be sure to place a water pan under the grate to collect all the juices.

Ready in No Time

My nearly 22 lb. fresh turkey takes about 3-3/4 hours to reach a 165°F internal temperature. In total, I use about 8 double filet wood chunks for the entire process. The best part, I can do other things while the turkey cooks, then rest it for about 20 minutes before carving. Don’t forget about all the beautiful juice it produces in the pan as well. Make gravy, use it as au jus, or save it for producing stock. Spatchcock fresh turkey – the easiest method of no-fuss grilling and smoking of a turkey!

What’s your favorite spatchcock turkey recipe? Leave us a comment to opine and subscribe to get all our postings on tips, techniques and recipes. Bringing innovation to wood fired cooking with recipes, techniques and the science behind the fire, smoke, and flavor. That’s SmokinLicious®.

Nice golden brown color to the bird, just cut into it for the best moist meat!

#spatchcocksmokedturkey


Love this article? Then please, share it!

SmokinLicious® Products used in this technique:

Our hand split double filet smoker wood chunks

#woodchunks

Wood Chunks- Double Filet

More related reading on Spatchcock Smoked Turkey and other Sptachcocking itmes see our smoking & Grilling tips and technique see our directory on previous blogs!

More related reading on Spatchcock Smoked Turkey and other Sptachcocking itmes see our smoking & Grilling tips and technique see our directory on previous blogs!

More blog topics you might enjoy:

-SPATCHCOCK CHICKEN IS THE WAY TO MOISTURE & HARDWOOD FOR FLAVOR

-SMOKE A TURKEY- LEARN HOW

-THE NOT-SO-SMOKEY SMOKED TURKEY

-WHY TWO-ZONE COOKING METHOD LET’S YOU WALK AWAY FROM THE GRILL

Dr. Smoke- Great moist smokey meat from our Spatchcock Smoked Turkey- awesome way to cook the "bird"

Dr. Smoke- Great moist smokey meat from our Spatchcock Smoked Turkey- awesome way to cook the “bird”

our food scale demonstrates Grande Sapore® and Double Filet wood chunks as a guide to adding wood flavoring with our Smokinlicious® products.

Our food scale demonstrates guidance on adding wood for food smoking.

One of the most common questions asked when it comes to smoking foods on a gas grill, traditional charcoal grill or smoker is, how much wood do I need? Likely the second most common question is where does the wood go? Click To Tweet

Listen to the audio of this blog


Let’s break this down by equipment and method of smoking so you have a good place to start in answering the above questions.

(more…)

Learn how to turn your charcoal grill into a smoker with the right hardwood chunks and chips!

Learn how to turn your charcoal grill into a smoker with the right hardwood chunks and chips!

LEARN HOW TO TURN YOUR CHARCOAL GRILL INTO A SMOKER Click To Tweet

Listen to the audio of this blog

Let’s be honest. When you bought that charcoal grill you were likely thinking that you could both grill and smoke without needing to add anything. Soon, you realized, that just wasn’t the case. Now, you’re contemplating whether you need to purchase a smoker. Well, hold on the shopping trip until you read this. We can help you turn your charcoal grill into a smoker!

You can turn your charcoal grill into a smoker with these simple steps!

(more…)

the technique of adding wood chips over a charcoal fire for flavor

Adding grill wood chips to charcoal brings added flavor to any cooking category

HOW TO USE CHARCOAL WITH WOOD IN COOKING Click To Tweet

Listen to the audio of this blog


The questions are quite frequent: “Since (the equipment) uses lump charcoal, do you need to add wood for smoke flavor?” “Do wood chips or chunks work best if they are needed or desired?” “Generally, how much lump charcoal does equipment use for 10 hours of smoke?”

Learn Adding Charcoal with Wood

(more…)

Our coals showing their hot glow and ready for direct wood ember cooking!

Our coals showing their hot glow and ready for direct wood ember cooking!

THE GLOW OF WOOD EMBER COOKING!

So what exactly is wood ember cooking and why is it suddenly gaining attention as a method of cooking? Well, first, it’s most certainly not a new cooking concept. Cooking over a fire and hot coals have been around for thousands of years. Recently, some Chefs and well-known restaurants have taken to returning to this method of cooking because they know where great flavor can come from and they know how to manage the heat from hot wood embers.

An ember is a glowing, hot coal made of greatly heated wood, coal or other carbon-based material that remain after a fire. The heat radiated from hot embers can be as hot as the fire which created them. You can see this first hand, by placing new wood pieces on hot embers and watching a full fire develop. An ember is usually formed when a fire has only partially burnt a piece of fuel and there is still usable chemical energy in that piece of fuel. It continues to stay hot and does not lose its thermal energy quickly because combustion is still happening at a low level. The small yellow, orange, and red lights are often seen among the embers are actually combustions. There just is not enough combustion happening at one time to create a flame. Once the embers are completely ‘burned through’, they are not carbon as is commonly believed (carbon burns, and is not normally left behind), but rather various other oxidized minerals like calcium and phosphorus. At that point, they are commonly called ashes. But why cook on the embers versus over a live fire? Because embers radiate a more constant form of heat, as opposed to an open fire which is constantly changing along with the heat it radiates (think water trapped within the wood and you’ll understand why there is heat fluctuation).

Ember cooking techniques include placing thickly skinned food items directly into the embers (i.e. garlic, onion, peppers, eggplant, steaks, etc.), placing a cast iron skillet into the embers that can hold any food items from vegetables, meats, poultry, fish – really anything. The results produced from this method are super moist, super flavorful, and the aromas are exceptional.

Peppers being cooked over wood embers

Sweet Peppers over direct wood ember cooking


Dr. Smoke- You don't need a flashy grill, a simple fireplace with enough room, just like Asado, you can do direct wood ember cooking.

Dr. Smoke- You don’t need a flashy grill, a simple fireplace with enough room, just like Asado, you can do direct wood ember cooking


discussion of the 8 common wood cooking mistakes to avoid.

Discussion of the 8 common wood cooking mistakes to avoid.

COMMON WOOD COOKING MISTAKES Click To Tweet

Listen to the audio of this blog

We are approaching that exciting time of the year when just about all of North America can start to enjoy cooking outdoors again! Make it the best outdoor cooking season yet by learning the steps to using wood for cooking and grilling successfully, avoiding the common wood cooking mistakes that can sink those outdoor meals.

(more…)

Steps to make Homemade smoked Bacon

Steps to make Homemade smoked Bacon

Listen to the audio of this blog

Just about everyone I know loves bacon, even if it’s the store-bought type. There are so many foods that have been designed around bacon including a chocolate chip cookie recipe featuring caramelized bacon pieces and a bacon ice cream! (which we’ll offer a recipe for soon).

One thing most bacon lovers don’t know is just how easy it is to make your own bacon at home, even the smoked type. You’ll be amazed at how different the taste and texture are with bacon you make at home. Just know, my technique will require you to cure the pork belly for a minimum of 7 days so be sure you have refrigerator room and time to wait. I know – when it comes to bacon it’s sooooo hard! But it will be worth the wait!

Quality Meat a Must for Homemade Smoked Bacon

Our fresh butchered pork belly begining our homemade smoked Belly steps

#porkbelly

When making homemade bacon, you’ll need a slab of pork belly, which is a relatively inexpensive cut of pork. Since this process is a time investment, consider purchasing a quality cut of belly which would be labeled “organic”. This cut normally comes from heritage breeds like Kurobuta and Berkshire. This investment will result in richer, meatier, and cleaner flavors to the finished product.

Although a full pork belly will weigh around 12 lbs., you only need about 3 lbs. to give you a sizeable quantity of bacon. Also, some belly will come with the skin still intact while others will already have the skin removed. Note, you will need to remove the skin before curing so you likely will want to ask the butcher to do this for you. If you’re doing skin removal yourself, simply separate the skin from the fat layer at one corner by inserting a knife point. Grab hold of the skin and begin making horizontal cuts with the knife in short sections, pulling the skin back as you go. Leave as much fat layer as you can. Once removed, it’s time to rub and cure.

Homemade Smoked Bacon- Rub and Cure to Flavor

Curing is preserving the meat. This is done not only by the ingredients in our rub but also by the process of hot smoking which contains antimicrobial benefits. Remember, when we are done with the smoking process, your bacon will be ready to eat as is, though you will be able to crisp it up if you want in a pan.

For my rub, I’ll be combining the following:

  • 1 cup of maple sugar, coconut sugar or regular sugar
  • ½ cup kosher salt
  • 1 tablespoon cracked black peppercorn
  • 2 teaspoons minced fresh thyme
  • ¾ teaspoon pink salt also known as Prague Powder #1
  • 1 crumbled bay leaf
  • 1 teaspoon ground coriander
Our seasoning mixture over the pork belly moving along for homemade smoked bacon

#briningporkbelly

Now cover every area of the pork belly with your rub. Place the rubbed pork belly in either a 13×9 baking dish covered with plastic wrap or in a storage bag. I prefer the jumbo size bags. Just be sure to remove all the air from the bag before sealing.

Place the belly in the refrigerator. Now starts the curing process. As it cures, the meat releases liquid. You’ll need to flip the meat every other day to ensure the cure is evenly distributed. Begin checking after 7 days if the belly is fully cured. You’ll know the pork belly is ready to be smoked when the meat feels firm to the touch but is still pliable. Rinse the pork belly under cold water to remove any excess cure or the outcome will be too salty. We are ready to smoke!

For Your Homemade Smoked Bacon- Make the Pork Belly Smoke!

Even if you don’t own a traditional smoker, you can still smoke the pork belly. Here’s the technique:

Charcoal Grill:

You will set up the charcoal grill using a two-zone cooking method. Start by loading about 3 lbs. of briquets or hardwood charcoal on one side of the charcoal fuel area. Place a water pan filled with water about 2-inches deep on the non-charcoal side. Then fill a chimney starter ½ full of briquets or hardwood charcoal. Lite and allow to burn to hot coals, then pour the hot coals over the top of the unlit charcoal in your charcoal grill. Add a couple of hardwood chunk pieces to the hot coals and allow to start smoking before you add the pork belly. Once the chunks are smoking, place the cured pork belly on the unlit side of the grate fat side up. Put the lid on and allow to smoke for about an hour without disturbing. Keep in mind, your intake vent should be open ½ way as well as the outtake vent at ½. A 3lb. pork belly will take about 1-1/2 to 2 hours to reach 150°F internal temperature. By using both hot and cold charcoal, you should not need to replenish the coal bed, just may need to add another chunk or two of hardwood.

Our Pork Belly on the charcoal grill for our homemade smoked bacon

#charcoalgrilling

Gas Grill:

Place a smoker box of small wood chunks directly on your heat shield or on the grill grate. Turn on only ½ the burners on your gas/LP grill and set to medium temperature setting. Place a small pan of water on the warming grate to keep a moisture rich environment during the cooking process. Allow the grill to reach 225°F and to have the wood chunks begin smoking. Place the cured pork belly fat side up on the unlit side of the grill. Allow the pork belly to cook until it reaches an internal temperature of 150°F. Replenish the wood chunks in the smoker box as needed.

Traditional Smoker:

Set up your smoker as normal targeting a 225°F cooking temperature. Be sure to include a water pan if your smoker doesn’t include one (a disposable foil pan works great). Again, use 2-3 hardwood wood chunks for the flavor. Place the pork belly fat side up and cook until the internal temperature reaches 150°F.

Homemade Smoked Bacon- Ready to Eat!

Once the pork belly has reached 150°F internal temperature, it is ready to eat as it is fully cooked! Remember, smoke has an antimicrobial quality which helps to make this consumable at this temperature level. I recommend you allow the bacon to cool to room temperature on a wire rack set over a sheet pan. Then wrap in plastic wrap and refrigerate for at least 4 hours. This will set all those great flavors.

By slicing it paper thin, you can consume this cold and enjoy a more prominent smoke flavor. However, you may pan fry this like traditional store-bought bacon or oven cook this on a rack over a foiled lined sheet pan for those who prefer a healthier, more rendered fat version. This method also allows you to do a lot more bacon at one time then pan frying allows.

Refrigerated homemade bacon will last 5-7 days while frozen will keep for several months. Once you sample your own homemade smoked bacon, you’ll never purchase prepackaged again!

(more…)

We are cooking on a chimney starter with a grill pan to nicely char our head of Cauliflower for this recipe!

We are cooking on a chimney starter with a grill pan to nicely char our head of Cauliflower for this recipe!

COAL FIRE CAULIFLOWER BY COOKING ON A CHIMNEY STARTER

listen to our blog

listen to our blog


A cousin to broccoli, #cauliflower is one of those vegetables that can be eaten raw or cooked and converted to so many different textures. Best yet, cauliflower is one of those super cancer-fighting foods as it contains sulforaphane known to kill cancer stem cells.

I’ll be taking my head of cauliflower and introducing it to hot coals, first, direct heat using a #chimneystarter for the actual cooking and then directly on the hot coals to give it the perfect “meat” char. No matter what color you enjoy – white, yellow, purple – grab a head and get your chimney starter ready, as I show you how to use a chimney starter as an actual grill.

Cooking on a Chimney Starter: Why a Chimney Starter?

All our hot embers accumulated in the Chimney starter provides an excellent heat source for cooking

There are times when you really don’t need to fire up a full charcoal area of coals on the charcoal grill. I have the perfect solution when you’re doing just a small quantity of a food, like our head of cauliflower. Use your chimney starter

To start, I place a mesh screen on the charcoal grill grate to help retain the small, hot coals for cooking. I have a collection of micro charcoal pieces that work perfectly for this type of cooking.

After lighting a Firestarter, I place the charcoal filled chimney starter on top of the Firestarter and allow the coals to burn down to hot embers. Hot embers are what I will be using to cook my fresh cauliflower, first, directly on the chimney starter, then on the mesh screen once I dump the hot embers from the chimney starter.

(more…)

Showing how to infuse cherry wood smoke into brussels sprouts using an iron skillet on the gas grill is simple and easy and adds a smoky touch

Infusing cherry wood smoke into Brussels sprouts using the gas grill is simple and easy and adds a very flavorful touch to this hearty vegetable.

INFUSING WOOD SMOKE INTO BRUSSELS SPROUTS

Listen to the audio of this blog

A favorite of the cabbage family, Brussels sprouts came to the United States via French immigration in the 18th century. They are dominantly grown in California and available June thru January making them a Fall and holiday menu favorite. SmokinLicious® will take the flavors up a notch and add wood smoke into Brussels sprouts for two upcoming recipes. We’ll do this on the gas grill fit with wild cherry wood chunks to bring subtle smokiness to the finish sprouts. First purchase 3 lbs. of Brussels sprouts and get two cherry single filet chunks, and you’re ready to fire up the grill and get smoking.

The Easy Grill Method for Infusing Wood Smoke into Brussels Sprouts

Bringing the flavor of wood smoke into Brussels sprouts is so easy. To start, gather about 3 lbs. of Brussels sprouts, some cooking oil, butter, and a heavy-duty skillet. I prefer a nut oil like walnut or almond. For a skillet I’ll be using cast iron. I’ve trimmed the ends on about half the sprouts and for the other half, I’ve trimmed the ends and cut them in half. That’s it! Fire up the grill and get ready for a quick method of adding great wood-fired flavor.

It only takes a couple of pieces of wood chunk to bring fabulous flavor to the grill. I set up a cast iron pan on one side and place two cherry wood chunks on the heat shields of the far burner. Let the pan heat up for about 5 minutes then pour in a couple of tablespoons of oil and heat. Right before I add the Brussels sprouts, I add a couple of tablespoons of butter. In go the whole Brussels sprouts and the lid comes down. Leave untouched for about 5 minutes before turning.

Flavor Finish

As I have two recipes in mind I’m cooking two batches of Brussels sprouts: one batch whole and one batch halved. After leaving for 5 minutes, I stir them to ensure that all surfaces are infused with wood flavor. I maintain a temperature of 350-375° F which will make this a quick cooking method. The first 5 minutes, the lid is down but once stirred, you can finish the cooking with lid up. Remember, cast iron will retain heat, so you can turn the heat off and let sit for about 5 minutes.

The cooking time for this recipe is approximately 20 minutes
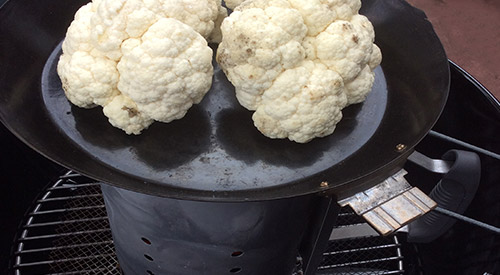
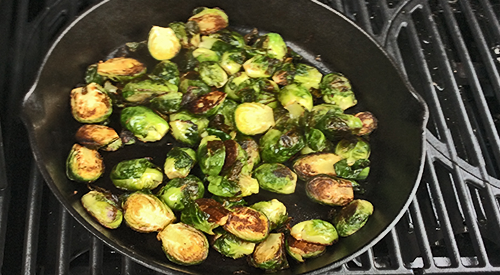
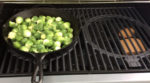
After stirring a couple of times, both the whole and halved Brussels sprouts are ready in about 20 minutes time. I simply remove them from the heat and bring them in to be added to my favorite recipes.

I have two recipes I’ll be working on: Smoky Brussels Sprout Gratin and Tortellini with Lemon and Smoked Brussels Sprouts. These truly are the most flavorful Brussels sprouts! For those of you thinking about a holiday meal with them, well, the grill will give you that extra oven room you need. Take advantage of the long harvest season and try these mini cabbages on your grill. Check in for our recipes soon so we can get you started on how to use your prized sprouts.

Bringing you new methods of infusing wood fired flavor into seasonal items. Be sure to subscribe and follow us to gain great tips, techniques, recipes and the science behind the fire.

The Culinary Crew wants you to know…

 Chef Bert and Tom discuss how to infuse wood smoke into brussels sprouts.

#chefbertandtom

… that the direct infusion of hardwood-fired smoke to foods, like Brussels Sprouts, is considered a flavor ingredient, much in the same way that spices, minerals and sauces enhance taste. When fired, the components of smoke vapor carry the hardwood’s distinctive flavor profile directly into meats, seafood, fruits or vegetables with pleasing results to the palate.

SmokinLicious Products used in this recipe- wood smoke into brussels sprouts:

Our Single Filet is hand split to the proper size for larger equipment infusing wonderful wood smoke into brussels sprouts.

#singlefilet #woodchunks

Wood Chunks- Single Filet

More Related reading on this subject

More Related reading on this subject

Additional reading:

-WOOD GRILLING AVOCADO

-HOW TO TURN YOUR LP/GAS GRILL INTO A SMOKER

-WHAT’S IN THE SMOKINLICIOUS® WOOD CHUNK BOX?


Dr Smoke- "Soften the taste of your Brussels sprouts by adding smoke flavoring from your gas grill using Smokinlicious® cherry wood chunks."

Dr Smoke- “Soften the taste of your Brussels sprouts by adding smoke flavoring from your gas grill using Smokinlicious® cherry wood chunks.”

Next Page »