
Building the perfect fire for cooking! Our chimney starter full of flaming hot charcoal being poured into our kettle grill.

In Part I of our series on lighting an outdoor fire for cooking, I addressed fire production for the outdoor fireplace or fire pit cook, known as open fire appliances. In Part II, I’ll address the needs for kettle, drum and box grills’ fire set up.
The Wood-Fired Environment
There are many choices in equipment for working with a wood fire but each has different material components that determines how much work would be involved to cook on the unit. Here is the primary point when you’re selecting equipment for live fire: how will you cook on that equipment?
If your plans are to always do indirect cooking whereby the source of heat (fire, coals) will be on one side and you will cook on the non-heat side (in my opinion, the preferred method for all cooking), then know that most any equipment selected will work. However, the time for the equipment to heat up may play a factor, as the heating time is directly related to the insulation of the grill. Plus the amount of radiant heat it can hold.
If a unit is manufactured from heavy metal, brick, clay, or ceramic housing, then it will perform exceptionally by giving radiant and retained heat. Why is that important? Because producing retained and radiant heat means less fuel consumption and even cooking results.
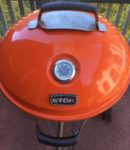 The Kettle Grill
For thinner material grills like the traditional kettle grill which are very popular, low cost, and preferred
by many, you can compensate for the potential heat loss and improve efficiency by adding fire bricks to the walls and floor of the grill. You will simply start your live fire directly on the fire bricks rather than the charcoal grate. Fire bricks will work well in any grill that could improve on its insulation.
Drum/Barrel Grill
The overall cooking space in a drum/barrel grill is larger than that of a kettle grill. However, just like any metal material, there are different grades so quality can be variable. Same rule applies to these grills: if the insulation is not great, add fire brick to improve the performance.
Box Grills
These units are traditionally made of high heat metal with a deep, metal charcoal pan that includes grid and vents. A grilling grate is suspended above and there often is a lid to the unit.
Fire Set Up
As I’ve stressed before, a good fire needs 3 elements: fuel (wood, charcoal), oxygen (air intake vents), and heat. As with any fire cooking, a small, hot fire is ideal.
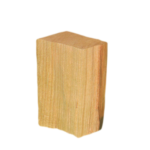
Double Filet Wood Chunk
To start your fire in one of these pieces of equipment, first open the air intake vents at the base of the charcoal firebox area. This will ensure that oxygen can stimulate the start of the fire. Since this is an enclosed firebox area, the size of the wood pieces may need to be adjusted from what you would commonly use in a fireplace or fire pit/fire ring.
I like to use the log cabin method of starting a fire with this equipment. Lay 2 longer pieces of hardwood parallel to each other with about 3 inches of air space between them. Lay 2 more hardwood pieces on top perpendicular to the first pieces. Place the last 2 in position to match the base woods’ alignment. In the center, add a pile of tinder which can be hardwood chips, pine cones, even newspaper if need. Again, I like to use wood in its natural form as much as possible. Pile some kindling size wood pieces on top of the tinder pile. You can drizzle vegetable oil on top of the kindling and tinder to assist with ignition which proves helpful if you plan to light with a long wooden match. I prefer to lite my fire using a MAP torch.
Don’t Rush It
It is imperative that you allow the fire to go through the full stages of combustion before you introduce foods to the cooking grate. Too much flame and smoke will ruin the foods. The ideal is to wait until the fire burns down to glowing embers. If your equipment has the room in the firebox, rake or shovel some of the hot embers to one side and add just a small quantity of additional hardwood to keep the heat steady. The rest of the hot embers are what will be used to cook with.
Position the foods based on the heat needed for the cooking. Meats will require more of the heat while vegetables and one pot dishes will take the medium to low heat. An infrared thermometer will aide with knowing heat levels in your equipment or you can use the hand test: hold your hand over the coals the distance your foods will be. If you can only hold your hand for a count of 2 seconds before you need to pull it away, that is high heat. 3-4 seconds is medium-high, 5-6 seconds is medium and 7-8 seconds is low heat.
Be sure you visit Part I of this series so you can view the list of recommended tools to have when you wood-fire cook.
I hope you gained some new information on lighting a fire. Whether you plan to cook over/in your kettle, barrel or box grill. Leave us a comment and subscribe so you don’t miss anything concerning wood fired cooking, flavors, and the science behind the fire.
Purchase products:
Wood Chunks- Double & Single Filet
Wood Chips- Grande Sapore®

More Related reading on this subject
Related reading:
-OPEN PIT COOKING FIRE BUILDING: PART I
-EMBER FIRED FRESH ZUCCHINI
-BEYOND PRICING: THE TOP THINGS TO CONSIDER WHEN PURCHASING COOKING WOOD

Dr Smoke- “The key to any success in grilling and smoking outdoors is building the fire with the proper materials and patience to develop the right base before you attempt to cook the food.”
