Our outdoor kitchen guest blog is authored by Mike Cahill

Our outdoor kitchen guest blog is authored by Mike Cahil

Listen to the audio of this blog

Mike is part of the Content Marketing team and enjoys applying market insights to provide valuable content on all things real estate. Mike’s dream home would be mid-century modern style near the water.

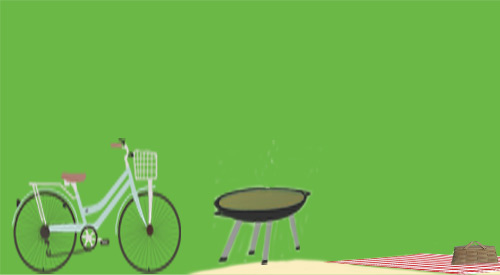
As days get warmer and summer approaches we’re all looking for more ways to spend time outside. Whether it be biking, running, hiking, or walking we can all agree that being outside is one of the best ways to spend time during the summer. So why not cook outside too? Having an inviting outdoor space that can double as a beautiful kitchen is a great way to be outside and create memories to be cherished for years to come. For that, we reached out to the experts from Yolo to Palm City to provide our readers with a few tips for creating the Ultimate Outdoor Kitchen.

Make it your own Outdoor Kitchen

The trend of outdoor design is experiencing a dramatic shift today. Landscape designers are moving away from traditional masonry-built structures to waterproof cabinets equipped with storage, trash receptacles and even vegetable and herb potting areas providing a whole new experience. Moya Living and Urban Bonfire offer two creative and functional products that bring color and extreme functionality into the design and provide the structure with every ability to create the perfect outdoor kitchen. Whether the homeowner desires a smoker from Kalamazoo, a pizza oven from Lynx, or Versa Powder Cooker from Alfresco, the options are endless in the design creation. Outdoor kitchen design now takes front and center focus when planning a remodeled home and now is simply an extension from the indoor to the outdoor so that every space of the home is utilized. – Annette Reeves

Find a proper grill

The focus of any outdoor kitchen is the grill. At Chicago Outdoor Living we believe a grill’s value shouldn’t be based solely on price. Features such as design, quality of materials, and functionality, combined with price, play an important role in choosing the grill that is right for you. It is also important to be aware of the manufacturer’s warranty. Chicago Outdoor Living carries a variety of high-quality grills to fit everyone’s grilling needs and budget – Chicago Outdoor Living

Grilling burgers on the grill

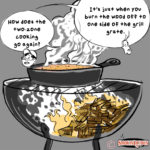
Our Authors image of cooking burgers

Choose complimentary finishes

Leather finish granite countertops are my go-to countertop surface for outdoor kitchens. It looks matte enough to feel like it belongs outdoors but is cleanable and ages well. – Attainable Form

Utilize misting systems

During sweltering summer days that are hot enough to have you fantasizing about moving to Antarctica, it can be difficult to enjoy your outdoor kitchen while you are feeling sweaty and scorched. With our misting systems that cool the air by up to 30 degrees without getting anyone drenched, you’ll be able to elevate your lifestyle and enjoy your outdoor kitchen in comfort all you want. – Advanced Misting Systems

Incorporate patio heaters

Enjoying your outdoor kitchen can be extremely difficult during winter days that are so cold it feels like you could chip a tooth from shivering. With our outdoor patio heaters that emit radiant heat to keep an area warm, you’ll have your own patio encased in a bubble of warmth, allowing you to enjoy your patio and outdoor kitchen while the neighbors are stuck indoors. – Gas Outdoor Patio Heaters

Storage is key in your Outdoor Kitchen

You can never have enough storage outside. The key is drawers: paper plates, utensils, corn on the cob holders, grill grates…. Keep them at your fingertips and you will be much happier. Drawer cabinets have to be fully enclosed to avoid creatures from crawling in for a vacation. – Cowgirl Q

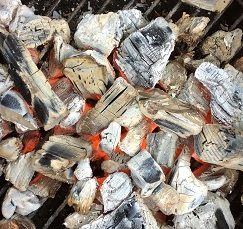
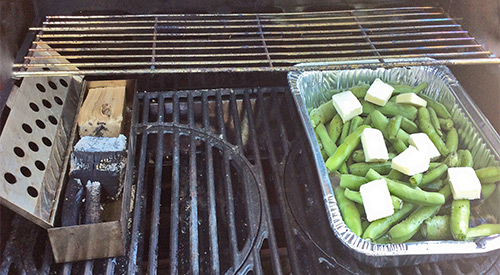
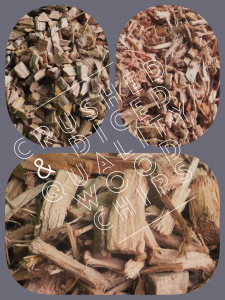
If you love wood-fired flavors to foods cooked outdoors then be sure to consider wood storage when designing your outdoor kitchen. Pizza ovens, ceramic or clay ovens/smokers, traditional smokers and gas/hybrid grills all allow for the addition of charcoal, charwood, and/or hardwood to bring flavor essence to favorite cuts of protein, vegetables and fruit. Include in your design wood storage that allows for good air circulation to the wood as well as storage placed close to the equipment. Mesh bins or small wood crates work well for smaller pieces of wood that can fit on shelving under the counter or design open shelving in metal, stucco or concrete material that allow larger pieces of wood to remain dry, nonreactive and at the ready. – Smokinlicious

Don’t forget about the island

The best way to start creating your own Ultimate outdoor Kitchen is by getting ideas of different types of islands and kitchens. Researching will help you brainstorm an idea of your own (shape, size, color, components, etc). The next step is to find out where your Island will be placed. After finding a perfect fit, take a few measurements to see how the unit will be laid out. Over the years, KoKoMo has created various Outdoor Kitchen models with all kinds of different designs. A good example is our custom sports bar. This unit is fully stocked with all of our most popular components and accessories. This kitchen has a beautiful white-looking stone that covers the base, with a nice steel-looking tile to go with it. We used a large 15×15 aluminum shade cover with two giant TVs to entertain both sides of the island. – KoKoMo Grills

Keep it comfortable

Outdoor kitchens draw people in, whether it’s your guests gathering to offer help or little ones looking for a snack before the big meal. Make everyone comfortable with our thick, high-density cushions. Bonus tip: all our cushions are covered in water-resistant fabric, making rain and spills the least of your worries. And at the end of the party, if you need a special type of cover for your furniture or grill, we’ve got you covered with custom-made covers! – Classic Accessories

Get a personalized rub kit

Whether you’re grilling or smoking, when you’re cooking outdoors, having your own personalized “rub kit” at the ready is critical. A rub kit should include staples like lemon pepper, garlic pepper, and all-purpose seasoning salt. Round out your kit with your favorite rubs for the big four – beef, chicken, pork and seafood. – Savory Spice Shop

Picture of all the fixings being cut for the grill

We love this image from the author!

Consult with a pro for the Ultimate Outdoor Kitchen

For homeowners who want to build a fully functional outdoor kitchen area in their homes, I always recommend consulting with a designer, in addition to the outdoor kitchen company themselves. One thing I have learned with my experience in the business, is one layout for a kitchen does not necessarily work for every future buyer of the home — so the key is: versatility and simplicity. Most buyers these days are not so focused on decking, they want to see more grass. So artificial grass is a great alternative to decking, plus easy to maintain. Keep your dining area separate, and not built-in, should someone in the future want to change it, or if you entertain and need a different layout for a specific event. – Jenny Okhovat Homes

Originally published on Redfin

More Related reading on smoker More Related reading on Outdoor Kitchen essentials and other design ideas.

More Related reading on smoker More Related reading on Outdoor Kitchen essentials and other design ideas.

Related reading:

-Outdoor kitchen location tips

-Does Outdoor Kitchen Stainless Steel Rust

-6 TIPS FOR A HEALTHY OUTDOOR COOKING SEASON


Dr. Smoke- has an Outdoor Kitchen for grilling, smoking and entertainment, follow these great tips from our guest blogger!

Dr. Smoke- has an Outdoor Kitchen for grilling, smoking and entertainment, follow these great tips from our guest blogger!

Discusses How to keep a Bundt cake from Sticking

Discussing How to keep a Bundt cake from Sticking

Listen to the audio of this blog


Introducing to you Peggy Hatfield, the Bella Cupcake Couture’s resident dessert couturier, and baker. Peggy became passionate about baking when she was 9 years old. She served freshly- baked treats in her small town in Alabama for 28 years before her home bakery and café was closed. But with the Bella Cupcake Couture website, she was able to share her expert reviews on the best baking tools, equipment, accessories, and the latest trends, including the know-how of baking. Bella Cupcake Couture is pleased to present to you the expert baker’s how-to guides, expert tips, and hacks for baking and dessert making.

While there are other techniques in cooking, baking is considered one of the most critical types. Baking requires precision and dedication to the entire process. If you forgot one or add too many ingredients, you can ruin the entire dish. Also, cooking a baked item for longer than the required time will also result in a big problem. That is why, in baking, you need to have lots of patience to succeed with your product.

Bundt Cake- Making A Cake

At some point, people tend to become excited when removing a just baked cake, forgetting to be more careful after the baking process is complete. The last part of the baking, which is removing your cake from the pan, requires the same level of care as was used in mixing the batter. This article provides the key tips in keeping a bundt cake from sticking to your pan.

Bundt Cake- Prevent from Sticking

The more careful you are in the cooking part, the more cautious you need to be removing your cake from the pan. It is frustrating when you spend your time, effort, and money , then all of a sudden, your cake decides to remain stuck in your pan, ruining your efforts.

Hey! Don’t worry because here are the effective ways to prevent your bundt cake from sticking.

For more pro baking guides and DIY tips, check out Bella Cupcake Couture at www.bellacupcakecouture.com!

Bundt Cake- Use a Simple and Nonstick Heavy Bundt Cake Pan

This step is one of the highly recommended ways on how you can prevent a cake from sticking. If you are wondering about its efficiency, you can look for reviews online to have an idea on the brand of bundt cake pan with the best value and rating for your purchase.

To maintain the pan’s efficiency, you should put extra care into cleaning it. Avoid using strong dish washing liquid and abrasive sponges because these can cause damage to the pan’s coating. The most efficient way to take care of your nonstick pan is to wash with mild soap, dry it with a soft towel, and avoid using any metal cooking tools or abrasive brushes.

Bundt Cake- Use Grease

Take note that using just any grease can also affect the quality of your nonstick pan. Nonstick cooking sprays contain chemicals that can degrade your pan’s nonstick coating. Butter may affect the quality of your cake due to the milk properties which can bind your cake to the pan. One of the highly recommended types of grease that proves best for baking is melted shortening.

Bundt Cake- Loosen the Edges

You cannot and should not forcefully remove your cake from a pan. You need to slowly and carefully loosen the edges and let the cake sit for 5 minutes before turning it upside down on a cooling rack. The use of a plastic spatula is a must to avoid scratching your nonstick pan and cutting into your cake.

Bundt Cake- Get Your Cake Upside Down

Once the pan is upside down on a cooling rack, let it sit for another five minutes before lifting from the cake completely.

Final Notes

Removing the cake from your baking pan is critical to the final result. Following our simple steps above will ensure a perfect bundt cake. Making the investment in high-quality baking equipment adds insurance for the best product results. If it happens that your cake still sticks in your pan, don’t give up! Try and try again until you flawlessly achieve the perfection of your cake.

More Related reading on baking in a smoker bundt cake and more!

More Related reading on baking in a smoker bundt cake and more!

Related reading:

-WHY TWO-ZONE COOKING METHOD LET’S YOU WALK AWAY FROM THE GRILL

FOIL PAN FOR SMOKING IS INDISPENSABLE

-Coffee Smoked Foods: A New Flavor Craze

Dr. Smoke- our guest blogger discusses Bundt cake tips!

Dr. Smoke- our guest blogger discusses Bundt cake tips!

Our tips can help with your spring season for grilling plans!

Our tips can help with your spring season for grilling plans!

SPRING SEASON FOR GRILLING!

Spring is finally here and that means it’s time to prep the grill for your Spring Season for Grilling! Yup, the winter blahs are gone and it’s time to fire up the grill, BBQ, the Barbie, the Brac, or whatever suitable name you use to call your equipment on your specific continent.

No, there is no way around it! First, comes the dreaded cleaning of your unit. Whether it’s less than $30 or over $3,000, all equipment needs some cleaning attention once in a while. What better time than Spring to roll up your sleeves and get everything ready.

Remember, a grill or smoker is an oven that has been seasoned over time with all that cooking so a little soap and water is generally all that is needed to do a nice cleanup. You simply want to clean the unit of dirt and dust, so gently clean being careful not to rub out the “seasoning” of the unit!

Of course, there are those times when you failed to provide suitable attention to your equipment and a bunch of soot, grease, and all kinds of other nasty things developed on the equipment. When you’re faced with that situation, then consideration has to be made to a good degreaser or oven cleaner! Once the unit has been put back into good clean order, get ready to season it again. That’s right, all the harder cleaning agent to the seasoning right out of the unit. Actually, this the perfect time to use all the leftover charcoal, wood chunks/chips from last year! Start a fire and let burn/smoke in the unit to “season”. You’re not cooking now so there is no need to worry about moisture levels, water pans, etc. – just generate the smoke and heat, and re-season your unit. Don’t forget to add a little oil (vegetable, coconut, whatever handles higher heat levels) to the grilling grates to get them all ready.

Own an LP/gas grill? You can do the same process by taking a chunk and lighting it on the grill, or take a disposable foil pan or tin foil and put some wood chips in. Then lite with a match or lighter (not with the unit’s burners), close the lid and capture the smoke/heat!

Now you’re ready for new SmokinLicious® culinary quality wood products and what will promise to be a great Spring Season for Grilling!

Bon-Bar-B-Q!


Dr. Smoke has tips for your Spring Season for Grilling plans.

Dr. Smoke has tips for your Spring Season for Grilling plans.

Don't ruin your experience by making simple smoking & grilling mistakes!

Don’t ruin your experience by making simple smoking & grilling mistakes!

10 THINGS YOU DO THAT RUIN YOUR SMOKING & GRILLING EXPERIENCE Click To Tweet

Listen to the audio of this blog

#smokinlicious

We’ve all had those moments when the food comes off the smoker or grill and we wonder, What went wrong??

Sometimes the event is so bad you want to swear off outdoor cooking for good because of committing common smoking & grilling mistakes. I’m here to ask you to step away from the ledge and think about whether you do any of the following things. The more items on the list you engage in, the more likely you can benefit from my suggestions.

SMOKING & GRILLING MISTAKES:

#1 Resting Meat

This tends to be the common practice for roasts and steaks/chops. You’ve managed to get a nice crisp skin to the roast or steak and then you let it sit or rest, thinking it will make the outcome juicier. You end up with a soft skin, a wet outside, and waxy fat. These are meat cuts that don’t require resting. In fact, they will rest enough on your dinner plate so they are best served hot of the grill or smoker, without a rest period.

#2 Using Too Much Wood

You know that charcoal and gas are the fuels used to reach and maintain temperature while you’re cooking, and that hardwood is what flavors your food. You want to ensure there is adequate smoke flavor so you add 10 pieces of wood chunks to the hot coals when you start cooking. Then after the first hour, you add another 6 pieces of wood. STOP! That is way too much and simply put, a waste of a tree. On average it takes just 6 ounces of wood to start flavoring meat. My rule of thumb is to add 3-4 wood pieces for a full chimney of charcoal plus a couple of pounds of unlit. Only when those pieces are fully combusted (black and ashy) do I add a couple more pieces. Depending on what and how long I’m cooking, I may only use 6 pieces total.

#3 You Soaked Your Smoking/Grilling Wood

I know this is one of the biggest controversies out there when it comes to smoking with wood. To soak or not. I take the stand that you should never soak the wood as adding water will only fluctuate your cooking temperature and take more energy away from the fire to steam the water from the wood. Remember, the wood cannot start to combust until the excess water has been vaporized. Work with a wood that has at least 20% moisture for the best flavor.

#4 Room Temperature Meat

It is well documented that when you want to attract smoke vapor from burning wood, colder temperatures are like a magnet. Don’t take the meat out of the refrigerator until right before you’re ready to place it on the grill. In addition to attracting smoke vapor, colder temperature meats will warm up faster in your equipment than if you left them out on the kitchen counter.

#5 Searing to Lock in Juices

This is the one item even well-known restaurants can get wrong. Searing meats before finish cooking does not lock in the juices. What it does do is brown the outside of the meat and firm up the outer surface, giving a distinct pleasant flavor. The meat fibers do not get sealed by this method or produce any additional juiciness to the meat.

#6 Marinating Overnight or Longer

As marinades tend to contain oil and meat is made up mostly of water, the two tend to compete against each other. Here’s the thing with marinades. Marinating for long periods of time do not allow the marinade to penetrate any deeper than if you marinate for just one hour. In fact, you have an increased risk of breaking down the meat fibers too far with a marinade, producing a soggy outer layer. Stick to short marinade times and understand most of that flavor will penetrate only to the outside layer.

#7 Don’t Trim the Fat Cap

Just like meat being made up of mostly water, fat is made up of oil. Again, water and oil don’t mix. Leaving a fat cap on meat only allows it to melt and drip into the equipment you’re using. This can produce some additional flavors to the meat but allow too many drippings into the fire area, and you’ll cause flare ups that will deposit soot onto your meat. Don’t forget, most of us have a habit of trimming fat off meat before we consume it.

#8 It’s Done When There’s No Pink Meat

(more…)

Guest Blog- Kylee Harris on Coffee Smoked Foods!

Guest Blog- Kylee Harris on Coffee Smoked Foods!

Kylee Harris on Coffee Smoked Foods– At one point, all foods had an element of smoke; everything was cooked over an open fire before gas and electric stoves came about. It’s thought that the smell and imparted taste of smoke is programmed into mankind as a result, which is why smoked foods are popular all over the globe. Meat, seafood, and even smoky desserts like fruit pies, are still flavored with a variety of wood smoke. Recently, professional and home cooks alike have begun to wonder about the hidden potential of another thing close to their hearts: coffee. Smoking food with a combination of wood and coffee beans could be the next big taste revolution.

Coffee Smoked Foods- Coffee Varieties for Smoking

Just as there is a variety of options when it comes to smoking food with wood, there are a few choices in coffee as well. For flavor profile, darker and richer bean varieties pair best with red meat, while more mild varieties are better sampled with poultry and seafood. There’s also the question of regular or decaffeinated types of coffee. No, smoking with coffee won’t caffeinate your food (though wouldn’t that be interesting), but there can be a difference in flavor here as well. Regular has a higher level of acidity and thus bitterness, while decaf is less so. Rule of thumb: if you like the bitter tang of a certain coffee, then you will probably like the flavors it lends to smoked food.

Coffee Smoked Foods- Beans, Grounds, and Pellets

Of course, flavor is one thing- this is open to individual tastes- but what about what works best for the actual smoking process? Ground coffee is great as a marinade or rub for meat, but it burns up too quickly to be very useful for smoking. Coffee beans are better for the process, as they can burn more slowly. A combination of wood chips with coffee beans (a 3:1 ratio) is a good balance, allowing the coffee beans to add their subtle flavors without becoming too smoky and overpowering. There’s also the option of coffee pellets, which are coffee grounds and saw dust pressed into compact pellets used as a fuel for both cooking and heating. These are said to have a much more subtle flavor when used for cooking and work particularly well, according to fans, for flavoring smoked corned beef.

Coffee Smoked Foods- Pre-Roasted vs. Green Coffee Beans

While both grounds and pellets have their place, most people prefer smoking food with whole coffee beans, which then poses the question: raw and green, or already roasted? The answer really depends on personal preference, once again. Green coffee beans will give off much more smoke, which can be a good thing if that’s the flavor you’d like to try. Pre roasted, on the other hand, will smoke less, but may need to be soaked in water first in order to be able to smolder for a longer time to produce a sustained smoking processes.

As you can see, there are quite a few choices you can make to customize your coffee-smoked food experience. Experimenting with flavors and methods is what really makes cooking the art form that it so clearly is. The options are plentiful, and the vision (or taste, as it is) is all up to you.

More related reading on Applewood and other orchard woods see our smoking & Grilling tips and technique see our directory on previous blogs!
More related reading on our smoking & Grilling tips and technique see our directory on previous blogs!

Other blogs you might enjoy:

Great Sustainable Wines To Pair With Your Smoked Meat

How To Maintain A Safe Kitchen Environment

Himalayan Salt Blocks: Benefits, Uses, and Tips

Dr. Smoke-
Dr. Smoke- Kylee Harrris discusses Coffee Smoked Foods

"<yoastmark

To our blog kiwifruit gets smoky

A SPICE FOR YOUR EQUIPMENT: SMOKIN’ DUST®

There seems to be some legend out there that wood-fired cooking methods are all about the endless hours of tending food and fire that produce taste results that are only granted to a small percentage of committed cooks; nothing could be further from the truth. Ready for simple methods of wood flavor infusion that do not take stockpiles of wood and equipment so large, you start thinking about adding on to your house?

Wood-fired cooking includes the simplest methods of wood infusion like the current rage with hand-held food smokers or even the stovetop smoker. Kitchen gadgets that have opened the door to anyone who wants to explore the fragrant and flavorful bounty that awaits all foods and beverages. One thing that still is evolving is the concept of spices not for your food but for your equipment!

If you’ve read some of our previous articles on wood flavoring you’ll come to understand and appreciate that there is no set rule on wood-fired cooking. Oh, yes, there is plenty of science when it comes to cooking with fire or as I like to say when you combust to flavor, which is what you are accomplishing with wood for cooking. I feel more attention should be given to the actual wood products; rather than focusing on the ingredients to the foods being cooked.

Wood is an ingredient

First, wood to us IS an ingredient, one that still needs to be balanced with the other components to bring forth a food memory. As an ingredient, the easiest by far to manage for wood flavor infusion is sawdust or in our Company’s listing, Smokin’ Dust®. Compatible with all types of equipment, Smokin’ Dust® literally becomes a ‘spice’ for your equipment.

Thinking of island flavors of pineapple, coconut, and mango for a recipe? Why not add one or more of those flavorings through the wood product? Yes, using all-natural flavoring infused into our Smokin’ Dust® is one of the quickest methods of getting the great flavor to a specific regional dish. With 15 flavor-infused options that are 100% all natural, designed for cooking, and infused in hardwood, as well as 8 natural hardwood flavors, we’ve given new meaning to the word ‘spice’ as ours can now apply to the wood product! Remember, applewood doesn’t smell or taste anything like an apple. Use our apple infused product, and you’ll experience hints of cinnamon, nutmeg, and the bite of an apple!

Why settle for a run-of-the-mill smoking sawdust product that you don’t know where it comes from? A softwood, swept from the floor, shoveled from the ground, or worse, taken from under an animal? Instead, get excited about the flavor opportunities awaiting you and your equipment when you use a smoking sawdust product from a real cooking wood company. Get excited about the opportunities out there to experiment with, whether for hot smoking, cold smoking, handheld food smoking, stovetop smoking, or even traditional LP and charcoal grilling. And get ready to experience the world through flavor aroma!

Smokin Dust is one of our most customized and versitle cooking wood product.

Dr. Smoke- “Smokin’ Dust is one of our most customized and versatile cooking wood product.” which is a spice for your equipment

More Related reading on this subject

More Related reading on this subject

Additional reading:

-TASTE IS AROMA!

-JUST BECAUSE YOUR SMOKING (FOOD THAT IS!) DOESN’T MAKE IT ALL BAD!

-KIWIFRUIT GETS SMOKY

Our products used in this Blog:

Flavored Smokin’ Dust

Our coals showing their hot glow and ready for direct wood ember cooking!

Our coals showing their hot glow and ready for direct wood ember cooking!

THE GLOW OF WOOD EMBER COOKING!

So what exactly is wood ember cooking and why is it suddenly gaining attention as a method of cooking? Well, first, it’s most certainly not a new cooking concept. Cooking over a fire and hot coals have been around for thousands of years. Recently, some Chefs and well-known restaurants have taken to returning to this method of cooking because they know where great flavor can come from and they know how to manage the heat from hot wood embers.

An ember is a glowing, hot coal made of greatly heated wood, coal or other carbon-based material that remain after a fire. The heat radiated from hot embers can be as hot as the fire which created them. You can see this first hand, by placing new wood pieces on hot embers and watching a full fire develop. An ember is usually formed when a fire has only partially burnt a piece of fuel and there is still usable chemical energy in that piece of fuel. It continues to stay hot and does not lose its thermal energy quickly because combustion is still happening at a low level. The small yellow, orange, and red lights are often seen among the embers are actually combustions. There just is not enough combustion happening at one time to create a flame. Once the embers are completely ‘burned through’, they are not carbon as is commonly believed (carbon burns, and is not normally left behind), but rather various other oxidized minerals like calcium and phosphorus. At that point, they are commonly called ashes. But why cook on the embers versus over a live fire? Because embers radiate a more constant form of heat, as opposed to an open fire which is constantly changing along with the heat it radiates (think water trapped within the wood and you’ll understand why there is heat fluctuation).

Ember cooking techniques include placing thickly skinned food items directly into the embers (i.e. garlic, onion, peppers, eggplant, steaks, etc.), placing a cast iron skillet into the embers that can hold any food items from vegetables, meats, poultry, fish – really anything. The results produced from this method are super moist, super flavorful, and the aromas are exceptional.

Peppers being cooked over wood embers

Sweet Peppers over direct wood ember cooking


Dr. Smoke- You don't need a flashy grill, a simple fireplace with enough room, just like Asado, you can do direct wood ember cooking.

Dr. Smoke- You don’t need a flashy grill, a simple fireplace with enough room, just like Asado, you can do direct wood ember cooking


Our Old Hibachi Wood Grill after the spring cleaning

Our Old Hibachi Wood Grill after the spring cleaning

DOING THE HIBACHI WOOD GRILL WAY! Click To Tweet

Everyone starts their grilling career on this convenient, inexpensive, small piece of equipment. But do we do it correctly? Let’s review the basics.


First, this is for grilling over an open fire; it needs high heat to cook. It has a low (height) fire pan and generally no hood or lid. Great high heat cooker/grill – not a smoker.

Lesson #1 Hibachi Wood Grill:-plan what you cook properly!

Now, let’s review how to set up the fire. The region that gave the hibachi its popularity is the Far East which has access to a type of charcoal called “bichiton”. This is a very dense, heavy charcoal made from oak that is direct fired to a high carbonization level. This charcoal produces an extremely high heat; 3-4 times the heat level of an American charcoal!

Can’t locate “bichiton” charcoal or don’t want the expense if you find it? Well, you can use SmokinLious® products to get close to the results. Let’s begin with charcoal – North America produces lump charcoal pieces that are too large for the small Hibachi. So take 2-3 pieces(depending on size), put them in a small paper bag (lunch bag size) and press with your hands to break them into smaller “thumb” size pieces (or you can use a meat mallet). Then pour into the firebox. If the firebox is not full –repeat until you fill it. If you don’t have a small torch available, put some paper under the charcoal, then ignite. Or, you can place the original charcoal pieces in small paper bags, then break the pieces apart, and place the bag in the firebox for lighting.

SmokinLicious® wood chips are crushed from the center of hardwood

Once the charcoal burns down (gray in color), start adding Grande Sapore® wood chips as this will provide for immediate heat and eventually, some flavoring to the food. Once the charcoal/chip combo’s flames settle down, you can begin cooking! Remember, hibachis are traditionally used for thin meats so adjust your cook time to what you’re cooking.

What I like about hibachi cooking is the ease of adding more wood chips when more fuel is needed!

Once you master the fire set up, you will enjoy some wonderful food and some really fun cooking the Hibachi way. Think Korean BBQ! Yum!

(more…)

The SmokinLicious® culinary crew's two-zone cooking method set up to smoke Fava Beans on the Gas grill with Wood chunks!

The SmokinLicious® culinary crew’s two-zone cooking method set up to smoke Fava Beans on the Gas grill with Wood chunks!

WHY TWO-ZONE COOKING METHOD LET’S YOU WALK AWAY FROM THE GRILL

listen to our blog

listen to our blog


We all know that the key to easy and successful outdoor cooking is to control the temperature. I also believe that outdoor cooking should not hold you hostage at the grill. That’s why everyone should learn the two-zone cooking method for grilling.

Let’s cover what type of cooking you can do by this method, why it’s so successful, and how to set up the zones.

Two Zone Cooking Method- Why it is Best

 smoker box and single filet wood chunks


Two-zone cooking can be done on any type of grill no matter the fuel source. What is two-zone cooking? Using the fuel source on only half the grill while the other half holds the food. Although you may use the unlit side of the grill for most of the cooking, you have the benefit of finishing crispy skins of items or quick cooking thinner cuts of meats on the direct heat side.

Two-zone cooking is also called direct and indirect cooking. The indirect side uses indirect convection heat to cook the food which means the heat generated by the lit side radiates into the material of the equipment and produces heat (convection heat) on the unlit side. The direct side produces the heat within the unit and can be used when quick cooking is needed or when a food that has been cooked on the indirect side needs crisping, additional coloring, or some char.

Two Zone Cooking Method- The Set Up

setting up the smoker box on the grill

The primary reason you want to set up two-zone cooking is most of the grill cooking does not require direct heat. When you consistently cook foods, especially meats, over direct heat, you easily can have dried, stiff, flavorless results. This is due to the components of meat reacting at different temperatures that with direct cooking occur too fast to react.

I will tell you that you need a grilling area that is large enough to establish two zones. I judge the space needed with a rectangular, disposable foil pan. If the pan can fit on half the grill area without issue, then you have plenty of room for a two-zone setup. When using a gas grill, this means lighting the burners on one half of the grill. If you don’t have an even number of burners, then decide how many are to be turned on and how many left off. With a charcoal grill, placing the hot coals on only half the charcoal area. On an electric unit, if you can manipulate the heating element, isolate the element to one side of the unit. The temperature that works ideally for two-zone cooking is 225°F. Of course, I always add wood chunks to give a smoky flavor to the foods. Remember, the hardwood goes on the direct side of the grill or lit burner or hot coals.

Chef Bert & Tom explaining the two zone cooking method

#chefbertandtom

Note that you can also use a water pan using two zones. This can be placed on either side of the grill depending on when you need the direct heat side. Keep in mind, when doing meats, it’s great to place a pan under the meat with vegetables (onions, potatoes, celery, peppers, etc.) and a small amount of liquid that can collect the meat renderings. You can also place pans of beans to catch those drippings. Anything is fair game.

For those times when you don’t want to add any additional foods, you can simply lay a thin foil pan under the grill grate of the indirect side or a sheet of foil. That will collect any fat drippings.

Cook Anything!

Smoking Tomatoes on the gas grill with the two-zone cooking method


Since radiant heat is what you are cooking with when foods are placed on the indirect side, you can cook anything. I love doing tarts and cakes via this method, especially during the hot months when you don’t want to lite your indoor oven. In fact, those are the times that I cook an entire meal using a two-zone setup.

You can also cook multiple items using both direct and indirect heat. A long cooking meat goes on the indirect side, is cooked to temperature and held there, while a side dish is cooked on direct heat. Don’t forget, if the cookware you use is high heat tolerant, you can use cookware as well. This is how I can make cakes, tarts, and bread on the grill. You need to view this equipment like an oven as that is essentially what it is!

Two Zone Cooking Method- Use Like an Oven & Walk Away

I’m going, to be honest. Although it’s true that you can produce more moist foods using a two-zone method the real reason I love this method of cooking is I can walk away from the grill. This is particularly true when using a gas grill which holds the temperature steady, which for me, is 250°F for long cook meats and regular baking temperatures for all my cookies, cakes, tarts, bread. Remember, charcoal grills will still require you to refuel so the temperature can fluctuate more if you’re not careful. Keeping an extra chimney starter of charcoal going will solve that issue.

What is a two zone fire? You may ask…

A two zone fire is also called two-zone cooking method can be used to grill or smoke any type of food on any grill (smoker, gas, charcoal, wood-fired or electric)! Setting up a two-zone cooking method is very easy- have a hotter side on one half of the grill and a lower or no setting on the other half. A two zone fire gives the cook or chef “a stylized or finessed” way to grill without ruining great food flavors by over cooking. It is especially the best way to cook meats and vegetables. Keep in mind that grills radiate and transfer heat, so it’s really not necessary to crank up every burner or heat source to a temp equivalent to the Sun! It’s as simple as that!

As a final note, even though two-zone cooking allows you more time away from the grill, you still need a good digital thermometer to monitor the temperature of the food. Invest in an easy read one and you’ll really enjoy this new way of grilling and smoking.

SmokinLicious products used in this blog:

Wood Chunks- Double & Single FiletVisit our store to buy products

More Related reading on great smoking and grilling tips and techniques

More Related reading on #twozonecooking method and other food items to prepare

Additional reading:

-EASY GRILL ROASTED TOMATOES

-ODE TO THE GRILLED FAVA BEAN

-WOOD ROASTED ONIONS TO DIE FOR!


Dr. Smoke- The two-zone cooking method on the gas grill is a great time saver for the busy Chef trying to prepare other parts of the meal menu!

Dr. Smoke- The two-zone cooking method on the gas grill is a great time saver for the busy Chef trying to prepare other parts of the meal menu!

Our preparation of smoked herbs, from picking, smoking and grinding to make smoked herb dust. Adding great flavor to dishes.

Our preparation of smoked herbs, from picking, smoking and grinding to make smoked herb dust. Adding great flavor to dishes.

SMOKED HERBS FLAVORS WITH SMOKED HERB DUST

Listen to the audio of this blog

Don’t make the mistake of thinking fresh herbs are to be used in dishes as, well, fresh only. Although you may have dried your fresh herb harvest before, we are bringing another alternative to you, smoked herbs.

We hot smoke the fresh herbs on the grill then turn them into a dust for use in all types of dishes. The smoking process will bring a depth of flavor that you’ve likely never experienced before. Go to the herb garden and pick your favorite varieties and let’s get making smoked herb dust!

Smoke Vapor Infusion

Fresh herbs on the grill using a grilling cage

One thing about this smoked herb technique is you can do the smoke infusion by a variety of equipment methods.

For those with a gas grill, add wood chunks either directly to the heat shields on one side of the grill or add wood chunks to a metal smoker box that can be placed on the heat shields or the grill grate. For charcoal grill owners, light your charcoal and allow to reduce to hot coals only. Add a piece or two of hardwood chunks or a handful of hardwood chips to the hot coals. If possible, push the hot coals to one side of the grill. For both grill types, you want to use a two-zone cooking method so the herbs don’t catch fire.

For those that don’t own grilling equipment or who simply don’t want to bother lighting up the grill, you can use a handheld food smoker. Simply place micro wood chips in the bowl of the unit, place the herbs in a storage bag with the tubing of the smoker unit, cinch the end of the bag around the tubing, and light the chips. I like to leave the smoke in the bag for maximum smoke vapor infusion.

I used both my gas grill and charcoal grill for the smoke process by placing my herbs in a vegetable basket and grilling with the herbs on the unlit side of the grill. Within the first 5 minutes, you’ll see how the herbs lose moisture and begin the drying stage.

Tasting Notes: I find the handheld food smoker will produce the boldest smoke flavor to the herbs. The intensity of flavor rated from lightest to boldest based on equipment would be a gas grill, electric smoker, pellet smoker, charcoal grill, handheld food smoker.

Grinding Process

smoked herbs in the food processor for reduction into smoked herbs dust

Once the herbs have charred and dried, it’s time to remove them from the grill and bring them to the food processor. I have a mini processor that only has two settings: chop and grind. I prefer to use this appliance to bring the smoked herbs to dust level but a spice grinder works just as well.

First, remove all the herb leaves from the stems and place a small quantity in the food processor bowl. You can remove the leaves by placing the entire herb sprig in a colander and pressing the leaves through to parchment paper. Secure the lid and grind until you get as fine a dust as the appliance will allow. Both the appliance and the herb will determine how fine the herb dust will get. As you will see, basil dust becomes finer than oregano. This technique will work for just about any herb you can grow or locate at the market. Store the herb dust in glass or metal jars for up to a year.

Tasting Notes: Smoked herbs are much stronger in flavor than the standard dried herb. Adjust the amount used in recipes as needed. It is often best to start with less, taste, and then add more as needed.

So Many Uses

finished herb bottles of smoked Basil and Smoked oregano

Experimentation is key when it comes to #herbdust. Most often, herbs will be applied to meats and poultry, perhaps rice and pasta dishes, but there are so many more foods that are good pairings for herb dust. Let’s take parsley as an example. Commonly used with fish and beef, parsley is a great pairing for sweet items as well. This includes banana and cream. It’s important that you look beyond the traditional side dishes and entrees and explore the sweet side of what herbs can offer. By doing so, you’re sure to find endless combinations that will tickle your palate and give you more pleasing menu experiences.

The Culinary Crew wants you to know …

… that the two-zone method is certainly a practice that you will want to master and prioritize in your wood cooking toolkit, especially when grilling and smoking delicate fresh consumables like herbs. Not only will two-zone cooking avoid those acrid tastes associated with flare ups, it will infuse your food items with a nice balance of wood smoke flavoring.

SmokinLicious® products used in this blog:

Wood Chunks- Double & Single Filet

Wood Chips- Minuto & Piccolo

More Related reading on smoked herbs and other great grillable flavoring ideas

More Related reading on smoked #herbs and other great grillable flavoring idea

Additional reading:

-WHY TWO-ZONE COOKING METHOD LET’S YOU WALK AWAY FROM THE GRILL

-STOVE TOP SMOKED CHIVES

-PAN COOK ZUCCHINI ON THE GRILL WITH WOOD FLAVOR

Dr. Smoke- Our process to prepare the smoked herbs is easily done on our gas grill with our double or single filet wood chunks!

Dr. Smoke- Our process to prepare the smoked herbs is easily done on our gas grill with our double or single filet wood chunks!

<strong>As Fall approaches think about the storage of cooking wood.</strong>

As Fall approaches think about the storage of cooking wood.

Donna from our culinary staff

Posted By Donna G


Listen to the audio of this blog

It seems every year as we approach the Fall, weather predictions are made on how severe the winter will be. This includes predictions on subzero cold in our area of the Northeast USA. In preparation for whatever Mother Nature brings our way, we thought this would be a good time to remind you about the storage and maintenance of your cooking wood products. Storage of wood is necessary to keep the flavor essence at its best which makes your foods taste great!

(more…)

Wines to pair with your smoked Meat is important but not easy!

Wines to pair with your smoked Meat is important but not easy!

Great Sustainable Wines To Pair With Your Smoked Meat Guest blog by — Kylee Harris is an events planner and writer who is a strong advocate of allergy awareness.

listen to our blog

listen to our blog regarding wood chips for smoking

Introduction of our Guest Blogger

She has also expanded her mission to stress the importance of food safety not just in events, but in her community. She also has a great eye for current interests and finds great ways to tie wood fired foods and sustainable food practices together.

Back in 2015, only 6% of consumers said that their first choice of wine would be a bottle that is produced in a sustainable way. This figure has been steadily rising. The 2018 American Wine Consumers Survey even showed that customers are willing to pay $3 more for a sustainable option. They want an environmentally-conscious wine that has been made from ethically grown grape varieties. The farming process is pesticide free and even bottling the wine is done in a way that won’t cause harm to the environment. It has even been suggested (although not proved as yet) that sustainable, organic wine can prevent a hangover. You’re more than welcome to test out this theory – and even better, you can pair the wine with some delicious smoked meat.

Wines to Pair- Maple-Smoked Pork Chops

Pairing your wine with smoked meat, is all about complimenting the delicate smoky flavor of the wood used. Maple-smoked meat will naturally have a slightly sweet and fragrant taste. This can be achieved by using maple woodchips in your barbecue or smoker. In order to contrast the sweet maple taste and the white umami flavor of pork, you should pair your meal with a sharp and zingy white wine. Benziger Family Winery

Benziger Chardonnay-Coelo Chardonnay
Coelo Chardonnay

in Sonoma county have a few delicious and fresh Chardonnay options, including the Coelo Chardonnay and the West Rows Chardonnay. Perfect for a barbecue on a hot summer’s day with friends and family. Don’t forget you can also buy sustainable wines by the can – this makes it so easy to keep cool when you’re having a garden party. Everyone can help themselves.

Wines to Pair- White Oak Smoked Venison

The strong and almost pungent aromas of white oak are best paired with a dark, gamey meat that can hold its own. Duck breast, pigeon and venison are good choices. The white oak adds a complimentary bitterness that balances well with the rich flavors. A hearty sustainable red wine is a good option with smoked white oak. Silver Oak Vineyard in Napa Valley have a fruity and dark Cabernet Sauvignon that pairs beautifully with White Oak smoked dark meat. New York’s sustainable Red Tail Ridge Winery offer a tangy Teroldego,

2012 Teroldego bottle -Red Tail Ridge winery
Teroldego

which is similar to Syrah that is a great partner to White Oak smoked venison.

Wines to Pair- Alder-Smoked Seabass

The mild flavor profile of alder makes it the perfect wood choice to smoke fish with – particularly slightly salty seabass. The taste of the alder itself adds a slightly sweet taste to the fish, even if it is only smoked for a short amount of time. Pairing alder with a sustainable wine is easy. A good Prosecco or sparkling wine will work well – look for something dry and fresh. Left Coast Cellars in Oregon have a lively Blanc de Noir

Left Coast Cellars Blanc de Noir sparkling wine
Left Coast Cellars

that is perfect with alder. It adds citrus notes of lemon and pineapple, which complement the taste of the smoke and the fish well.

There are an increasing number of vineyards and suppliers in America offering truly sustainable wine. Pair something tasty and delicious with your smoked meat and enjoy a great meal.

More related reading on Wines to pair with Smoking & Grilling meat, plus other tips and techniques- see our directory on previous blogs!

More blogs you may enjoy:

Sip ‘Em If You Got ‘Em: Smoked Whiskey Cocktails And Meat

-HOW TO MAKE THE BEST SMOKY COCKTAILS

How To Maintain A Safe Kitchen Environment

Dr. Smoke- Kylee did a great job on the wines to pair with your Smoked meat!

Listen to the audio of this blog

CRUSHED OR DICED WOOD CHIPS? Click To Tweet

You see the options all the time. Crushed or diced tomatoes? Every chef knows when and why you choose one over the other. Did you know the same concept is true for wood chips?

At SmokinLicious®, the only true cooking wood Company, we produce our wood chips in the same manner as tomato processors! We crush the wood for our Grande Sapore® chips – these pieces produce a unique flavor because of their shape just like crushed tomatoes give a deeper flavor to recipes! These chips are meant to last and work with other ingredients for full flavor balance. We also offer our “diced” option of predetermined wood slices to produce our Minuto® and Piccolo® chips for smoldering on heat plates, cast iron, and flavor bars. Just as diced tomatoes give a fresh-from-the-garden taste, diced wood chips likewise produce a different, often more intense fresh wood flavoring.

SmokinLicious® only manufacturers cooking woods. That is our primary and only business. We know hardwoods for cooking, all types of wood-fired methods. And we know wood flavoring – how to get the best clean flavors from the select hardwoods ideal for cooking!

See for yourself why we are a superior product with a superior outcome. Enjoy the benefits of the knowledge of our flavorists and get the options you are looking for. Made the SmokinLicious® way!

Dr. Smoke- there is a smoking difference between crushed or diced wood chips

Dr. Smoke- there is a smoking difference between crushed or diced wood chips

Our Culinary Team wants you know

… that the crushing and dicing method of our making of culinary wood chips is strikingly similar in concept to how grapes are processed in the phases of wine making? For example, the Ripasso method of Italian wine production starts out with crushed, partially dried grapes and proceeds on to fermentation with the leftover skins. Both Ripasso produced wine and our crushed or diced wood chips offer distinctive flavor, body and personality in a class of their own!Our process is very similar to making wine from grapes

Charcoal Grilled Asparagus

Our asparagus after seasoning and ready to become Charcoal grilled Asparagus!

Our asparagus after seasoning and ready to become Charcoal grilled Asparagus!

Guest Blogger

By Chef C. V. Calle Guest Chef in Residence, SmokinLicious Kitchens

By Chef C. V. Calle Guest Chef in Residence, SmokinLicious Kitchens


listen to our blog

Nothing in the vegetable word represents late spring-early summer than fresh local asparagus but the window for fresh local asparagus is a short one. The growing season in our area (Western New York State) typically begins mid to late May and lasts until mid to late June all depending on the weather. Buying your asparagus at a Farmers Market or a Farm Stand provides the highest quality asparagus.

Luckily asparagus season corresponds to the beginning of outdoor grilling season and that is a good thing. If you have never prepared asparagus on the grill read this and you may never want to boil or steam asparagus again.

Fortunately for me, my good friends Terry and Donna Grant, owners of SmokinLicious® in Olean, New York provided me with their locally manufactured charwood product for grilling. Try it and you will never go back to charcoal briquettes again. SmokinLicious® all-natural charwood, adds flavor as well as the high heat needed for proper grilling. Remember, cooking with wood is not just a heat source because when you grill with high-quality wood products like SmokinLicious® you add substantial and delicious flavor to whatever is on the grill.

This is a simple recipe and takes just minutes to prepare.

Charcoal Grilled Asparagus- Ingredients: (serves 2 to 4 persons as a side dish)

1 pound local farmer’s market asparagus

high-quality extra virgin olive oil (EVOO)

salt & pepper

Procedure for Charcoal Grilled Asparagus:

Asparagus on the charcoal grill

  1. Wash and break off the tough bottom two inches of each asparagus spear
  2. Toss with EVOO and lightly sprinkle with salt and pepper to taste
  3. Place asparagus on a hot grill top
  4. Cook 3-10 minutes; depending on the size of the stems and until lightly charred on the outside but the stems remain firm and crisp (al dente). Tasting a spear or two while cooking will let you know when they are ready to eat
  5. Remove from grill, add salt and pepper to taste and you are ready to go
  6. Optional plating technique: top with fresh Parmesan Reggiano cheese and drizzle with a high-quality balsamic glaze

Charcoal grilled Asparagus with Parmesan Reggiano cheese


Charcoal Grilled Asparagus- Chef’s Recommendation:

The above recipe is suitable for anyone including vegans. If you are a meat eater, always grill your asparagus after you finish grilling your meat. While the beef, pork, lamb or chicken rests you can complete this process. Place asparagus spears on the grill where the meat was located, and the small amount of fat left on the grill top adds to the flavor of the natural wood. (This recipe can also be used on a gas grill with wood chunks placed on the heat shields).

Purchase products:

Charwood

Additional reading:

-WHY CHAR-WOOD IS THE BETTER OPTION OVER CHARCOAL

-EMBER FIRED ASPARAGUS ON THE HIBACHI

-Flank Steak Pinwheels with Ember Roasted Asparagus

-Crostini with Smoked Asparagus

Thank you, Chef Calle, for this Charcoal Grilled Asparagus recipe- It was yummy!

Thank you, Chef Calle, for this Charcoal Grilled Asparagus recipe- It was yummy!

JUST BECAUSE YOUR SMOKING FOOD (THAT IS!) DOESN’T MAKE IT ALL BAD!

Tap for audio

listen to JUST BECAUSE YOUR SMOKING FOOD

Recently, I received a very interesting question regarding the safety of ingesting foods and beverages that have been exposed to smoke vapor using hand-held food smokers. Specifically, the question consisted of whether you need to be 18 years of age for items that have been infused with smoke using these gadgets.

The breville handheld smoker

#handheldsmoker

This got me thinking:

  • does the word “smoke” automatically give off the bad vibe response?
  • why do people only inquire about the smoke without needing to know more about the plant source that produces that smoke?

There is a lot of data out there on carcinogenic effect to high heat grilled foods like burgers, chicken, and steaks, even data on hot smoking foods at lower temperatures. Really, what it all boils down to is, if you grill meats to the point where you blacken them, that increases the risk for the carcinogens. Even if you cook to the blacken state, eating these foods in moderation will halt any real risk over an average person’s lifetime.

So why the question on legality to consume smoked foods and beverages?

If you understand that the tobacco industry had to start putting warning labels on tobacco packaging back in 1966, and smokeless tobacco products in 2010, then you comprehend that smoke vapor does contain toxins. Everything regarding the level of toxicity with cooking is related to the type of food, method of cooking, cooking temperature, and length of cooking time.

Let’s examine those parameters from the handheld food smoking perspective.

You are not cooking the food by this method, merely infusing it with the smoke flavonoids, so there is no temperature (cold smoking technique). You are not exposing the food to smoke vapor for hours – it really comes down to minutes. Most importantly, you are not directly attempting to inhale the smoke vapor into your lungs. Yes, if your standing near the container that is holding the cold smoke when you open it, you will have some exposure but not like the person that takes a drag directly from a tobacco product or is chewing on a tobacco product!

Like anything else in our world, there are risks to everything we do, experience, sense, taste, explore, desire. Hot smoking is another name for roasting just at a lower temperature and usually with cheaper cuts of meat.

SmokinLicious® Double Filet wood chunks are clean and bark free wood pieces that will provide a tasty tinge of smoke to all of your favorite ingredients.

SmokinLicious® Double Filet wood chunks

What should never be compromised is the plant material – the wood – that is used to extract these flavors.

I believe it is time to start asking more questions about the hardwood products being used for the smoking process rather than focusing on the process itself. Click To Tweet Perhaps the risks associated with dirty, moldy, contaminated wood are too high to ignore anymore.

SmokinLicious® products:

Wood Chunks- Double & Single Filet

Dust- Smoking Dust

Wood Chips- Grande Sapore®, Minuto® & Piccolo®


More related reading on the art of smoking food and cooking wood

More related reading on the art of smoking food and cooking wood

More blog topics like this one:

-APPLEWOOD – WHY WE DON’T USE IT! – HERE’S WHY

-SHOULD YOU GRILL WITH MOLDY WOODS?

-BEYOND PRICING: THE TOP THINGS TO CONSIDER WHEN PURCHASING COOKING WOOD

-SMOKING-GRILLING WOOD SELLING TERMS DEMYSTIFIED

Dr. Smoke hopes you enjoyed-JUST BECAUSE YOUR SMOKING FOOD (THAT IS!) DOESN’T MAKE IT ALL BAD!

Dr. Smoke hopes you enjoyed-JUST BECAUSE YOUR SMOKING FOOD (THAT IS!) DOESN’T MAKE IT ALL BAD!

Next Page »