You smell it before you see it! The aroma of foods being cooked outdoors. When those foods involve cooking over wood – hardwood to be specific – well, it’s a flavor experience that is in a league of its own.
Today, instead of concentrating on the cooking technique of wood-fires, let’s examine the smoke vapor.
Does BBQ smoke color mean anything for flavor outcome?
The quick answer: absolutely! Let’s take a closer look at the finer points of smoke vapor colors.
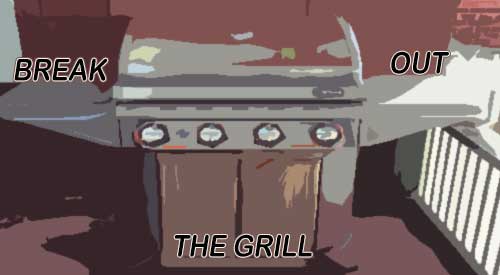
Including the grill in staycation plans is a flavor rich must this year!
Including the Grill in Staycation Plans:
The Grill
The reports are in and all point to one common theory: people are likely to cancel previous plans to vacation away, especially those considering foreign travel, and instead opt for a staycation.
What does this mean for the economy? Of course, there will be negatives with this decision not to travel but one potential positive is the soar in potential grill sales as people begin to ponder ways to keep home cooking interesting.
Options of Including the Grill in Staycation Plans
Likely the first assessment for most considering a staycation is what do we do for food. People often have dining out plans built into their weekly schedule but due to concerns with visiting populated locations like a restaurant, food truck, or even street vendor, these locales will likely be one of the first voluntary bans. That means, cooking at home just moved to the front of the line. Cooking on the stove top or in the oven are certainly options, but given you want to keep your body from getting bored you’ll likely want to branch out to the outdoors and start grilling, especially if the weather makes that enticing.
Here’s where the lesson needs to be learned. Don’t just settle for cooking direct heat method like you do with hamburgers, hot dogs and sausages. Learn how to grill with indirect heat and you’ll be in great position to put a variety of foods including vegetables, animal proteins, and even fruits and nuts on the grill.
The starting point, however, is to assess your current outdoor cooking equipment and decide the following:
► Is the equipment in good working order to be used frequently?
► Are there any components of the grill that need replacing? For example, the grill grates, heat shields, ignitors, wheels on a portable unit, charcoal pan, water pan, etc.
► Is the current equipment of adequate size to feed your family all at once?
► Is the equipment easy to operate meaning it won’t burdened you with constant supervision?
► Does the equipment have an option for a dedicated fuel set up like LP gas conversion to natural gas which will allow you full use without having to worry about filling LP tanks?
► If you want to up the flavor of your grill foods, can you easily add wood to the unit?
If you’re in the market for a new grilling unit, assess the frequency of its use and what you want to be able to cook on it before making the purchase. The more frequent use the higher quality the materials that make up the grill need to be, to keep the grill functional for a very long time.
In the end, you not only will have piece of mind in knowing you can feed your family great tasting foods, but you’ll likely have a great opportunity to bond in a great outdoor environment.
Do you plan to take a staycation? Leave us a comment and subscribe to get our latest tips, techniques, recipes and the science behind the fire and smoke, for all live fire cooking methods. That’s SmokinLicious!
More related reading on including the grill in staycation plans and for more smoking & Grilling tips and technique see our directory on previous blogs!
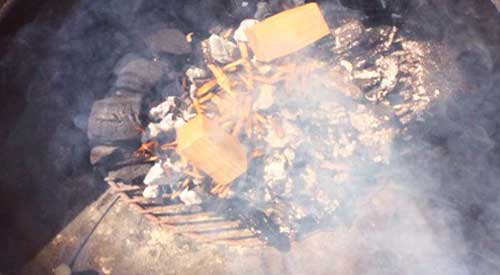
Let’s be honest. When you bought that charcoal grill you were likely thinking that you could both grill and smoke without needing to add anything. Soon, you realized, that just wasn’t the case. Now, you’re contemplating whether you need to purchase a smoker. Well, hold on the shopping trip until you read this. We can help you turn your charcoal grill into a smoker!
You can turn your charcoal grill into a smoker with these simple steps!
The questions are quite frequent: “Since (the equipment) uses lump charcoal, do you need to add wood for smoke flavor?” “Do wood chips or chunks work best if they are needed or desired?” “Generally, how much lump charcoal does equipment use for 10 hours of smoke?”
How do you keep a charcoal grill at 200°F? How do you cool down a charcoal grill? Do you keep the vents open all the time?
When it comes to smoker air flow, here are a few common questions posed for learning all about the importance of air flow in controlling the temperature of a grill or smoker. This can be a challenge specifically for charcoal/wood units as they rely on the human hand to determine when to add fuel as opposed to a gas/LP unit that has continual, regulated flow.
You might assume that the only combustible material used in these units is charcoal or wood but there is another one. Oxygen.
I’m going to provide my top tips on gaining control of temperature by instructing you on smoker air flow or oxygen regulation in specific styles of charcoal/wood burning equipment.
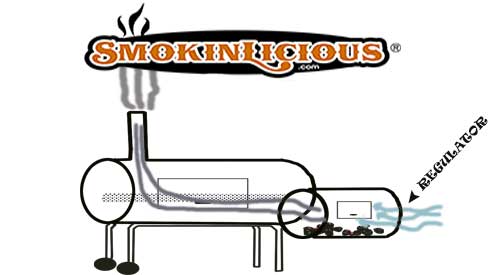
Intake and Outtake of smoker air flow
For many of the charcoal/wood using units, they are built with an intake and an outtake vent. Let’s make sure you understand what these vents are and what the purpose of each is.
Intake Vent: It has one job – bring in oxygen to control the heat of the fire. If you need to raise the temperature of your unit, open the intake vent. Too much heat, close the intake vent which starves the fire for oxygen. Note: if you close the intake vent entirely while keeping the outtake open, you will still starve the fire and put it out.
Here’s the trick – each unit will have a “sweet spot” for the perfect balance of oxygen flow. Find that spot, and you can maintain a temperature easily in your equipment. But, I’m getting a little ahead of myself. Let’s discuss the opposing vent.
Outtake Vent: This goes by different names (chimney, flue, outtake, vent) but has the same purpose regardless of what you call it; vent out the gases from the combustible material and pull in oxygen from the intake vent which is commonly know as draft. Remember a charcoal/wood fire produces gases which need to be vented. If they aren’t properly vented, they will smother the fire.
When learning how to regulate your equipment for the desired temperature setting, always start with the outtake vent fully open. This allows you to manipulate only the intake vent until you reach the desired temperature. That will help you learn where the sweet spot is on your equipment.
There are times when no matter how you play with the intake vent, you never seem to get the temperature to hold. What now?
Time to look for leaks in your equipment. If an access door or lid are bleeding smoke, then you know where the extra oxygen is coming from. That will affect the draft between the intake and outtake vent and result in fluctuating temperature that cannot be controlled. Best course of action is to try to seal the leaks with food grade silicone or other materials suitable for high heat appliances.
The Shape of the Equipment
In my opinion, the vertical-style equipment models tend to be much easier to get airflow/temperature control. Horizontal units also referred to as off-set smokers and grills, specifically the inexpensive models, tend to have poor design in the vent placements as well as poor insulation that results in heavy leakage.
If you insist on purchasing a horizontal unit, read reviews and ask questions about how the unit is insulated. Get specific with the materials used, quality of the metal parts, etc.
Always try to light your initial fuel product, whether briquets, lump hardwood charcoal, or charcoal in a chimney starter so you can control the quantity with every cook. Use the chimney to add hot coals to the unit when you need to increase temperature. Although you can have unlit charcoal in your charcoal area so it will ignite as the lit produce makes contact, this isn’t always a guarantee that you won’t produce some temperature variance. The best chance of getting the temperature regulated is by adding hot coals as needed, even if this may be every hour or so.
To summarize, learn to control temperature by using the same quantity and type of material for the fuel, lit it with a chimney starter, only add hot coals to increase the temperature, and always have the exhaust vent open at least ½ way when cooking. Remember the number one thing is Temperature control is all in the air flow and you will have tasty grilling results!
Our Readers Are Asking..
When should I add more wood to my smoker to prevent a bitter flavor?
There are a few possible causes for bitter smoked food outcome and easy to fix:
#1 Outtake vent is to tight – open it a bit more;
#2 Wood chunks are too wet. Don’t pre-soak the chunks. Put them on the charcoal dry;
#3 Using too much wood at a time. It only takes 3–4 chunks to infuse smoke flavor;
#4 Not using an ideal hardwood. Stick to common hardwoods like cherry, maple, oak hickory, pecan, ash, alder, beech. Never use softwoods like pine, spruce, cedar, etc;
#5 Use a water pan to keep a good balance of heat, vapor, and moisture.
We are approaching that exciting time of the year when just about all of North America can start to enjoy cooking outdoors again! Make it the best outdoor cooking season yet by learning the steps to using wood for cooking and grilling successfully, avoiding the common wood cooking mistakes that can sink those outdoor meals.
Just about everyone I know loves bacon, even if it’s the store-bought type. There are so many foods that have been designed around bacon including a chocolate chip cookie recipe featuring caramelized bacon pieces and a bacon ice cream! (which we’ll offer a recipe for soon).
One thing most bacon lovers don’t know is just how easy it is to make your own bacon at home, even the smoked type. You’ll be amazed at how different the taste and texture are with bacon you make at home. Just know, my technique will require you to cure the pork belly for a minimum of 7 days so be sure you have refrigerator room and time to wait. I know – when it comes to bacon it’s sooooo hard! But it will be worth the wait!
Quality Meat a Must for Homemade Smoked Bacon
#porkbelly
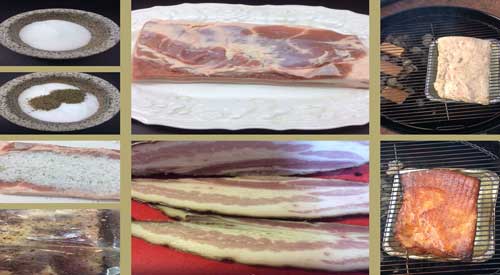
When making homemade bacon, you’ll need a slab of pork belly, which is a relatively inexpensive cut of pork. Since this process is a time investment, consider purchasing a quality cut of belly which would be labeled “organic”. This cut normally comes from heritage breeds like Kurobuta and Berkshire. This investment will result in richer, meatier, and cleaner flavors to the finished product.
Although a full pork belly will weigh around 12 lbs., you only need about 3 lbs. to give you a sizeable quantity of bacon. Also, some belly will come with the skin still intact while others will already have the skin removed. Note, you will need to remove the skin before curing so you likely will want to ask the butcher to do this for you. If you’re doing skin removal yourself, simply separate the skin from the fat layer at one corner by inserting a knife point. Grab hold of the skin and begin making horizontal cuts with the knife in short sections, pulling the skin back as you go. Leave as much fat layer as you can. Once removed, it’s time to rub and cure.
Homemade Smoked Bacon- Rub and Cure to Flavor
Curing is preserving the meat. This is done not only by the ingredients in our rub but also by the process of hot smoking which contains antimicrobial benefits. Remember, when we are done with the smoking process, your bacon will be ready to eat as is, though you will be able to crisp it up if you want in a pan.
For my rub, I’ll be combining the following:
1 cup of maple sugar, coconut sugar or regular sugar
½ cup kosher salt
1 tablespoon cracked black peppercorn
2 teaspoons minced fresh thyme
¾ teaspoon pink salt also known as Prague Powder #1
1 crumbled bay leaf
1 teaspoon ground coriander
#briningporkbelly
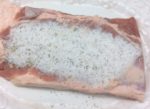
Now cover every area of the pork belly with your rub. Place the rubbed pork belly in either a 13×9 baking dish covered with plastic wrap or in a storage bag. I prefer the jumbo size bags. Just be sure to remove all the air from the bag before sealing.
Place the belly in the refrigerator. Now starts the curing process. As it cures, the meat releases liquid. You’ll need to flip the meat every other day to ensure the cure is evenly distributed. Begin checking after 7 days if the belly is fully cured. You’ll know the pork belly is ready to be smoked when the meat feels firm to the touch but is still pliable. Rinse the pork belly under cold water to remove any excess cure or the outcome will be too salty. We are ready to smoke!
For Your Homemade Smoked Bacon- Make the Pork Belly Smoke!
Even if you don’t own a traditional smoker, you can still smoke the pork belly. Here’s the technique:
Charcoal Grill:
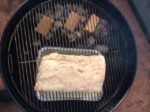
You will set up the charcoal grill using a two-zone cooking method. Start by loading about 3 lbs. of briquets or hardwood charcoal on one side of the charcoal fuel area. Place a water pan filled with water about 2-inches deep on the non-charcoal side. Then fill a chimney starter ½ full of briquets or hardwood charcoal. Lite and allow to burn to hot coals, then pour the hot coals over the top of the unlit charcoal in your charcoal grill. Add a couple of hardwood chunk pieces to the hot coals and allow to start smoking before you add the pork belly. Once the chunks are smoking, place the cured pork belly on the unlit side of the grate fat side up. Put the lid on and allow to smoke for about an hour without disturbing. Keep in mind, your intake vent should be open ½ way as well as the outtake vent at ½. A 3lb. pork belly will take about 1-1/2 to 2 hours to reach 150°F internal temperature. By using both hot and cold charcoal, you should not need to replenish the coal bed, just may need to add another chunk or two of hardwood.
#charcoalgrilling
Gas Grill:
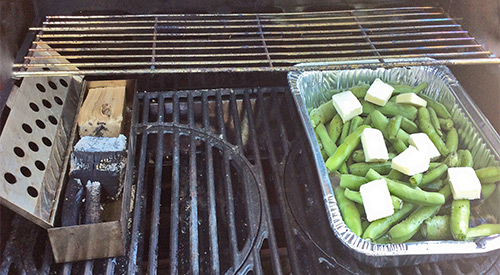
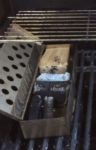
Place a smoker box of small wood chunks directly on your heat shield or on the grill grate. Turn on only ½ the burners on your gas/LP grill and set to medium temperature setting. Place a small pan of water on the warming grate to keep a moisture rich environment during the cooking process. Allow the grill to reach 225°F and to have the wood chunks begin smoking. Place the cured pork belly fat side up on the unlit side of the grill. Allow the pork belly to cook until it reaches an internal temperature of 150°F. Replenish the wood chunks in the smoker box as needed.
Traditional Smoker:
Set up your smoker as normal targeting a 225°F cooking temperature. Be sure to include a water pan if your smoker doesn’t include one (a disposable foil pan works great). Again, use 2-3 hardwood wood chunks for the flavor. Place the pork belly fat side up and cook until the internal temperature reaches 150°F.
Homemade Smoked Bacon- Ready to Eat!
Once the pork belly has reached 150°F internal temperature, it is ready to eat as it is fully cooked! Remember, smoke has an antimicrobial quality which helps to make this consumable at this temperature level. I recommend you allow the bacon to cool to room temperature on a wire rack set over a sheet pan. Then wrap in plastic wrap and refrigerate for at least 4 hours. This will set all those great flavors.
By slicing it paper thin, you can consume this cold and enjoy a more prominent smoke flavor. However, you may pan fry this like traditional store-bought bacon or oven cook this on a rack over a foiled lined sheet pan for those who prefer a healthier, more rendered fat version. This method also allows you to do a lot more bacon at one time then pan frying allows.
Refrigerated homemade bacon will last 5-7 days while frozen will keep for several months. Once you sample your own homemade smoked bacon, you’ll never purchase prepackaged again!
A ‘MUST HAVE’ RESOURCE FOR CERAMIC SMOKER Posted By: Dr. Smoke
We know you are all likely aware of the excessive number of cookbooks and resource books available in the area of grilling and smoking, and I’m sure you’ve purchased your share. I’m also sure you’ve experienced periods of disappointment when you finally get the opportunity to delve into the pages of that book only to find that the recipes don’t all relate to cooking on the grill or ceramic smoker, and the tips are in short supply.
With that being said, I want to give my stamp of approval on a great resource for all you advocates of ceramic cookers out there!
Smoke It Like A Pro on the Big Green Egg & Other Ceramic Cookers by Eric Mitchell is the ultimate resource for all things done on ceramic cookers! Over the years, I’ve lamented about the need for a cookbook that includes all the detail to actual cook the recipes on the smoker and/or grill! Finally, Mr. Mitchell does just that!
His personal commitment to ceramic smokers truly shows not only in the beautiful photographs of the foods and cooker techniques, but in his simplistic terminology and focus on the small details that will make this resource a favorite. Even if you don’t own a ceramic cooker, you will gain great tips on fire starting and manipulation of the fire for fuel and flavor, as well as exceptional recipes – my personal favorite is that extensive dessert listing that is all done on the cooker.
Now available online and at select bookstores, Smoke It Like A Pro on the Big Green Egg & Other Ceramic Cookers by Eric Mitchell will get you firing up that cooker despite the weather! “Bon-Bar-B-Q!”
Dr. Smoke- For our friends that own a ceramic smoker, here’s a helpful resource you shouldn’t pass up- “Smoke It Like a Pro” by Eric Mitchell!
For additional reading and insight on ceramic smoker, here’s a list that will interest you:
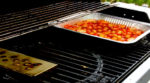
The SmokinLicious® culinary crew’s two-zone cooking method set up to smoke Fava Beans on the Gas grill with Wood chunks!
WHY TWO-ZONE COOKING METHOD LET’S YOU WALK AWAY FROM THE GRILL
listen to our blog
We all know that the key to easy and successful outdoor cooking is to control the temperature. I also believe that outdoor cooking should not hold you hostage at the grill. That’s why everyone should learn the two-zone cooking method for grilling.
Let’s cover what type of cooking you can do by this method, why it’s so successful, and how to set up the zones.
Two Zone Cooking Method- Why it is Best
Two-zone cooking can be done on any type of grill no matter the fuel source. What is two-zone cooking? Using the fuel source on only half the grill while the other half holds the food. Although you may use the unlit side of the grill for most of the cooking, you have the benefit of finishing crispy skins of items or quick cooking thinner cuts of meats on the direct heat side.
Two-zone cooking is also called direct and indirect cooking. The indirect side uses indirect convection heat to cook the food which means the heat generated by the lit side radiates into the material of the equipment and produces heat (convection heat) on the unlit side. The direct side produces the heat within the unit and can be used when quick cooking is needed or when a food that has been cooked on the indirect side needs crisping, additional coloring, or some char.
Two Zone Cooking Method- The Set Up
The primary reason you want to set up two-zone cooking is most of the grill cooking does not require direct heat. When you consistently cook foods, especially meats, over direct heat, you easily can have dried, stiff, flavorless results. This is due to the components of meat reacting at different temperatures that with direct cooking occur too fast to react.
I will tell you that you need a grilling area that is large enough to establish two zones. I judge the space needed with a rectangular, disposable foil pan. If the pan can fit on half the grill area without issue, then you have plenty of room for a two-zone setup. When using a gas grill, this means lighting the burners on one half of the grill. If you don’t have an even number of burners, then decide how many are to be turned on and how many left off. With a charcoal grill, placing the hot coals on only half the charcoal area. On an electric unit, if you can manipulate the heating element, isolate the element to one side of the unit. The temperature that works ideally for two-zone cooking is 225°F. Of course, I always add wood chunks to give a smoky flavor to the foods. Remember, the hardwood goes on the direct side of the grill or lit burner or hot coals.
#chefbertandtom
Note that you can also use a water pan using two zones. This can be placed on either side of the grill depending on when you need the direct heat side. Keep in mind, when doing meats, it’s great to place a pan under the meat with vegetables (onions, potatoes, celery, peppers, etc.) and a small amount of liquid that can collect the meat renderings. You can also place pans of beans to catch those drippings. Anything is fair game.
For those times when you don’t want to add any additional foods, you can simply lay a thin foil pan under the grill grate of the indirect side or a sheet of foil. That will collect any fat drippings.
Cook Anything!
Since radiant heat is what you are cooking with when foods are placed on the indirect side, you can cook anything. I love doing tarts and cakes via this method, especially during the hot months when you don’t want to lite your indoor oven. In fact, those are the times that I cook an entire meal using a two-zone setup.
You can also cook multiple items using both direct and indirect heat. A long cooking meat goes on the indirect side, is cooked to temperature and held there, while a side dish is cooked on direct heat. Don’t forget, if the cookware you use is high heat tolerant, you can use cookware as well. This is how I can make cakes, tarts, and bread on the grill. You need to view this equipment like an oven as that is essentially what it is!
Two Zone Cooking Method- Use Like an Oven & Walk Away
I’m going, to be honest. Although it’s true that you can produce more moist foods using a two-zone method the real reason I love this method of cooking is I can walk away from the grill. This is particularly true when using a gas grill which holds the temperature steady, which for me, is 250°F for long cook meats and regular baking temperatures for all my cookies, cakes, tarts, bread. Remember, charcoal grills will still require you to refuel so the temperature can fluctuate more if you’re not careful. Keeping an extra chimney starter of charcoal going will solve that issue.
What is a two zone fire? You may ask…
A two zone fire is also called two-zone cooking method can be used to grill or smoke any type of food on any grill (smoker, gas, charcoal, wood-fired or electric)! Setting up a two-zone cooking method is very easy- have a hotter side on one half of the grill and a lower or no setting on the other half. A two zone fire gives the cook or chef “a stylized or finessed” way to grill without ruining great food flavors by over cooking. It is especially the best way to cook meats and vegetables. Keep in mind that grills radiate and transfer heat, so it’s really not necessary to crank up every burner or heat source to a temp equivalent to the Sun! It’s as simple as that!
As a final note, even though two-zone cooking allows you more time away from the grill, you still need a good digital thermometer to monitor the temperature of the food. Invest in an easy read one and you’ll really enjoy this new way of grilling and smoking.
BOOST UP THE FLAVOR OF YOUR SMOKER BOX!- People are always in search of that great flavor to food that only comes from hardwood. In fact, it is common for discussions around outdoor cooking to use the terms grilling and barbecuing interchangeably as if they mean exactly the same thing. Let’s be clear – cooking with just LP/Gas is grilling. Barbecue is outdoor cooking over hot coals or wood, whether in lump charcoal form or straight hardwood pieces.
Barbecue vs. Grilling
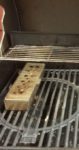
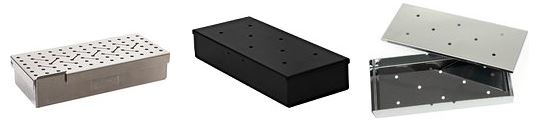
In an effort for grilling equipment manufacturers to compete with charcoal grills and smokers, many began integrating a wood chip drawer in their units to imply that “barbecue” was possible on a gas grill. If you ever tried these, you likely were disappointed in finding that the intensity of flavor just didn’t compare to charcoal equipment. Then the smoker box was developed with a wide variety of design options from rectangular in shape, V-shaped at the base to fit between grill grates, and venting hole configurations that made claim to more intense smoke penetration. Here’s the thing – no one ever discussed what should go in the smoker box. The assumption was to always use wood chips but I am going to take you on a flavor journey using that box that will open your eyes to understanding cooking with hardwood.
One of the key complaints I hear is that when using wood chips in a smoking box or drawer, the chips don’t seem to give off enough smoke and have a very short burn life. In fact, refilling the box or drawer is often needed to finish a simple food item like chicken pieces or ½ slabs of pork ribs. Wood chunks or uniformed sized pieces of hardwood lend to a much longer burn/smolder rate and give off great flavor infusion.
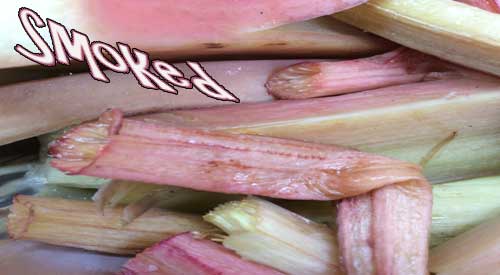
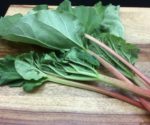
Rhubarb Smoked – I will make a confession: I don’t like rhubarb, a spring to early summer perennial vegetable, on its own, likely due to the very tart flavor. I do, however, enjoy this vegetable smoked and then blended with a sweet fruit.
This is likely why you may not have realized that rhubarb is a perennial vegetable since this is so widely used for dessert items. The rhubarb stalks are suitable to eat but the leaves are poisonous meaning they should never be eaten or added to a smoothie. Since this is a tart vegetable, I am going to first smoke it to change the balance of that tartness. Later, I plan to use these smoked stalks in combination with some smoked strawberry to make a strawberry-rhubarb fool, a delicious treat or dessert.
For now, let’s get about a pound of fresh rhubarb, hopefully from a garden or a fresh market, and meet at the smoker for an easy method of infusing wood flavoring to this tart stalk vegetable.
Smoked Rhubarb- Selecting and Preparing
#rhubarb
Rhubarb is a perennial vegetable that prefers cold conditions to thrive. When first planted, you won’t be able to harvest any of the stalks until the second year, similar to growing asparagus. When ready to harvest, you’re looking for stalks 12 to 18-inches in length with good girth to them. If the stalks are too thin, that means the plant does not have enough nutrients.
Here is a great guide on growing your own rhubarb for those that want to add to your garden production or simply like this vegetable: https://happydiyhome.com/growing-rhubarb/
Once harvested, clean well under water and pat dry. Trim all the leave ends from the stalks as these are poisonous, and discard. Note you can compost the leaves as the poisonous oxalic acid breaks down quickly when decomposition begins.
I prefer to cut my stalks into 3-4-inch lengths. That’s it! Likely one of the easiest vegetables to prepare for the smoker. Speaking of the smoker, time to prepare ours. I’ll be using an electric smoker today since smoking rhubarb takes very little time.
Tasting Notes: Whether to cut the stalks is dependent on what you plan to do with the rhubarb so adjust this step according to your planned recipe.
Smoked Rhubarb- Fire Up the Smoker!
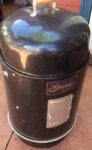
The Electric Smoker for our Rhubarb (smoked) technique
I’ll be using a standard vertical electric smoker that uses lava rocks as the radiator of the heat as well as an electric element as the fuel/heat source. My electric smoker allows me to use wood chunks so I have an assortment of small sizes that total about 6 ounces of hardwood. The double filet wood chunk size is ideal and as a tip, if you note to SmokinLicious® the need for thin chunks, these can be provided.
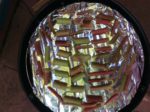
My set up is simple: I wrap one of my grill grates in aluminum foil, place my element on the lava rocks and insert wood chunks between the element’s spaces. I’m using a combination of maple and cherry hardwood. I add my water pan with about 2-inches of hot water so energy from the unit isn’t wasted heating up the water. On goes my tray of pre-cut rhubarb that are spaced to allow the smoke to penetrate all around. Leave these untouched on the smoker for about 20-25 minutes or until the thickest stalks are fork tender.
The best part about rhubarb on the smoker is it takes very little effort. Trim, clean, and cut to size then place on the grate and smoke. In about 15 minutes time, you’ll see a golden hue come out of the rhubarb pieces. That means the smoke has penetrated its great flavor. Using a fork or the tip of a paring knife, I check the thickest stalk to be sure I can easily pass the metal tip thru. If so, then the rhubarb is tender and ready to come off the smoker.
Cut up Rhubarb pieces in the smoker
If your plans are to prepare this for rhubarb pie, then just continue with your favorite recipe. This step is simply to provide another flavor level and begin the cooking process. Check in with us soon as we release our version of the strawberry-rhubarb fool featuring this smoked rhubarb and smoked strawberry.
What’s your favorite method of cooking rhubarb? Leave us a comment to opine and subscribe to get all our postings on tips, techniques and recipes. Bringing innovation to wood fired cooking with recipes, techniques and the science behind the fire, smoke, and flavor. That’s SmokinLicious®.
It’s time I go there. I’ve fielded way too many questions to ignore it. Now is the perfect time for me to opine on this highly controversial topic: when it’s called barbecue.
Your BBQ shoes for safety is as important as comfort!
“Wear heat resistant footwear!” how to protect your feet around hot embers!
I remember a particular year, I believe it was 2007, when my Culinary Events Crew traveled to 29 of the 50 states in the US and 4 provinces of Canada. I felt like I never slept in my own bed and constantly was repacking the suitcase with clothing suitable for the area we would be traveling to.
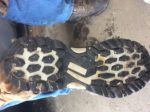
That was the year I lost my favorite lace up/zipper ankle boots to the fire.
Not literally burning in a fire but from repeated exposure to hot, stray coals that are common when you engage in wood fired cooking. I was constantly stepping on these stray embers and this consistency lead to me putting more than one hole in my favorite boots.
It was a lesson well learned and one I want to pass on to you to bring home the point for heat resistant footwear!
Don’t Be Surprised
Just as your educated that the standard oven mitt won’t cut it when your dealing with excessive heat levels in metal equipment commonly used for wood fired cooking, the same holds true for your footwear. When working around chimney starters that spit and shoot hot sparks of scalding coals and water pans that hold 212°F water, flip flops are not the ideal choice in footwear. Unlike the professional kitchen where Chef’s clogs are the ideal to prevent slips and falls on the constantly wet floors as well as to keep your tootsies comfortable when on your feet 15 hours a day, cooking with fire takes some thought for heat resistant footwear practicality.
That led me to look at options in footwear designed for safety, specifically fire safety.
indestructible shoes
Indestructible® Shoes- Heat Resistant Footwear
We run a factory operation at SmokinLicious®, which means we have strict policy when it comes to personal protective equipment or PPE. That includes policy on heat resistant footwear that also specifies the need for steel toed footwear.
Over the course of a decade, safety footwear has seen a metamorphosis in style, comfort level, and level of protection. Gone are the days of limited color options and welcome the new days of vibrant patterns and even height options on the boot cuff. I was particularly intrigued with a relatively new shoe on the market called the Indestructible® Shoes.
Not only are the shoes stylish, but they offer features many other work shoes can’t match. Like the steel toed cap that cannot be penetrated by nails, saw blades, and weight (see the very impressive videos on these tests). With a shockproof midsole, these are also a work shoe that can be worn for hours.
But given that we work around a lot of extremely hot fires that emit stray coals, we wanted to ensure that the anti-slip rubber soles would not only protect you from slips but also from the penetrating heat of hot coals and embers. That led us to conduct our own tolerance testing for the right heat resistant footwear.
The Test for Heat Resistant Footwear
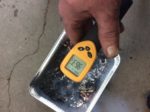
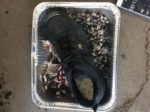
After firing up the charwood production oven and running a full day of production, we removed hot embers from the oven that had a heat temperature of nearly 1000°F. Our controlled testing included establishing a coal bed within an aluminum foil pan since aluminum is a great medium for radiating heat. We also elected to test the shoe without weight bearing so note that we cannot speak on this parameter, merely the shoes’ outer sole tested on high heat without weighted pressure from a wearer.
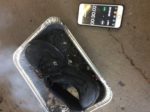
There were three levels of testing: 30 seconds, 60 seconds, and 90 seconds which in our opinion, simulated the length of time a person would stand stationary at a high fire or cooker. Following each test, the shoe was placed in snow with an ambient temperature of 30°F. We also alternated shoes between tests to ensure no carryover temperature of significance factored in to the stability of each test level.
963 degrees F of heatShoe on the hot embersTime for resting on the hot embers- 30, 60, 90 secondsSole inspection post resting on hot embersShoe sole resting in the snow to provide the cool down for our experimentTemperature of sole post cool down
Results- Heat Resistant Footwear
At all three test levels, the Indestructible® Shoes performed brilliantly. Although there is an obvious odor of the heated rubber, it is not considered excessively dangerous. Keep in mind, the thermodynamics of heating rubber results in the rubber shrinking not expanding with heat like other materials. This is due to the molecules of the rubber becoming disordered unlike when they are at a normal temperature which results in the molecules becoming less disordered (i.e. entropy/isothermal).
There was minimal discoloration to the lightest coloring of the rubber sole which is a reaction of the rubber’s cells and the carbon in the combusted material.
Overall the Indestructible® Shoes proved to be a great option for those who work with live fire and hot coals for cooking. Between the steel-toe and the thick rubber outer sole, as well the shock-proof inner sole, these are an option in footwear for the barbecue and live-fire cooking enthusiast, whether amateur or professional, in protective heat resistant footwear that is comfortable, long-wearing and fashionable.
You can find the Indestructible® Shoes at: https://indestructibleshoes.com/
What is your favorite footwear when you barbecue? Leave us a comment to share your views. Bringing you informative recipes, techniques, and the science beyond the fire, smoke, and flavor. That’s SmokinLicious®!
More related reading on how Smokinlicious® is committed to reducing risks in all aspects of wood cooking including and beyond pitching for heat resistant footwear.
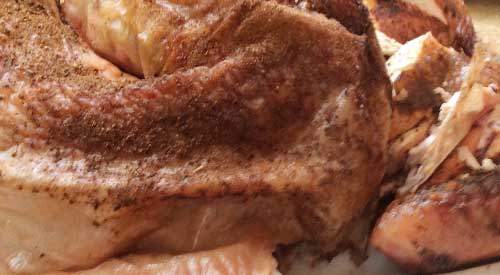
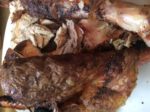
Our not so smokey Smoked Turkey is from cooking this on the gas grill, not on a smoker. We selected this photo because of the great color- not dark like a traditional smoker can impart!
Turkey is one of those items that is generally made for a special event – Thanksgiving, Christmas, New Year – and not associated with everyday cooking. I’m here to tell you that it’s easy to enjoy turkey any time of year when you use a gas grill for the cooking and smoke infusion. All you need is a turkey (preferably one under 15 lbs.), 6 wood chunks, a water pan with hot water, and your favorite gas grill.
Smoked Turkey- Turkey 101 Prep
#freshturkey
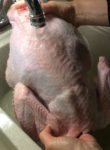
I’m fortunate to have a local fresh turkey farm, Sprague’s Turkey Farm in Portville, NY, close by so I’ve ordered one that is under 14 lbs. Before preparing the turkey for marinating overnight, I first need to remove the parts that are commonly found inside the turkey. This includes the neck, heart, liver, and gizzard which is part of the turkey’s digestive tract. These parts do make for great stock so if you can, save them to add to a stockpot down the road.
Once the organs and neck are removed, it’s important to wash the entire turkey under running water. After a thorough wash, pat dry with some paper towels and place in a shallow pan for the rub application.
Herb and Spice Rub
#turkeyrub
After washing and patting dry the turkey, I trim the excess skin from the neck area and then begin applying the rub. I’ve combined an assortment of herbs and spices for my rub as I tend to like a potent mix of ingredients to balance the fresh meat and smoke. My rub includes: allspice, clove, basil, cumin, cardamom, coriander, cinnamon, celery salt, garlic and onion powder, oregano, orange and lemon peel, paprika, and ancho chili powder. I make sure to cover the entire surface of the bird. I add a few drops of avocado oil and then apply additional rub. This will be refrigerated overnight to allow the flavors to marry and penetrate to the meat.
Tasting Notes: Feel free to incorporate different herbs and spices in your rub as there are no rules when it comes to combinations.
Smoked Turkey- Smoking on the Gas Grill
#twozonecooking
As you can see in some of the photos, this was a cold day at the grill, with a temperature below 25°F. I prepare my LP/Gas grill by first removing one of the grill grates, exposing two of my burner shields. To one of the shields I place 3 double filet wood chunks from SmokinLicious®. Now I lite only two burners; the one with the wood chunks and the one directly next to that. I set these burners to medium heat to start. Just before I’m ready to grill, I check the temperature readout and adjust my heat setting until I hit my target temperature of 325°F.
Time to add the rubbed turkey to the unlit side of the grill and my water pan right next to the bird. I insert a thermometer and close the lid. Basically, for the next couple of hours, I just need to monitor that the water pan has enough hot water in it and the bird gets spritz with water to keep the skin moist.
Tasting Notes: Although I’ve placed my water pan to the side of my turkey, between the lit and unlit sides of the grill, you can use this as a drip pan and place this directly under the turkey. I elected not to do this today due to my low outdoor temperature.
Time to Serve Your Smoked Turkey!
#turkey
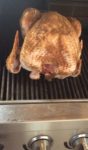
If you’ve maintained the steady temperature of 325°F and hot water in the drip pan, you won’t need to stay with the grill during most of the turkey’s cooking time. My skin has crisped up thanks to maintaining moisture both on the bird’s skin and in the cooker with my water pan. I remove the turkey and take it to the kitchen where I cover it for about 30 minutes prior to carving. It’s super tender, moist, with a crunch to the skin. The best part is that the smoke is subtle and does not over power the fresh meat.
That’s why the two-zone method of smoking is perfect when your feeding a variety of tastes. Those that tend to avoid smoked foods will find this full of flavor that is well balanced due to our rub and consistent cooking temperature. My turkey of 13-1/2 pounds took just about 4 hours to finish with very little effort on my part, even with a 22°F outdoor temperature and wind chill. The best part is my oven was free to cook a bunch of side dishes so everything was timed perfectly for the table.
What’s your favorite preparation for turkey? Bringing innovation to wood fired cooking with recipes, techniques and the science behind the fire, smoke, and flavor. That’s SmokinLicious®.
Dr. Smoke- Everyone forgets about the extra oven almost everyone has- the lp/gas grill! So this year we prepared smoked turkey using the gas grill with wood chunks providing the smoke!