Sat 31 Jul 2021
GRILLED HOT DOGS- TIPS TO PREVENT SHRINKAGE!
Posted by DrSmokeRead other related stories: General Smoking Information , Recipes , Smoking Tips
No Comments

Our top tips to prevent shrinkage to your grilled hot dogs!
top tips to prevent hot dog shrinkage Share on X

Prevent Shrinkage to Grilled Hot Dogs–There is nothing more frustrating than getting your family and friends all excited for a good hot dog barbecue only to have great disappointment when the dogs come off the grill. There they are. All shrunk and shriveled that it would take a least two hot dogs to fill a standard hot dog bun.
That’s why I’m going to share with you my top tips to prevent shrinkage and shriveling of your grilled hot dogs. All these tips are done before adding the hot dogs to the grill of your choice, making them very simple.
Let’s get started!
Three Techniques to Keep Size of Grilled Hot Dogs
Before I start with the first preparation tip, let me just clarify some information about the standard hot dog or frankfurter or wiener, additional terms you may be familiar with.
Hot dogs now come in a variety of options including all beef, beef and pork, chicken, turkey and even a vegetarian or vegan style. One thing that is common with hot dogs is that they contain a lot of water, fat and generally, sodium. Know that the water can be in the form of ice mixed with the meat trimmings and flavor ingredients. To adjust for all the wetness, dry starches or powdered milk are used to absorb the extra moisture, as starches do not allow moisture to enter the hot dog until heated. Once heated, the starch granules breakdown and allow the moisture to enter which makes the starch swell. This is the plumping commonly seen when grilled hot dogs are cooked on charcoal or gas fired equipment.
Know that all hot dogs are fully cooked before being packaged and some brands may also include smoking the hot dogs which gives them extra flavor and color.
Now, for our first tip on preventing grilled hot dogs from shrinking while being reheated or “cooked” on the grill.
Tip #1: The “X” End Slice to prevent Shrinkage of Grilled Hot Dogs
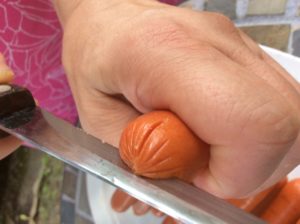
This is the easiest method of preparing the hot dog without an obvious change to its overall shape. Simply take the blade of a knife and cut an “X” shape on each end. This cut should go only about ½-inch deep into the meat. The ends will curl slightly and get additional crispness that make them extra tasty. Essentially, these dogs maintain most of their original shape.
Tip #2: The Length Cut to prevent Shrinkage to Grilled Hot Dogs
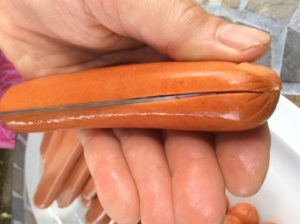
One of the reasons I prefer the length cut preparation to hot dogs is that if you are planning a large variety of toppings, this is an ideal preparation. Additionally, it allows the toppings to nestle comfortably in the middle of the grilled hot dogs and gives every bite full flavor. Simply take the blade of a knife and run it down the center of the hot dog from end to end about halfway down the meat’s thickness. You can know cook these in the flat form.
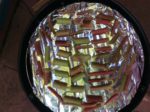
Tip #3: The Spiral Cut to prevent Shrinkage to Grilled Hot Dogs
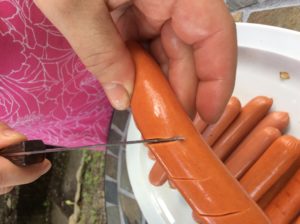
The spiral cut is another easy method of keeping your grilled hot dogs true to size. For this technique, simply pass the blade of a knife thru the skin of the hot dog about 1/2 -inch deep every inch or so down the length of the hot dog. Be sure to do both sides of the hot dog.
Load Up Those Grilled Hot Dogs!
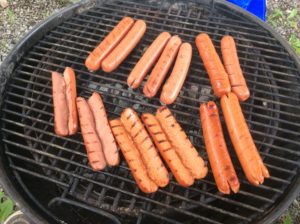
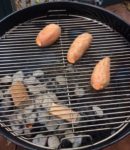
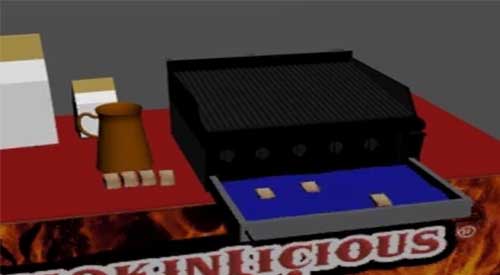
I’ve done all three preparation tips so you can see that the size of the grilled hot dogs remains essentially intact no matter which technique you elect to do. I also used both a charcoal and gas grill equipped with wood chunks for added smoky flavor to the grilled hot dogs.
I did set up an indirect cooking method on the gas grill to allow for a holding spot if I had some hot dogs cook faster than others, which tends to happen more on a gas grill than a charcoal unit.
I’ve got four topping options each that contains three ingredients. Now, let’s look at each option in more detail.
The Italiano Dog
Featuring: fresh mozzarella, fresh basil leaves, and marina sauce
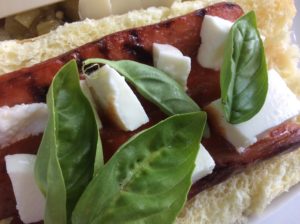
I am a lover of fresh ingredients and summer harvest season makes it easy to get those fresh flavors. I start by spooning on a flavorful marina sauce followed by cubes of fresh mozzarella and finally topped with fresh whole basil leaves.
The Allie Dog
Featuring: Gruyère cheese, caramelized onions, fresh thyme
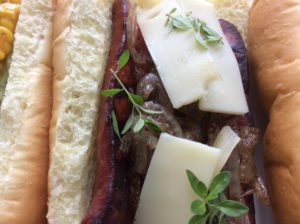
I call this one the Allie Dog in honor of the onions used as a bold flavor, which onion is part of the allium family, thus, the “allie” name. Load on the buttery, caramelized onions, then top with Gruyére cheese and fresh thyme sprigs.
The Jalo-Bean Dog
Featuring re-fried beans, white cheddar, jalapeño

If you have a taste for tacos, then this is the dog for you. Start by loading on a good quality refried beans. Then top with chopped jalapeño and cheddar cheese – I prefer the white version.
The Dog From Mexico
Featuring fresh guacamole, corn, fresh cilantro
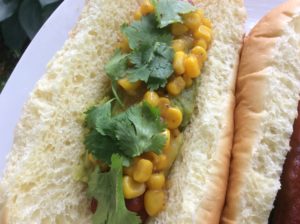
I love this hot dog combination! For me, spice is great so I tend to use a spicy corn but you can use just plain corn or buttered corn kernels if desired. Start with fresh guacamole on the grilled hot dogs. After that add the corn, and top with fresh cilantro.
There are no rules when it comes to toppings for your grilled hot dogs so experiment and find what combinations you enjoy. That includes experimenting with the bread as well so know that though I did not change the rolls on my combinations, that is another flavor level that can vary right along with the toppings.
What is your favorite method for grilled hot dogs and what makes your topping list? Let us know in the comments and don’t forget to follow us on all platforms. Providing tips, techniques, recipes, and the science behind the flame and fire to improve your skills with wood-fired cooking! That’s SmokinLicious®!
SmokinLicious® Products:
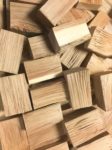
Wood Chunks- Double & Single Filet

More related reading on our smoking & tips to prevent shrinkage of grilled hot dogs and other techniques, see our directory for previous blogs!
More blogs you might enjoy:
–WELCOME TO OUR BRAT PARTY-BRATWURST IN THE ORION SMOKER COOKER
–3 METHODS OF SMOKING BOSTON BUTT FOR AUTHENTIC BARBECUE FLAVOR
-GIVE ME THAT BEEF BRISKET!

Dr. Smoke- follow our top tips to prevent shrinkage of grilled hot dogs and you will enjoy them more and more!


 ¼ Cut Wood Logs
 Unfileted Wood Blocks
 Single Filet Wood Chunks
 Double Filet Wood Chunks
 Grande Sapore® Wood Chips
 Minuto® Wood Chips