Sat 15 Aug 2020
GRILLED FAVA BEANS- ODE TO A SMOKY TREAT!
Posted by DrSmokeRead other related stories: Cooking With Wood , Grilling , Hardwood chunks , Outdoor Cooking , Smoking with chunks
No Comments
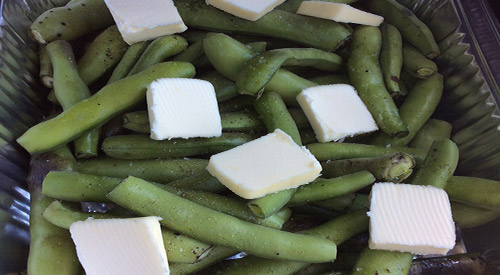
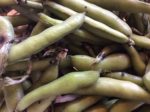
Fresh Fava Beans with Butter ready to become Grilled Fava Bean with a smoky flare!
ODE TO GRILLED FAVA BEANS

I love when the ideal weather comes around when at the same time there are so many options for fresh produce either at the Farmer’s Market or local grocery store. I tend to lean toward my grill and smoker for most of my cooking when the weather turns hot and steamy.
Beans are one of those vegetables that are spectacular on the grill but they get even better when you add a few wood chunks. I’ll show you how to prepare Fava Beans for the grill and give you my easy, fool-proof technique for incorporating wood chunks for flavor.
Grilled Fava Beans- The Grill Set Up
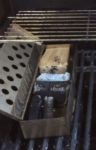
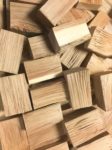
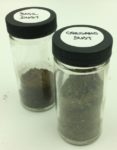
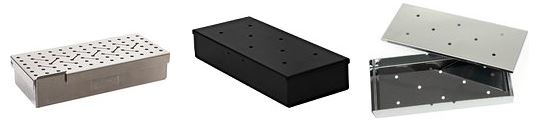
Before preparing the Fava beans, get the gas grill heated by turning on only half the grills’ burners which will be the side that radiates out the heat and holds the smoker box. For the smoker box, I’m using a stainless-steel model that has a hinged lid. I place 3 double filet wood chunks from SmokinLicious® in the box in a combination of woods. I’m using hickory, white oak and sugar maple to give me a great smoke balance to the beans. This will ensure I don’t overpower with the smoke vapor. By placing the smoker box with chunks on the grill grate as it preheats, it will be smoking by the time you have the beans ready.
Simple Bean Prep for Grilled Fava Beans
There is little to do with the Fava beans before they go on the grill. Wash them to start to make sure all the dirt and debris is removed. Pat dry with a paper towel and then move them to the cutting board. Remove any leaves and cut just the stem end to remove the stem. Place in a disposable foil pan, spread out evenly, and add roughly 6 tablespoons of butter to the beans, as well as salt and fresh ground pepper. That’s it. Leave the bean pods intact as they are going to act like a miniature steamer to cook the beans and ensure they don’t become over smoked.
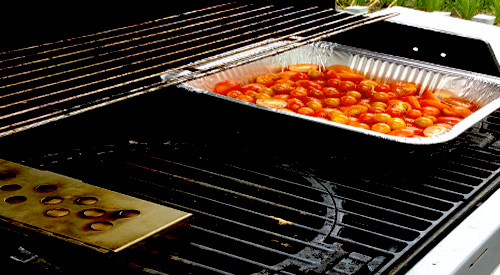
The Grill Act
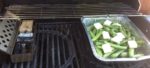
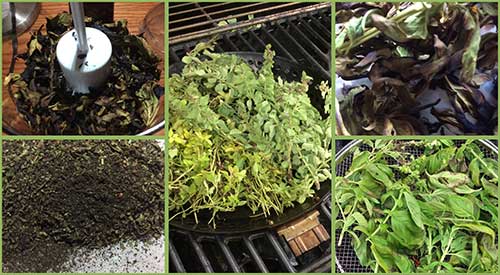
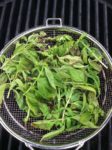
With the grill heated and the wood chunks smoking in the smoker box, place the pan of beans on the unlit side of the grill and close the cover. Check that your grill temperature steadies out at about 375°F. If lower, simply increase the heat setting on the active burners. Too high, decrease the heat setting. Leave the beans untouched for about 30 minutes. Return to the grill, stir the beans and check the wood chunks. If the chunks are still emitting smoke, close the grill lid and leave for an additional 10 minutes or so, or until fork tender. Remove the pan from the grill and allow to cool for about 10 minutes.
Grilled Fava Beans- Buttery, Smoky Finish
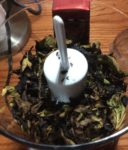
 After the beans have cooled enough to be handled, take each pod and push the beans out one end into a bowl. You may keep the empty pods to use for making broth or for puree in a sauce or smoothie. These Fava beans are now ready for you to enjoy as is or use in your favorite recipe. Now, I’m taking my Fava beans and making a dip with goat cheese, lemon and tarragon.
Purchase products:
Wood Chunks- Double Filet

More Related reading on “What Wood for Smoking” and other great smoking and grilling tips and techniques
Additional reading:
-STEPPING UP RADISH SALAD WITH A WOOD-FIRED FLARE
-WOOD GRILLING AVOCADO
-INFUSING WOOD SMOKE INTO BRUSSELS SPROUTS

You Can take your fresh Fava Beans and put them on the Grill with wood chunks to do a “Grilled Fava Beans” for your favorite dip or condiment!