Smoked Ricotta Cheese- with wood chips on the Stove top

Making Smoked Ricotta Cheese on the stove top


How to Do Smoked Ricotta Cheese on the Stove Top Click To Tweet

Listen to the audio of this blog


Smoked Ricotta Cheese – I know not everyone has a dedicated stove top smoker but I do know that we all have a large stock pot handy. I’m going to show you an easy way to convert that pot to a stove top smoker by using micro wood chips, aluminum foil, and a roasting rack. I’ll explain to you a combination hot/cold smoking method to bring a smoke flavor to whole milk ricotta, that will allow you to use this product in any recipe calling for traditional ricotta. Find your stock pot and roasting rack, and let’s get smoking!

Smoked Ricotta Cheese: 1st Step- Making the Stove Top Smoker

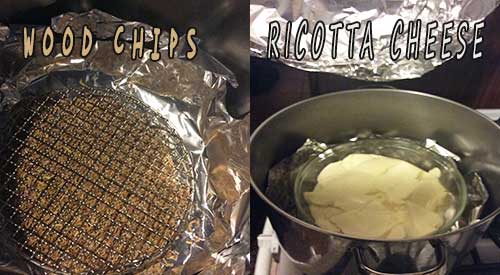
Once you’ve selected a stock pot to use for the smoking, the preparation of the pot is quite simple. Start by placing 2 sheets of heavy-duty aluminum foil in the bottom of the pot, allowing it to go up the sides slightly. Then select the micro wood chips of your choice – I’m using a Sugar Maple Minuto® wood chip in size #6 – and spread into a thin layer on the foiled bottom. Add a roasting rack. Mine is round to fit easily in my pot. I also like to line the lid of the pot in foil as all hardwood contains creosote which can cause some discoloration to the pot. The foil will protect this from happening and makes clean up a breeze.

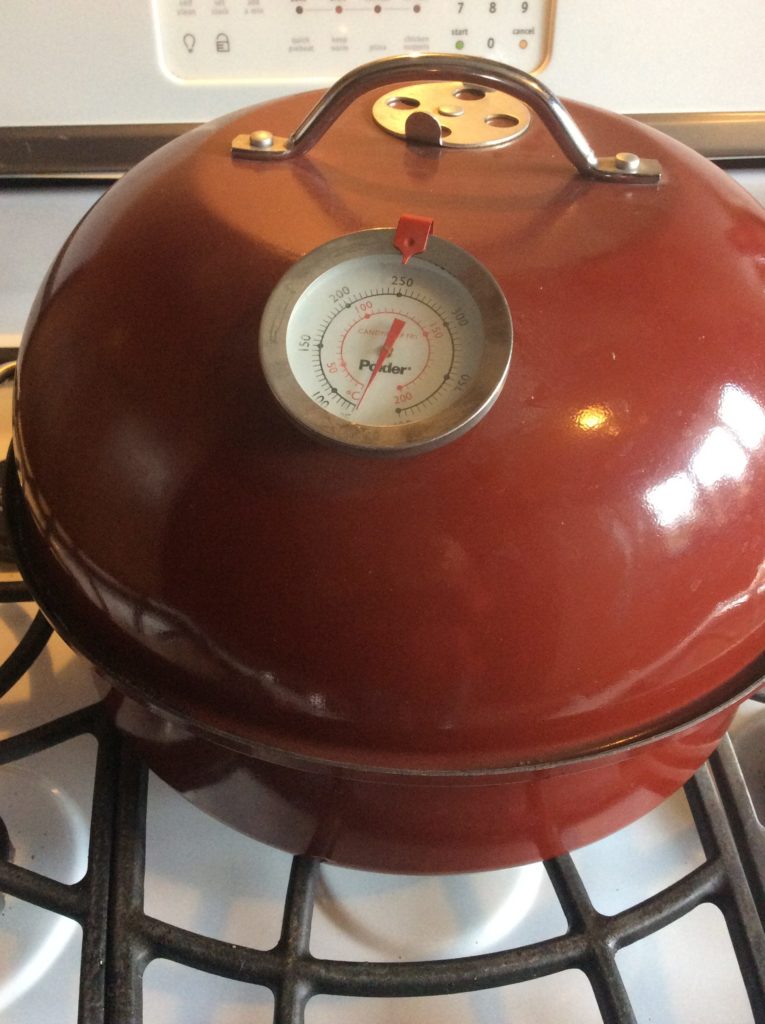
Then place the prepared pot with the lid in place over a medium-high heat and allow the chips to heat until they are consistently producing smoke. This will take less than 15 minutes.

Once the chips have started to combust and produce smoke vapor, it will be time to add the ricotta. I am doing 3 pounds of whole milk ricotta as I plan to make a dessert pastry horn and then keep some spare smoked ricotta cheese for pasta recipes.

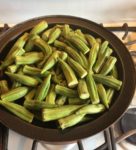
After 12-15 minutes of heating, lift the lid and place a heat safe container of the ricotta on the rack inside your smoking pot. Secure the lid in place and allow this to stay on the heat for about 5 minutes. Then shut the heat off and leave the pot with the ricotta inside untouched for about an hour. Let the smoke infusion occur with this cold smoke technique.

Tasting Notes: Any hardwood can be used for the smoke infusion but note that by retaining the pot lid in place, you are limiting the oxygen that can enter the pot. This produces a much bolder smoke infusion than is common with the same wood used on a traditional smoker or grill.

Smoked Ricotta Cheese- Smoky, Creamy Goodness

Here’s something to keep in mind with this stove top DIY smoking technique. I have a very tight seal on my pot which means it doesn’t take a lot of wood chip product to infuse a smoky flavor in the ricotta. Plus, the fat level of this dairy product attracts smoke vapor well as this is high in water content which smoke vapor is naturally attracted to.

If after about an hour, and after you’ve sampled the smoked ricotta, you still desire more smoke, simply turn the heat back on for about 10 minutes to stimulate the chips for additional combustion. Then repeat turning off the heat and allowing the ricotta to sit absorbing the smoke for the set amount of additional time you want. Once done, refrigerate the smoked ricotta until you are ready to use it, keeping this covered well. If any liquid accumulates while refrigerated, simply pour off before using the smoked ricotta in a recipe.

To get your recipe ideas stimulated, I’ll offer up my Smoked Ricotta Pastry Horn recipe which is super easy, fabulous looking, and can be made with an assortment of filling options. Keep watching our website for the announcement on this recipe release.

What’s your favorite food to stove top smoke? Leave us a comment to opine and subscribe to get all our postings on tips, techniques and recipes. Bringing innovation to wood fired cooking with recipes, techniques and the science behind the fire, smoke, and flavor. That’s SmokinLicious®.

The Culinary Crew wants you to know

… that experimenting with “Do It Yourself” techniques can certainly apply to using your outside charcoal or LP gas grill as a quasi-smoker too! We’ve heard from many of our followers about deep dished aluminum food serving trays and even pie tins being used to offer a quick and easy try to food smoking.

SmokinLicious® products used in this blog:

Wood Chips- Minuto®

More related reading on Smoked Ricotta cheese in a horn, plus other smoking & Grilling tips and technique see our directory on previous blogs!
More related reading on Smoked Ricotta cheese in a horn, plus other smoking & Grilling tips and technique see our directory on previous blogs

Additional reading:

-THE EASY METHOD TO COLD SMOKED CHEESE

-THE KITCHEN FIND!

-TO THE SMOKE THE CHESTNUT GOES!

Dr. Smoke- Try our Stove top approach for Smoked Ricotta Cheese very easy
Wood Smokers need Charcoal for fuel/heat/combustion and smoking wood for flavor!

Wood Smokers need Charcoal for fuel/heat/combustion and smoking wood for flavor!

Listen to the audio of this blog

WOOD SMOKERS & GRILLING- RETURN TO THE BASICS! – I recently received an email from a new customer who was questioning the moisture level of the wood she recently purchased. Her claim was, she thought the moisture wasn’t ideal as she was finding that the wood chunks “weren’t catching fire.” That got me thinking that despite what we publish for information on the various methods of wood-fired cooking, when it comes to smoking, the very basics of this method may not be understood, as well as the basics of grilling with wood.

My goal with this article is to remind you of what is needed to be successful with each type of wood-fired method.

Wood Smokers- Know the Combustion Need

One of the knowledge areas I feel is weak is understanding what is needed from the wood for different styles of wood-fired cooking. Let me get you educated.

Smoking

Hopefully you know that hot smoking means you are cooking with wood material to affect the color, aroma, texture, and flavor of the food. This method requires a lower temperature, a longer cook time, fuel for temperature and wood for flavor. Certainly, you can use wood for both flavor and fuel but a more cost-effective method is to use charcoal or briquets for fuel and wood just for the flavor, aroma, color, and texture to food.

For cold smoking, you still need the same items listed above but the temperature needs to be under 80°F which means the fuel is often wood which will flavor, color, provide texture, as well as the minimal heat level.

What’s the difference for these methods? Moisture of the wood product.

Hot smoking needs hardwood that is at least 20% moisture and preferably under 30%. Cold smoking needs hardwood that is under 15% moisture.

Wood-Fired Grilling

This method of grilling generally requires the use of wood both for higher temperature and for flavor. Here’s a big difference with this method: you can vary the type of food used on the grill but how you position the food to the active fire versus the hot coals is another need. Often operators of a wood-fired grill will have a couple of stations to the fire. One will be direct fire or flame cooking. This is for mostly animal proteins that you want to get a great char on the outside while cooking relatively quickly. Then there is wood grilling with the hot coals from the fire. By raking hot coals to one side, you can direct fire items that need less char to them like fish, vegetables, fruits, etc.

Another option with wood-fired grills is you can do both direct heat cooking and indirect. These two methods can also be done directly on cooking grates or by using grilling accessories like high heat tolerant cookware, grill baskets, and grilling pans.

Animal Protein Preparation

Everyone has their own preference when it comes to preparing meat or poultry for the grill or smoker. But did you know that marinating meat or poultry should be done for shorter periods of time not over night or longer. Why? Marinades contain oil and meat contains water so… just like the old saying “oil and water don’t mix”. Don’t take a risk of breaking the fibers down too far and stick to short marinating times. Don’t forget – any marinade left in the bag or pan after removing the meat or poultry should be discarded as it CANNOT be reused due to bacteria growth potential from exposure to raw product.

Now if you’re thinking about a dry rub, feel free to marinate just as long as you want. In fact, I’ve been known to marinate up to 3 days!

A wet rub, however, goes by the rule of a marinade. If you’ve included oil in that rub, short marinating time is best.

Wood Smokers- Wood Quantity Doesn’t Make It Better

If you’ve made the commitment to introduce wood flavor to the grill or smoker, then know up front, it doesn’t take a lot of wood to add flavor. As mentioned at the start of the article, you need to be sure you select the right wood chips, chunks or charwood with the right moisture level for the right application.

When smoking, about 6 ounces of hardwood is ideal to start. Although you may need to add wood during the cooking process dependent on what your cooking (larger cuts of meat may require you to feed additional wood every hour), always start with a reserved amount.

When grilling, the same quantity of wood applies – about 6 ounces. Wood is the ingredient that works with the other flavors to bring out a balanced wood-fired flavoring of the food. Put too much wood on and you’ll have food that tastes like an ashtray. Put wood on that contains too much moisture and it will produce an acrid smoke that will leave bitter flavors and black coloring to the skin or bark.

Let’s summarize. Decide what method of wood-fire cooking you plan to do, if you plan to set up a direct cooking method or indirect, and the hardwood you plan to use. If smoking, plan on that hardwood to smolder given a moisture level of at least 20%. If wood grilling, plan on that hardwood to be drier, between 15-20% to allow it to release flavonoids quickly. Start with about 6 ounces of wood regardless of the method you select and add only as the previous wood has combusted. That’s the basics to having a fun, positive experience no matter what you elect to put on the grill or smoker.

Making you an informed consumer through valuable articles like this one. Leave us a comment and follow us or subscribe for more great recipes, techniques, tips, and the science behind the flavor and fire. That’s SmokinLicious®.

SmokinLicious® products:

Wood Chunks- Double & Single Filet

Wood Chips- Grande Sapore®, Minuto®, & Piccolo®

Charwood

More related reading on Wood Smokers & Grilling tips and technique see our directory on previous blogs!

More blogs like this one:

GRILLING & SMOKING QUESTIONS/ANSWERS THAT MAY SURPRISE YOU!

-WHAT WOOD TO USE FOR SMOKING: A PRIMER

-HOW MUCH WOOD TO ADD WHEN SMOKING

Dr. Smoke Tip- in Wood Smokers-you need more charcoal then you need smoking wood. You have to remember cooking temperature!

Love this content? Then please Share!

Our Fresh Okra ready and on the stove top smoker pan to become our Smoked Okra

Our Fresh Okra ready and on the stove top smoker pan to become our Smoked Okra

Smoked Okra- Veggies like a Smoky flavor Too! Click To Tweet

Listen to the audio of this blog

It’s time to bring a smoky flavor to one of my favorite though limited in availability, vegetables – smoked okra! Known as a super healthy food but one that sometimes confuses people on how to cook and eat it, I’m going to bring you an easy method of tenderizing and infusing okra with a pleasant smoky flavor that doesn’t stimulate the sticky juice known to lurk inside.

Though I’m going to use a stove top smoker for my infusion, you can easily adapt this method to the gas grill, charcoal grill or electric smoker using a vegetable basket or tray. Seek out some vibrant green, firm okra and let’s get started on a new way to cook and flavor this healthy vegetable.

Smoker Set Up for Smoked Okra

The nordic ware stove top smoker we used
#smokedokra

I’m using my Nordic Ware Stove Top Kettle Smoker for this hot smoking method. To start, I place the smoker base on the unlit burner and add about ¼ cup of Minuto® Wood Chips – I’m using a #6 in Sugar Maple – from SmokinLicious®. I place the drip pan on top of the wood chips and then ensure the food insert pan is clean and dry. For vegetables, I usually use a medium heat setting on my stove – I have a gas stove top. This will register between 200-250°F on the kettle smoker’s temperature gauge. Next, I’ll do a simple preparation to the okra and we’ll be ready to turn on the heat to the stove top unit.

Tasting Notes: For the charcoal grill set up, use a two-zone cooking method – charcoal and wood lit on one half of the grill while the vegetable tray or basket containing the okra will go on the unlit side of the grill. Do the same set up on the gas grill. For the electric smoker, be sure to use a lower heat setting – around 180°F.

Smoked Okra- Trim and Smoke

Nothing could be simpler than the preparation for okra. You’ll want to ensure that the outside is clean and dry so a simple water wash is good with a pat dry. I like to remove the stem top to allow penetration of the smoke vapor into the center of the pod.

our prepared fresh okra on the smoker pan
#okra

Place about one pound of fresh okra with the stem tops trimmed into the smoker’s food tray. Try making an even layer of pods so the smoke vapor can flavor the pods evenly. Cover the kettle smoker with the lid and turn the burner on to a medium setting. I use my stove’s vent on high to keep the aroma down somewhat.

Allow the okra pods to tenderize and smoke for about 20 minutes before checking. You just want them to be tender (not falling apart), to where a knife can still cut them into pieces. Once done, remove the pods to a bowl and use these in recipes calling for okra or you can serve as is with a favorite sauce.

(more…)