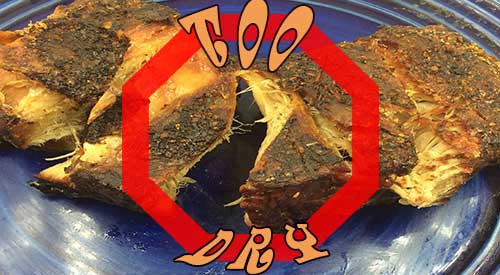
Poor Tom! He, like many other grill and smoker enthusiasts out there, never learned the value of a water pan. By providing moisture to the grilling area, you can avoid drying out your meats and poultry and never have someone mistake your food for a rock!
If you’ve purchased a smoker, you’re likely familiar with the term “water pan”. If, however, you’re more of an LP/Gas Grill person, than this term is likely one that escapes your knowledge.
Water pans are a means of introducing valuable moisture into the cooking environment which has immense value when grilling and smoking. Let me explain each of the pros of learning and using a water pan for your outdoor cooking, no matter the type of equipment you’re cooking on.
Temperature control. This is the ultimate need when you grill or smoker, especially when you smoke. Maintaining a stable temperature that you’ve predetermined. When the day is scorching hot and the equipment is made of metal, you will experience a challenge with temperature control. Introduce a water pan, and your battle can be won.
A water pan goes above the heat source. If using a charcoal grill or charcoal/wood smoker, this pan would be placed above the coal area. Have an electric unit and you’ll find the pan over the electric heating element. If you want to introduce a water pan on an LP/Gas Grill, this would be placed over the lit burners. Many vertical smokers come with a water pan.
Water Pan Pro #2
Water cannot go above the boiling point which is 212°F. Additionally, evaporative cooling also takes place as the water is exposed to heat.
Water Pan Pro #3
A water pan can become the number one tool when doing direct heat cooking over an open flame. Why? It acts as a repellent for the flame giving your foods a chance to survive without becoming a blackened, dried out, former piece of food.
Water Pan Pro #4
Are you having trouble with hot spots in your equipment? Well, a water pan will even them out. Now, the temperature you desire can essentially be locked in just by using a water pan.
Water Pan Pro #5
Humidity that develops from the use of a water pan keeps the surface of the meat moist, which in turn, attracts smoke vapor, which in turn, produces great flavor. The water vapor mixes with the combustible gases which are emitted from the burning material and add to the overall flavor. Yes, water is a passageway to all things flavorful!
What Goes in the Water Pan
It’s called a water pan for a reason. It is designed to hold water, specifically hot water to keep the cooker from wasting energy on heating cold water put in the pan. Here’s a tip when you fill the water pan: use a teapot to fill the pan while it’s in place so you don’t take the chance of spilling hot water on surfaces or you. Remember, water evaporates while other liquids don’t evaporate.
Don’t Make the Water Pan a Drip Pan
Here’s the thing with a drip pan. Due to its location directly over the heat source, when used on vertical units it often serves double duty as a drip pan. Don’t do that! Here’s why. The rendered fat drippings can produce an oil slick on the surface of the water which will prevent water evaporation.
Make Cleaning a Snap
Here’s a couple of tips when using a water pan. If your unit comes with a water pan, line it in aluminum foil which will allow you to simply pull the foil off and preserve the condition of the original pan.
If you’re using a unit that has no water pan but want to introduce one, simply purchase a disposable foil pan. You will want to purchase one that is compatible in size to the unit your using, that will fit comfortably over the heat source, and that can hold enough water to prevent you from having to make refill trips every 15 minutes.
Dr. Smoke- The water pan in smoker explained is essential for moist results in grilling and smoking.
Our Readers Are Asking…
What does water pan do in a smoker?
A water pan induces moisture directly into your smoker as an ally for the indirect dispersion of heat. Never use your water pan as a drip pan. Remember- drip pans = a collection unit for residual or run off grease from the cooking process; a water pan = water for moisturizing foods.
The foil pan for smoking is the handiest and, we believe, the indispensable part in all the stages necessary for cooking, functionality and sanitary purposes.
Many people have their favorite tool when it comes to outdoor cooking. It might be a wireless thermometer, specific grill grate, awesome fire safe gloves, or the go-to chimney starter. For me, it’s likely the least expensive item you can think of – the disposable foil pan. I’m going to list for you my top 6 uses for a simple and inexpensive foil pan.
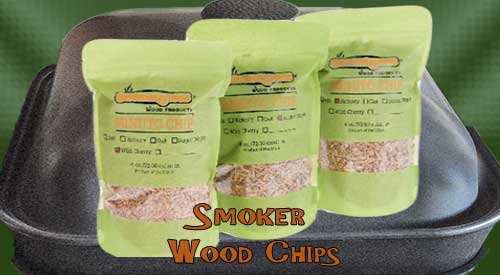
These are the small bags of wood chips for the technique BBQ Grill & Smoker pan, try the 3 pack or a box!
Welcome QVC shoppers who purchased the Technique Pre-seasoned Cast Iron 11″ BBQ Grill Pan & Smoker over the U. S. holiday weekend (July 4th). Dr Smoke did some research and watched the demonstration of this product by the great people of QVC. During the segment that I watched they recommended the use of Smokin’ Dust® with this unit. While this is true, I would also recommend the use of Smokinlicious WoodChips as well! We have tested other stove top smokers and found that with the heavier “cast” iron pans our WoodChips sometimes perform better than our Smokin’ Dust®
When applying our Smokinlicious Smokin’ Dust® with the Technique Pre-seasoned Cast Iron 11” BBQ Grill Pan & Smoker you may have to add water to make a paste and put it on the bottom tray of the unit. This will prolong the burn life of the Smokin’ Dust® and increase the smoke flavor during the cooking process
We have ordered a unit and will be testing our products in the next couple of weeks. Dr Smoke and the culinary crew will be testing this unit and will be adding information to our “Match your Cooker“ section of our web site. Please check back to Smokinlicious®for updates! Please enjoy your unit!
If you need additional assistance, regarding product compatibility, or tips on smoking,please call 1-800-941-5054
Bon Bar B Q!
Dr. Smoke-create smoked foods with our wood chips for the Technique BBQ Grill & Smoker
We do a summer favorite WOOD FIRED GRILLED WATERMELON!
WOOD FIRED GRILLED WATERMELON BECOMES A STAR
You may have seen segments on grilling watermelon before which show slices of watermelon on a standard gas grill. Although I agree that the heat generated from the grill will produce a sweet outcome, there is no comparison to doing a grilling technique that incorporates wood for added flavor.
In this segment, I’ll show you how to grill watermelon on a grill of your choice with wood chunks for the unique combination of sweet and char flavors that only comes from grilling with wood.
Grilled Watermelon- Easy Prep
I think this is by far, the easiest preparation for the grill. All you need is a watermelon of your choosing and a grill; gas, electric or charcoal. Just 2-3 wood chunks from SmokinLicious® and about 20 minutes once you have a lit grill, and this method of bringing flavor to the standard watermelon will be complete.
As watermelon contains a lot of water, it is essential that you work with a medium heat setting on your gas grill and hot coals with a moderate flame for the charcoal grill. If using a gas grill, be sure to set up the wood chunks on just one side of the grill and allow the chunks to smolder first so there is plenty of smoke vapor. Since watermelon grills in no time at all, you want to have enough smoke vapor produced to give a great tasty outcome for both a gas grill or charcoal grill method. Electric smokers are self-contained allowing for simple dialing in about 15 minutes worth of smoking time.
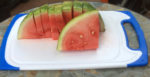
For the watermelon, cut lengthwise in half and cut each half into individual slices about 1-1/2 to 2” thick. Or, you can remove all the rind and grill just the watermelon meat. Keep fire safe tongs at the ready so you can turn the watermelon slices just once as they evaporate some water and sweeten up. DO NOT leave the grill! This fruit requires a careful watch so stay put and you’ll have every piece cooked to perfection.
So Many Uses for Grilled Watermelon
You’ll see how the watermelon darkens in color, get bits of char coloring to the skin, and is less water soluble. That’s the perfect outcome. Now it’s time to think about how to use your wood flavored melon.
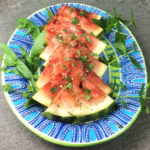
First, you can enjoy it as is. When I serve this naked, I just give one additional flavor such as fresh, chopped mint. But if you’re looking for a lunch or lite dinner entrée, think salad by including some baby arugula, goat cheese and a splash of balsamic vinegar. For a spicy version, sprinkle the wedges with red pepper flakes, a bit of granulated sugar, and lime zest. Wood fired watermelon also works great with other summer favorites like grape and cherry tomato, pepper slices, sugar snow peas, and cucumber. No matter how you choose to serve it, grilled watermelon with wood flavoring is going to top your list of grilled favorites.
Proving that there’s more to wood-fired cooking than just animal proteins, SmokinLicious® brings you great ideas for recipes featuring a wood-fired ingredient. Bringing you tips, techniques, recipes and the science behind the fire and smoke.
The Smokinlicious® Test Kitchen had an opportunity to use the Technique® Cast Iron Pan and Smoker which many of you purchased via QVC. Here are some preliminary findings by our Culinary Team:
➝Use caution when selecting cuts of meat with this cast iron pan! We had purchased a 10 lb. pork shoulder and struggled to get the cover tightly on the pan. Right now, it appears that cuts less than 8 lbs. would be ideal for cooking/smoking/roasting/grilling.
➝I’m sure we were not the only purchasers to be disappointed to read in the Technique® brochure that you should “not try to smoke in the oven” with this unit. Rest assured, Dr. Smoke will see if there is a means of actually smoking in a conventional oven by using low temperature and LiquidInfusedWoodChips /Smokin’ Dust®.
/WoodChunks with this smoker unit (more on these findings as they become available).
➝ We cooked both a bone-in pork shoulder and bone-in chicken breast. Both cooks revealed great moisture to the meat. We used the recommended medium heat setting on our gas range but found that the cast iron pan radiates a significant amount of heat. Thus, we recommend reducing the heat setting to a low-medium (“3″ if you have a digital setting) on gas units. We also turned the heat off our cast iron pan approximately 20 minutes prior to completing the cooking time in order to benefit from the pan’s ability to generate further heat on its own. Remember, all meat should rest prior to cutting.
➝ There was considerable “rendering” out of the fat drippings into the drip pan. There is significant staining on the stainless steel drip pan so you may want to consider lining the pan with foil or even parchment paper to reduce metal staining.
➝ Smokin’ Dust® Usage: although the dust will render black in this pan, it did give off a tremendous amount of aroma. We used the Smokin’ Dust® dry, about 2 Tablespoons worth, in the center of the smoking pan. This appears to be the correct amount although we did not feel it produced as much flavor to the meat as a conventional smoker.
➝ WoodChips: we used Wild Cherry WoodChips (standard grind) in the smoker pan while cooking a bone-in chicken breast on the gas stovetop. The chips also produced significant aroma in the air but we found that they produce much more flavor to the meat. Keep in mind, our chicken breast was just over 2lbs so it fit easily in the grill pan with the cover tightly on. The fact that more flavor was infused in the chicken could be the result of less air leakage than the pork shoulder and the fact the chicken is much more porous allowing for ease in accepting smoke. We used the WoodChips pre-soaked for 15 minutes in water, then allowed to drip dry before placing in the smoker pan. We used approximately 1 handful and spread them in the smoking pan to allow the drip pan to fit easily in place. Once our chicken was finished, we noted that the wood chips also blackened during the cooking process, much like the Smokin’ Dust®.
At this stage in our testing of the Technique® Cast Iron Pan and Smoker, we feel it is comparable to other stovetop units that we’ve tested. One important difference is the fact that there is no built in thermometer, so you must check the meat with a handheld or wireless thermometer to ensure you remove the food at the proper cooking temperature. Here are some other points worthy of mention:
➝ this is a heavy cast iron pan and all parts of it become very hot
➝ the pan can use some additional seasoning as there is some food sticking occurring with the grill pan
➝ it does take some effort to clean but if you re-season and continue to use the cast iron pan, I would anticipate this to become less of an issue
➝ there is a significant convection occurrence when cooking which produces a very moist product but as mentioned above, you must time the cooking process to ensure no over-cooking
Stay tuned for additional posting regarding this cookware. Our plans are to try the Smokin’ Dust®.
mixed with liquid as well as to try our Woodscuit®Flavor-Infused products.
Till then, “Bon-Bar-B-Q!”
Donna G
Dr. Smoke- The Technique® Cast Iron Pan & Smoker passes the Smokinlicious® kitchen test with flying colors when using our sized hardwood smoking chips!
For more related reading on stove top smoking, check out these articles:
when you smoke flavored food too much and how to correct!
I’m going to start this by stating smoke is a lot like salt. You can add more of it but if you add too much to smoke flavored food, it’s hard to correct. All is not lost though. I’m going to provide a tip that could save a smoke flavored food item that has been over smoked.
It’s All in the Ingredients
You’ve made the mistake of either using too much wood material to smoke or you smoked for too long. Either way, the outcome appears to be a disaster. Take a breath and a step back and assess the ingredients you used.
Often, you can correct the smoke level by adding an ingredient that was not included in the recipe. For instance, if your smoke flavored food involved a vegetable for a soup, find an ingredient in the soup recipe that has not been used. This may be cream, sugar or vinegar. Additionally, by adding the ingredient that was smoked in a non-smoked fashion, you can reduce the smoke flavor intensity. If you infused too much smoke in the broccoli for your broccoli cream soup, think about steaming some additional raw broccoli and adding with the smoked base. That will diffuse the smokiness.
SMOKE IS A GAS- Prime Factor for Smoke Flavored Food Items
Smoke is a vapor or gas. That means it is readily absorbed by the food product especially if moisture is present. This is one of the reasons why a water pan is used in a smoker.
Certain foods are more apt to be over smoked. Items like vegetables, fruits, dough item like breads, pies and tarts, and dairy items like egg-based recipes. Wood choice, amount of wood and length of the smoking process all play a part in how much essence comes from the wood.
Remember, smoke flavored food like a cut of meat can taste bitter with too much smoke vapor. This results from using wood that is too wet or using a wood that is not ideal for food.
But even a bitter smoked meat item can be saved by blending the meat with a sauce or glaze, especially one that contains a balance of sweet and heat.
In the end, you may find a smoke flavored food destined for the trash becomes a star dish when you know how to balance the smokiness with another flavor.
It is obvious that a return to a “normal” work environment is not likely soon. You may be one of the blessed who has decided you do not want to return to an office but rather continue the joys and challenges of working, educating, entertainment and sleeping from home.
To manage all these needs, meal planning needs to be addressed to allow for more family time. Rather than discuss animal proteins as we have previously done, the focus will be on other food categories that provide for endless options at mealtime.
Time to bring in our top 10 foods to get on the grill or smoker for fabulous flavor to your meals!
Foods to Bulk Grill
#1 Peppers
Do not purchase fire roasted peppers in the store! They are so easy to make using any type of grill you own and any pepper you prefer. By grilling in bulk, these can be added to meals like grilled sausage topped with peppers and onions, whipped into a fire roasted pepper tapenade for snacks or appetizers, bring an elevation to a salad, or as an addition to Dutch oven meals (think chili, goulash, mac and cheese).
This certainly is a clear example of how anyone can produce authentic barbecue on the equipment they have even if it’s not a traditional smoker.
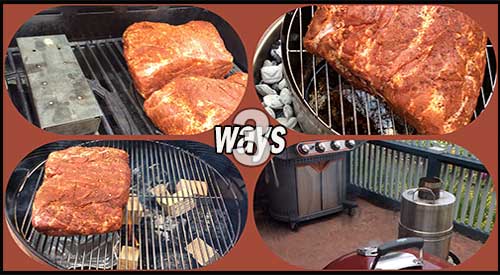
3 Methods of Smoking Boston Butt-
It should come as no surprise that majority of grill owners invest in a gas grill for their outdoor cooking with over 80% of these owners investing in multiple accessories for that grill. Often, many of these grill owners will venture to make an additional purchase of a second type of grill like a charcoal or pellet grill/smoker, in order to be able to cook more barbecue or smoked food options.
My intent is to demonstrate to you that you can produce authentic flavors, colors, textures, and aromas of favorite barbecue proteins with a variety of equipment, all outfitted with hardwood for the authentic wood flavoring.
I’ll be taking Boston butt to a traditional gas grill, a kettle charcoal grill, and a convection-style grill to demonstrate just how easy it is to cook this popular animal protein while giving you a bit of education on how these units are different when hardwood is incorporated.
Set Up Similarities and Differences for Smoking Boston Butt
When it comes to setting up the grills for smoking, there are some obvious differences. First, let me name the equipment brands I’ve included and the intended set up of each for cooking and smoking the Boston Butt cuts, all of which approximate 8 lbs.
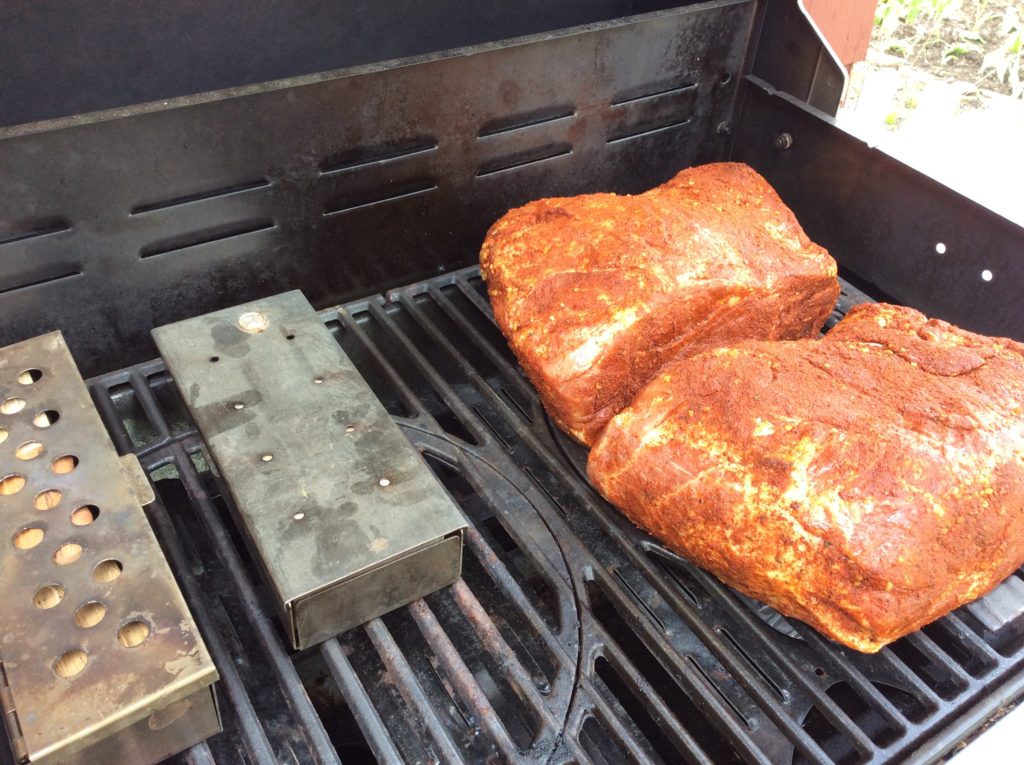
Our Boston Butt (s) on the Stok Gas Grill with accompanying Smoker boxes
The Stôk Quattro 4-Burner Grill:
If you are not familiar with this grill, it is equipped with an insert system to allow you to use a standard grilling grate, a griddle, grill basket, vegetable tray, pizza stone, Dutch oven, Wok, and other inserts that easily pop in and out of the cast iron grates. Despite this feature, you can do traditional smoking using wood chunks without the need for the smoker/infuser insert.
Whenever I smoke on a traditional gas grill, I always set up a two-zone cooking method. This means, on my 4-burner Stôk, I will ignite just two of the burners on one side. You can either place wood chunks directly on the heat shields of the unit or use a metal smoker box. My Boston butt will cook on the unlit side of the grill with a metal smoker box containing 3 wood chunks on the hot side. I’ve also included a second smoker box to make it easier to swap out the first when the wood becomes completed charred. My temperature is 225°F for the actual cooking.
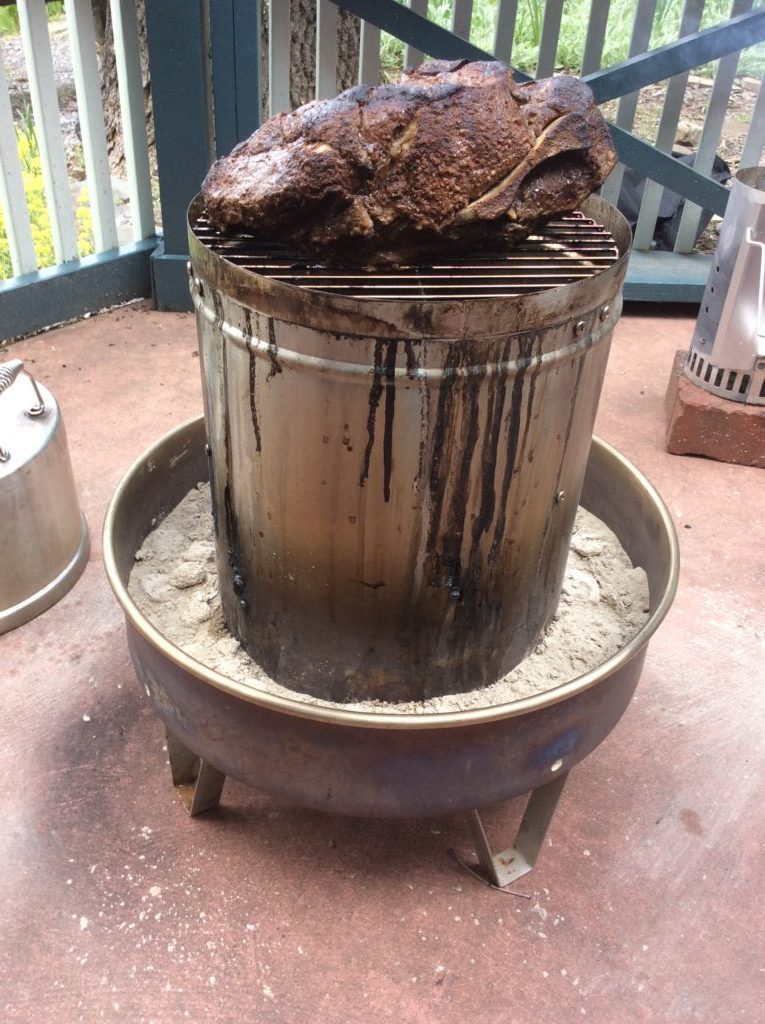
Our Boston Butt on the Orion Cooker with Minuto® wood chips in the inner ring
This is an outdoor convection unit that uses briquets for the heat and Minuto® Wood Chips placed around the drip/water pan for the wood flavoring. This unit will be the fastest to cook the Boston Butt, with an anticipated timing of 4-1/2 hours total. This is a direct cooking method that uses the radiated heat of the stainless-steel body to trap and circulate the heat for faster cooking time.
There is no ability to replenish the wood chips with this unit due to the high heat level. About 15 lbs. of briquet and 4 ounces of OrionCustom Wood Chips is all that is needed to smoke, plus some water in the water/drip pan for a moist outcome.
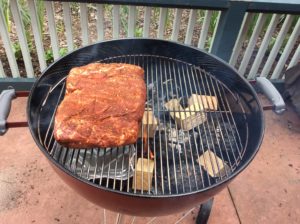
Our Boston Butt on the Weber® kettle Grill with double filet wood chunks
Weber® Kettle 22” Charcoal Grill:
Likely one of the most popular charcoal grills, the Weber® kettle provides for the opportunity to cook with charcoal and hardwood. I’ll be setting up my grill using a two-zone method; charcoal/wood on half the fire area and the meat placed on the indirect side.
Due to the length of time Boston butt takes to cook, you likely will need to replenish the charcoal for maintenance of heat level. I prefer to maintain a temperature around 250° F.
For similarities: both the Weber® and the Stôk grill were set up with a two-zone cooking method. Both included use of the SmokinLicious® double filet wood chunk. The length of cooking time between the charcoal unit and the gas unit are very similar, taking close to 10 hours.
For differences: temperature maintenance is easier with the gas and convection units. The charcoal unit requires much more supervision to ensure that the fuel (charcoal) is replenished prior to the temperature of the grill decreasing significantly. You are also able to check on the meat’s coloring and evenness of cooking with the charcoal and gas units while the convection unit is generally left alone until closer to the recommended cooking times. Though you can check on the doneness of the meat at any point with the convection unit, generally there is no need to do anything but wait.
Regarding cooking variations, let’s discuss color, bark formation, moisture of the meat.
Barbecue By All Methods
With all four of the Boston Butt (s) prepared in the same manner – excess fat trimmed to ¼-inch or less, a dry rub applied on all sides, and marinated for 24 hours – this is a fair comparison of how each grilling and smoking method produces the barbecue results commonly looked for.
Bark:
Without question, bark or the outer crust that develops from exposure to a lower temperature, long cook time, and smoke vapor infusion was greatest on the Boston butt cooked on the Weber® Kettle 22” Charcoal Grill. The gas grill produces the least amount of bark which is dominate on the outer edges and top surface.
Color:
The darkest coloring to the bark and the most obvious smoke ring was on the meat cooked on the charcoal grill. The Orion Cooker produced a brown hue to the meat’s exterior while the meat cooked on the gas grill retained a red hue that was indicative of the dry rub color. Charcoal grills will produce a black hued coloring due to two combustible materials: charcoal or charred wood and hardwood.
Moisture:
The meat that produced the greatest amount of rendered juice was from the charcoal cooking method. Second, the convection grill method followed by the gas grill. However, the greatest internal moisture level was obtained from the indirect cooking method on the gas grill, followed by the charcoal method and lastly the convection method.
Final Notes:
What we’ve set out to accomplish with this multi cook segment is to prove that no matter what equipment you have, you can produce authentic flavor, aroma and texture to Boston butt. This can be invaluable for those times when you may not have a lot of time to supervise the smoker or grill but still want authentic barbecue. Or, when you must make a lot of meat meaning you must use all the equipment options you have available.
All four Boston Butt (s) one done on charcoal with the Weber, another in the Orion with wood chips and two on the gas grill with wood chunks- the coloring is not much different!
From a taste perspective, our sampling group indicated that the strongest smoked flavor was from the charcoal unit, followed by the convection grill and lastly, the gas grill. Keep this information in mind when you’re cooking for others, as boldness of the smoke flavor can be controlled not only by the amount of time exposed to the smoke vapor, but also with the equipment used for the cooking and the amount and type of hardwood used in the process.
This certainly is a clear example of how anyone can produce authentic barbecue on the equipment they have even if it’s not a traditional smoker.
Making you an informed consumer through valuable articles like this one. Leave us a comment and follow us or subscribe for more great recipes, techniques, tips, and the science behind the flavor. That’s SmokinLicious®.
Our tips can help with your spring season for grilling plans!
SPRING SEASON FOR GRILLING!
Spring is finally here and that means it’s time to prep the grill for your Spring Season for Grilling! Yup, the winter blahs are gone and it’s time to fire up the grill, BBQ, the Barbie, the Brac, or whatever suitable name you use to call your equipment on your specific continent.
No, there is no way around it! First, comes the dreaded cleaning of your unit. Whether it’s less than $30 or over $3,000, all equipment needs some cleaning attention once in a while. What better time than Spring to roll up your sleeves and get everything ready.
Remember, a grill or smoker is an oven that has been seasoned over time with all that cooking so a little soap and water is generally all that is needed to do a nice cleanup. You simply want to clean the unit of dirt and dust, so gently clean being careful not to rub out the “seasoning” of the unit!
Of course, there are those times when you failed to provide suitable attention to your equipment and a bunch of soot, grease, and all kinds of other nasty things developed on the equipment. When you’re faced with that situation, then consideration has to be made to a good degreaser or oven cleaner! Once the unit has been put back into good clean order, get ready to season it again. That’s right, all the harder cleaning agent to the seasoning right out of the unit. Actually, this the perfect time to use all the leftover charcoal, wood chunks/chips from last year! Start a fire and let burn/smoke in the unit to “season”. You’re not cooking now so there is no need to worry about moisture levels, water pans, etc. – just generate the smoke and heat, and re-season your unit. Don’t forget to add a little oil (vegetable, coconut, whatever handles higher heat levels) to the grilling grates to get them all ready.
Own an LP/gas grill? You can do the same process by taking a chunk and lighting it on the grill, or take a disposable foil pan or tin foil and put some wood chips in. Then lite with a match or lighter (not with the unit’s burners), close the lid and capture the smoke/heat!
Now you’re ready for new SmokinLicious® culinary quality wood products and what will promise to be a great Spring Season for Grilling!
Bon-Bar-B-Q!
Dr. Smoke has tips for your Spring Season for Grilling plans.
We’ve all had those moments when the food comes off the smoker or grill and we wonder, What went wrong??
Sometimes the event is so bad you want to swear off outdoor cooking for good because of committing common smoking & grilling mistakes. I’m here to ask you to step away from the ledge and think about whether you do any of the following things. The more items on the list you engage in, the more likely you can benefit from my suggestions.
SMOKING & GRILLING MISTAKES:
#1 Resting Meat
This tends to be the common practice for roasts and steaks/chops. You’ve managed to get a nice crisp skin to the roast or steak and then you let it sit or rest, thinking it will make the outcome juicier. You end up with a soft skin, a wet outside, and waxy fat. These are meat cuts that don’t require resting. In fact, they will rest enough on your dinner plate so they are best served hot of the grill or smoker, without a rest period.
#2 Using Too Much Wood
You know that charcoal and gas are the fuels used to reach and maintain temperature while you’re cooking, and that hardwood is what flavors your food. You want to ensure there is adequate smoke flavor so you add 10 pieces of wood chunks to the hot coals when you start cooking. Then after the first hour, you add another 6 pieces of wood. STOP! That is way too much and simply put, a waste of a tree. On average it takes just 6 ounces of wood to start flavoring meat. My rule of thumb is to add 3-4 wood pieces for a full chimney of charcoal plus a couple of pounds of unlit. Only when those pieces are fully combusted (black and ashy) do I add a couple more pieces. Depending on what and how long I’m cooking, I may only use 6 pieces total.
#3 You Soaked Your Smoking/Grilling Wood
I know this is one of the biggest controversies out there when it comes to smoking with wood. To soak or not. I take the stand that you should never soak the wood as adding water will only fluctuate your cooking temperature and take more energy away from the fire to steam the water from the wood. Remember, the wood cannot start to combust until the excess water has been vaporized. Work with a wood that has at least 20% moisture for the best flavor.
#4 Room Temperature Meat
It is well documented that when you want to attract smoke vapor from burning wood, colder temperatures are like a magnet. Don’t take the meat out of the refrigerator until right before you’re ready to place it on the grill. In addition to attracting smoke vapor, colder temperature meats will warm up faster in your equipment than if you left them out on the kitchen counter.
#5 Searing to Lock in Juices
This is the one item even well-known restaurants can get wrong. Searing meats before finish cooking does not lock in the juices. What it does do is brown the outside of the meat and firm up the outer surface, giving a distinct pleasant flavor. The meat fibers do not get sealed by this method or produce any additional juiciness to the meat.
#6 Marinating Overnight or Longer
As marinades tend to contain oil and meat is made up mostly of water, the two tend to compete against each other. Here’s the thing with marinades. Marinating for long periods of time do not allow the marinade to penetrate any deeper than if you marinate for just one hour. In fact, you have an increased risk of breaking down the meat fibers too far with a marinade, producing a soggy outer layer. Stick to short marinade times and understand most of that flavor will penetrate only to the outside layer.
#7 Don’t Trim the Fat Cap
Just like meat being made up of mostly water, fat is made up of oil. Again, water and oil don’t mix. Leaving a fat cap on meat only allows it to melt and drip into the equipment you’re using. This can produce some additional flavors to the meat but allow too many drippings into the fire area, and you’ll cause flare ups that will deposit soot onto your meat. Don’t forget, most of us have a habit of trimming fat off meat before we consume it.
If you have one or more grills at your home then likely, without even knowing it, you have prepped for emergency situations. I’ve been encouraged to see while social distancing is in place, people are reaching out to their grills to cook family meals. It is simply fabulous!
Don’t limit the use of this cooking equipment to the traditional items like animal proteins and thick-skinned vegetables like peppers, onions, and corn. Embrace the concept that nearly anything can be cooked on the grill.
Bagged Food Items
Common bagged food items that are considered perfect for storing as emergency food rations include: rice, dried pasta, dried beans, oats, quinoa, trail mix, dried fruits, candy, snack foods like chips and cookies, cornmeal, granola, and more.
Starting with common items like rice, dried pasta and beans, and quinoa, these items can be cooked in water or broth using cookware placed directly on the grill grate. Generally, direct heat works for these items, since you need to reach a boil and then simmer these items for a relatively long period before they are tender. Trail mix, oats and dried fruits work great as breakfast items to cook with milk or milk substitutes, again using a saucepan directly on the grill. Snack foods, candy, trail mix and more work well for making desserts on the grill. Cookie crumbs work for making tart and pie shells, crushed chips for crusting animal proteins, and candy for those special treats that may just include some type of chocolate candy and prepared phyllo dough sheets, which I always keep available in my freezer for spur of the moment needs.
This is the year! You made a promise to yourself, family and friends that this outdoor cooking season, you were going to bring more flavor to meals cooked on the grill by incorporating smoking wood and grilling wood. All you need to know is, what are the options for setting up the grill for this type of cooking without purchasing a smoker?
We have the answer and lots of options to utilize your existing equipment!
LP/Gas Grills of All Types
There is a great deal of variation in LP/Gas Grilling equipment in terms of grilling surface space, the number of burners, BTU rating, etc. Know up front, that this will play into how frequently you need to replenish grilling or smoking wood or even to monitor the foods being smoked on the grill. Essentially, these tips will work on any brand/model that you may own.
How To Add Wood Chunks on Gas Grill
Heat diffusers are commonly found on newer models of grills. They are made of high heat tolerant metal and cover the actual burners of the unit. Their purpose is to ensure even heat distribution throughout the grill so both radiant and conductive heat is maximized.
Wood Chunks On The Diffusers
If you have a grill model that has heat diffusers (remember, they may go by other names like flavorizer bars, flame tamers, heat plates, burner shields, and heat distributors) then you’re ready to use smoking wood chunks on your unit! Yes, I said smoking chunks. This is by far the easiest method of getting the true smoke flavor to the foods being cooked. Plus, you can set up an indirect method of cooking using smoking chunks.
You will need 3-4 wood chunks sized to fit over your heat diffusers and under the grill grate when setting in place. A 2x2x3-inch size fits most units and these should have some measurable moisture level; at least 20% moisture is ideal meaning you won’t need to presoak the wood. If you have an old grill model before heat diffusers were standard, you can still use smoking wood chunks by placing them in a smoker box. These boxes will generally fit 3-4 chunks of the size referenced above but be sure to use a good quality box. My preference is cast iron. Insert the chunks into the smoker box and leave the lid off!
Often when faced with cooking a whole turkey, you find the challenge of ensuring every part of the bird is cooked to temperature. This can result in some extra work in ensuring that certain parts that cook faster don’t dry out or burn on the exterior. Think the wings and drumsticks. It’s a lot of work!
I’m going to introduce you to a method of cooking a turkey that will ensure every part cooks at the same rate and to the same doneness level without having to cover specific parts with foil. Spatchcocking a whole turkey meets that goal and by doing the cooking process on the gas grill with hardwood, you get the added benefit of a smoke flavor and oven room for preparing other dishes.
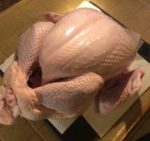
Order up a whole turkey, preferably under 24 lbs., and let’s meet in the kitchen to prepare the bird for smoking.
Does Fresh Make a Difference?
#freshturkey
There is no question that I prefer a fresh turkey over frozen as the flavor is simply cleaner and the bird produces super moist meat compared to a frozen turkey. We are fortunate to have within 10 miles of our location, a fresh turkey farm that harvests turkeys once a year, just a couple of days ahead of Thanksgiving. My bird weighed in just under 22lbs. The organs and neck are removed from the cavity and the bird flipped breast side down to expose the backbone. This is where we start our spatchcock process. Get sharp cutting shears ready as we prepare to remove the backbone of our turkey.
Tasting Notes: If fresh whole turkey is not available, you may substitute frozen whole turkey. Just be sure it is completely defrosted and pat dried before starting this recipe.
Flatten and Rub for a Perfect Spatchcock Smoked Turkey
I won’t lie to you. Removing the backbone of a fresh turkey can be a bit of work, but it is so worth it. Start on one side of the backbone, insert sharp kitchen shears, and start to snip away. You’ll draw the shears along the edge of the backbone, releasing the bone from the meat. Done correctly, the spine will come out in one piece.
#spatchock
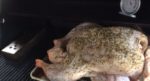
With the backbone removed it’s time for the final preparation to the turkey. Flip the turkey back so the breast is facing up. Time to break the breastbone so the turkey will lay flat on the cooking sheet pan. This will take both hands and a lot of force. Position your hands across the breast and push down with all your force until you hear the breast plate break. Now the turkey should be able to lay flat on a sheet pan equipped with a rack for rendering all the juice and allowing even heat distribution around the entire bird. The rack is key to use so heat distributes evenly. The turkey is now ready for a rub with your favorite seasonings, herbs, and spices.
#spatchocking
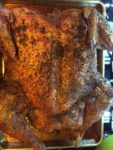
I’m using a simple herb rub that includes fresh sage, oregano, thyme, crushed red pepper, black pepper, marjoram, basil and cumin. I place my ground rub all over the skin of the bird and on the exposed meat side, reaching under the breast skin as well. Now cover with plastic wrap and refrigerate overnight. All this work can be done the night prior to grilling ensuring all that is left to do, is the simple two-zone cooking. Remember, two-zone cooking involves turning only half the burners on and placing a metal smoker box of wood chunks on the hot grate or directly on the heat shield of the hot burners. Be sure you have the box and hardwood at the ready for this step.
With our prepared spatchcock turkey readied, the sheet pan is added to the grill on the no heat side and the lid is closed. I leave this to cook on its own for about two hours before returning to rotate the pan, checking the smoker box of wood chunks I’m using on the lit side of the grill for the great smoke flavor. Remember, the heat from the burners that are lit will radiate throughout the entire grill, grill-roasting the turkey while the heat stimulates the release of the smoke vapor from the wood.
#twozonecooking #woodchunks#smokerbox
Tasting Notes: If you prefer, you can cook the turkey directly on the grill grate. Just be sure to place a water pan under the grate to collect all the juices.
Ready in No Time
My nearly 22 lb. fresh turkey takes about 3-3/4 hours to reach a 165°F internal temperature. In total, I use about 8 double filet wood chunks for the entire process. The best part, I can do other things while the turkey cooks, then rest it for about 20 minutes before carving. Don’t forget about all the beautiful juice it produces in the pan as well. Make gravy, use it as au jus, or save it for producing stock. Spatchcock fresh turkey – the easiest method of no-fuss grilling and smoking of a turkey!
What’s your favorite spatchcock turkey recipe? Leave us a comment to opine and subscribe to get all our postings on tips, techniques and recipes. Bringing innovation to wood fired cooking with recipes, techniques and the science behind the fire, smoke, and flavor. That’s SmokinLicious®.
More related reading on Spatchcock Smoked Turkey and other Sptachcocking itmes see our smoking & Grilling tips and technique see our directory on previous blogs!
You thought you timed the meat perfectly on your smoker or grill. When it came time to cut it, all you found was a gray, dry former piece of meat staring back at you.
What went wrong?
Don’t fall into your old habits when it comes to outdoor cooking, whether you’re using a traditional wood or electric smoker, charcoal grill or gas grill. Learn some easy tips to keep your foods juicy and enticing this outdoor cooking season by preventing the unwanted occurrence of dry smoked meats.