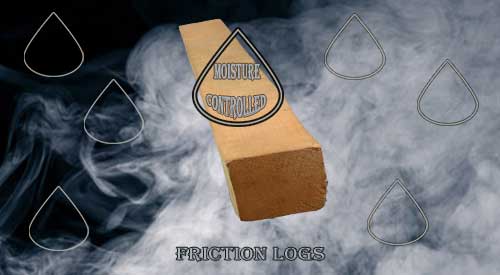
The Smokinlicious® friction log is not only cut to the correct sizing, we also customize the moisture level for optimal smoke generation.
You started your food process by ensuring you were unique in the market. You tested and retested ingredients and procedures for the perfect smoking program. Did you think of everything? What about the wood you use with your friction logs?
Friction Logs- How to Create Balance with Moisture and Wood
Do you know hardwood needs moisture to smolder and produce smoke aerosol? Why? First, friction logs are designed to produce a pre-stage to combustion. That means, no flames or fire. Secondly, this stage occurs at a lower temperature. That means less of the bad components of wood are introduced. Finally, reach the ideal moisture level and you are guaranteed a better product. Clean flavours, perfect colour and great aroma. Our logs bring that to you!
Why Things Go Wrong
Moisture in wood is critical. If you use a wood that is too wet, acrid flavours will form. Wood that is too dry gives no or limited flavour to foods. In short, that’s the reason why dialing in moisture for your friction logs is essential.
Isn’t it time you dial in the moisture level of your friction logs for flavour that makes your foods an experience for the customer?
We know what it takes to gain the perfect essence from the wood. Learn why SmokinLicious® is the perfect partner for your food process and explore the world of hardwood as an ingredient!
Smoking and wood-fired cooking are a passion for many. You invested in a quality piece of equipment. Shopped for the best ingredients. Dedicated time to watching videos and reading articles on smoking. Sourced hardwood that claims to be for smoking. But do you know for sure?
So Many Terms
Food labeling over the years has become complicated. That seems to have passed on to hardwoods for smoking and cooking as well. Package labeling for wood is not usually accurate. In fact, it implies certain information.
Case in point, many suppliers now use the term 100% natural. But what does that mean? Natural used for food labeling means there are no artificial ingredients or preservatives and there has been minimal processing. Certainly, a supplier that sources wood from orchards uses the “natural” term but you have no assurance the tree has not been genetically modified. Translation – chemicals have been added.
Move on to the various drying processes and even more confusion occurs.
Kiln-dried, air-dried, and naturally cured are all common labeling for wood. But that’s as far it may go. No one references how long that process is, or at what temperature the drying occurs, or even where this process happens (i.e. open yard, shed, etc.).
True Forest Hardwood for Smoking
When you see forest grown on the package you assume the wood comes from a natural growing area. Even if there is a reference to a drying process, be sure the wood does not appear cracked and light in weight. If too much moisture is taken from the wood, you’ll end up with seasoned firewood and not a hardwood for smoking. Remember, moisture is needed to produce a clean smoke. No moisture means no flavor from the wood.
Be sure the label states 100% of the hardwood named on the package. If not, you may be using a combination of hardwood AND softwood! You have to make the decision on whether you want to use bark-on or bark-free wood. Off-flavors can develop with bark.
In the end, by reading wood labels in detail like you do with food labels, can guarantee you a better choice. After all, some of the best flavors come from those items direct from the land around us.
It is obvious that a return to a “normal” work environment is not likely soon. You may be one of the blessed who has decided you do not want to return to an office but rather continue the joys and challenges of working, educating, entertainment and sleeping from home.
To manage all these needs, meal planning needs to be addressed to allow for more family time. Rather than discuss animal proteins as we have previously done, the focus will be on other food categories that provide for endless options at mealtime.
Time to bring in our top 10 foods to get on the grill or smoker for fabulous flavor to your meals!
Foods to Bulk Grill
#1 Peppers
Do not purchase fire roasted peppers in the store! They are so easy to make using any type of grill you own and any pepper you prefer. By grilling in bulk, these can be added to meals like grilled sausage topped with peppers and onions, whipped into a fire roasted pepper tapenade for snacks or appetizers, bring an elevation to a salad, or as an addition to Dutch oven meals (think chili, goulash, mac and cheese).
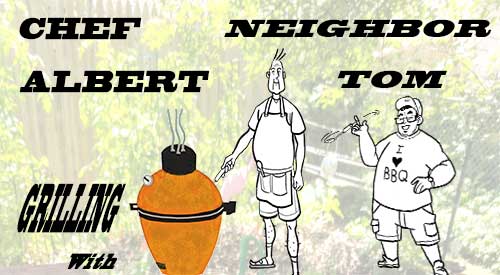
Poor Tom! He, like many other grill and smoker enthusiasts out there, never learned the value of a water pan. By providing moisture to the grilling area, you can avoid drying out your meats and poultry and never have someone mistake your food for a rock!
Let me tell you a story about my neighbor, Tom, we can all relate to.
A few years ago, Tom, a semi-trained Chef, wanted to smoke some food. So like all newbies, Tom went off to a box store, picked out a smoker ( offset), loaded a big bag of charcoal, a big plastic bag of wood chunks; next stop was at the butcher for three racks of ribs! Arriving at home he assembled the smoker, filled up the firebox with charcoal and wood, put on the rack of ribs and cooked them for hours. Finally, before dusk, he presented his charred masterpiece to the family!
Oh, he claimed to love the over-smoked taste! Politely and begrudgingly, the family told him how good the ribs tasted! Well, the smoker never was used again, went to the garage sale, the massive amount of wood went to the campfire, the charcoal lasted the summer for the kettle grill! The moral here is “wait to take on the rib”! Dr. Smoke doesn’t want this to happen to you! So, here are some suggested tips to follow!
First, go purchase the smoker/grill of your choice; next purchase a bag of quality hardwood charcoal; go home and assemble the unit. Then take some vegetable/olive oil and coat the grill! This is what is called seasoning.
Burn #1: start a charcoal fire in the unit or firebox and let it bring the unit up to temperature (250 degrees F)- do not put any food in the unit! Then let it cool down overnight!
Burn #2: start a charcoal fire in the unit or firebox, bring to around 200 to 225 degrees F. then put on some pork or beef hot dogs in the unit, then time the cook, sample the dogs for flavor, watch for hot spots and learn how to smoke- this is not charring. Learn the smoking process in your unit!
Burn #3: start a charcoal fire in the unit or firebox, bring to around 200-225 degrees F, then put on some chicken legs or thighs. No chicken breast-you need something with a bone. Time the cooking and taste the product!
Now order a SMALL number of wood chunks or chips from SmokinLicious®.
Burn #4: do the same as burn #3 only reduce the amount of charcoal and add SmokinLicious® chunks/chips to produce the smoke. Again time the cook, taste the results. Chicken is like a sponge it will absorb a lot of smoke so be careful when adding the quantity of wood.
We have all been in Tom’s position. We love grilling and smoking but prefer the warmer weather. For those of us in 4 season climates with below zero temperatures in winter and lots of snow, it seems too hard to continuing grilling! But just as Bert remarks, you do not have to give up cooking outdoors just because of the weather.
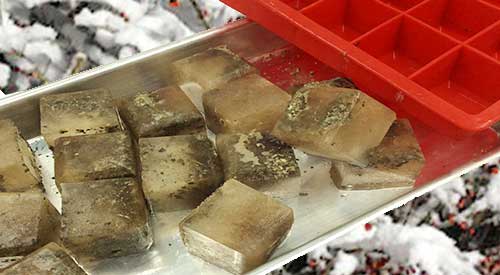
Our Fresh Herbs smoked and Iced ready to bring great flavors to our winter soups!
HERBS SMOKED AND ICED MAKE THE PERFECT WINTER FLAVOR CUBE
#smokinlicious
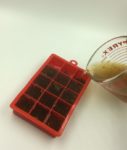
Here’s the perfect way to keep great flavors on hand for when you need them. I’m going to show you how to make smoked herb flavor cubes which consist of our previously smoked fresh herbs and, in my case, bone broth. Whether you smoke all the components of these flavorful cubes or not is up to you. I happen to like the combination of smoked bone broth and smoked herbs for some of my soups, sauces, and glazes. These are the perfect little flavor gems for all your recipes and the prefrozen cubes make adding so simple.
Herbs Smoked & Iced- Tools
#flavorcubes
Here is all you need to make these flavorful cubes . Silicone ice cube trays, your choice of herbs and spices, as well as broth or stock. It will take about one quart of broth to make 40 flavor cubes.
To make portioning the cubes a snap, I use a measuring cup for the liquid. As I previously smoked my herbs and placed them in spice jars, I can portion out the herbs directly from the jars. Today, I’m using smoked parsley and oregano dust for infused broth cubes. These are two of my more popular blends for sauces, soups, and extra flavor to vegetables. Be sure your broth or stock is well strained before adding to the cube trays.
Tasting Notes: Don’t forget about fruits as well. These make perfect flavor cubes and can be cold smoked using a handheld food smoker .
Herbs Smoked & Iced- 1-2-3 And Done!
The best part of making flavor cubes is the freezer does most of the work. I simply place previously smoked herbs of my choice into the bottom of the silicone tray compartments and pour in the broth. I like to put my cube trays on mini sheet pans for easy placement and removal from the freezer. Just be sure to label the trays so when you go to un-mold, everything will be easy to identify. That’s it! How easy is that??
Tasting Notes:You do not have to use silicone cube trays but I prefer these to metal or plastic. I find they don’t taint the flavor of the cubes and they are extremely easy to release.
A New Umami
#smokedherbs
After adding smoked herbs to silicone ice trays and pouring in smoked bone broth, these flavor cubes just take hours of freezer time to set and then they are ready for use. I like to un-mold mine and place in storage bags that allow me to reach in, grab what I need, and reseal the rest. The depth of flavor these little cubes add to soup and sauces, whether for meats and poultry or vegetables, is fabulous.
Don’t forget to experiment with a variety of tastes and don’t feel you are restricted to just one herb or spice per cube. Make flavor blends like Indian flavor cubes with curry, ginger, allspice, and cumin. Or an Italian blend with oregano, basil, marjoram, thyme and rosemary. Or, combine fruit and spices for cocktail-like blends. There are no rules to the combinations you can use so find the flavors you love and flavor cube away!
We’ve all had those moments when the food comes off the smoker or grill and we wonder, What went wrong??
Sometimes the event is so bad you want to swear off outdoor cooking for good because of committing common smoking & grilling mistakes. I’m here to ask you to step away from the ledge and think about whether you do any of the following things. The more items on the list you engage in, the more likely you can benefit from my suggestions.
SMOKING & GRILLING MISTAKES:
#1 Resting Meat
This tends to be the common practice for roasts and steaks/chops. You’ve managed to get a nice crisp skin to the roast or steak and then you let it sit or rest, thinking it will make the outcome juicier. You end up with a soft skin, a wet outside, and waxy fat. These are meat cuts that don’t require resting. In fact, they will rest enough on your dinner plate so they are best served hot of the grill or smoker, without a rest period.
#2 Using Too Much Wood
You know that charcoal and gas are the fuels used to reach and maintain temperature while you’re cooking, and that hardwood is what flavors your food. You want to ensure there is adequate smoke flavor so you add 10 pieces of wood chunks to the hot coals when you start cooking. Then after the first hour, you add another 6 pieces of wood. STOP! That is way too much and simply put, a waste of a tree. On average it takes just 6 ounces of wood to start flavoring meat. My rule of thumb is to add 3-4 wood pieces for a full chimney of charcoal plus a couple of pounds of unlit. Only when those pieces are fully combusted (black and ashy) do I add a couple more pieces. Depending on what and how long I’m cooking, I may only use 6 pieces total.
#3 You Soaked Your Smoking/Grilling Wood
I know this is one of the biggest controversies out there when it comes to smoking with wood. To soak or not. I take the stand that you should never soak the wood as adding water will only fluctuate your cooking temperature and take more energy away from the fire to steam the water from the wood. Remember, the wood cannot start to combust until the excess water has been vaporized. Work with a wood that has at least 20% moisture for the best flavor.
#4 Room Temperature Meat
It is well documented that when you want to attract smoke vapor from burning wood, colder temperatures are like a magnet. Don’t take the meat out of the refrigerator until right before you’re ready to place it on the grill. In addition to attracting smoke vapor, colder temperature meats will warm up faster in your equipment than if you left them out on the kitchen counter.
#5 Searing to Lock in Juices
This is the one item even well-known restaurants can get wrong. Searing meats before finish cooking does not lock in the juices. What it does do is brown the outside of the meat and firm up the outer surface, giving a distinct pleasant flavor. The meat fibers do not get sealed by this method or produce any additional juiciness to the meat.
#6 Marinating Overnight or Longer
As marinades tend to contain oil and meat is made up mostly of water, the two tend to compete against each other. Here’s the thing with marinades. Marinating for long periods of time do not allow the marinade to penetrate any deeper than if you marinate for just one hour. In fact, you have an increased risk of breaking down the meat fibers too far with a marinade, producing a soggy outer layer. Stick to short marinade times and understand most of that flavor will penetrate only to the outside layer.
#7 Don’t Trim the Fat Cap
Just like meat being made up of mostly water, fat is made up of oil. Again, water and oil don’t mix. Leaving a fat cap on meat only allows it to melt and drip into the equipment you’re using. This can produce some additional flavors to the meat but allow too many drippings into the fire area, and you’ll cause flare ups that will deposit soot onto your meat. Don’t forget, most of us have a habit of trimming fat off meat before we consume it.
Thinking about using cedar wood for cooking? 6 reasons to don’t!
6 REASONS TO AVOID CEDAR WOOD FOR COOKING
You love different techniques for cooking and absorb new information like a sponge. In particularly, you love outdoor methods of cooking. One of your favorites is plank cooking on cedar wood. Every time you read a recipe, they all call for use of a cedar plank or other methods to use cedar wood for cooking.
But is cedar really the best choice? More so, is cedar wood for cooking a safe choice?
#1 Softwood Classification Presents a Concern for Using Cedar Wood for Cooking
Cedar wood is not a hardwood. It is a softwood that is from the gymnosperm trees meaning, it is a conifer or cone producing tree. As a rule, softwoods should not be used for cooking as they contain a lot of air and sap which equates to a fast burn and unpleasant flavors. In fact, there are many softwoods that can be toxic if cooked over.
#2 Poor Fire Resistance
During plank cooking, you are using the wood as a vessel to infuse flavor to whatever food is placed on top of the plank. Here’s the concern with cedar – because it is a lower density wood (23 lb./ft³), it has very poor fire resistance. That means, it reaches full combustion much faster than hardwood and will burn as a result. Certainly, that’s not what you’re looking for when you plank cook.
#3 Poreless
Unlike hardwood which contain pores in the cell walls, softwoods like cedar are poreless. They use cell components called tracheids to transport water and nutrients. In addition, the organic compound lignin found in the cell walls, is much lower than in traditional hardwoods used for cooking. Why is this an issue? Lignin is what gives wood fired cooking the distinct flavor and aroma to foods. In using cedar wood for cooking, the average lignin composition is 20%±4 compared to common hardwoods used for wood-fired cooking which average 28%±3.
#4 Plicatic Acid
Cedar contains chemical properties (specifically plicatic acid) that are shown to be a good absorber of odors and moisture. This is one of the key reasons why cedar is a preferred softwood for pest control to keep fleas, ants, mites, moths, and mosquitoes away. When exposed to plicatic acid for lengthy periods of time, a condition known as “cedar asthma” can develop.
Additionally, a regular exposure to the cedar oil found in the wood can result in contact dermatitis or skin irritation, rhinitis, and conjunctivitis.
#5 Animal Toxicity
There are many studies available on how the use of cedar wood chips and shavings have affected animals continually exposed to these products. Most studies show a correlation with liver dysfunction in animals such as rabbits, guinea pigs, and hamsters. In fact, smaller animals, like guinea pigs and hamsters, have a higher incidence of death which may be attributed to plicatic acid exposure. The phenols and aromatic hydrocarbons also have been shown to cause respiratory problems in animals like those listed above.
#6 Not All Cedar Is The Same
Cedar is part of the pine family of trees with native origin in North Africa and Asia. There are no native cedar trees to North America. The red cedar common in the Eastern USA is part of the Juniper family and can be highly toxic if taken internally. Under no circumstances should you ever cook with red cedar from the Eastern states of the USA.
USA cedar trees are referred to as false cedars since there are no native varieties. There are commonly 5 varieties of the false cedars available: Western Red Cedar (common to Southern Alaska, Northern California, and the Rockies), Northern White Cedar (Southeastern Canada, Northeastern quarter of the USA, south into Tennessee, and west into Iowa), Eastern Red (Aromatic) Cedar (Eastern USA), Yellow Cedar (Pacific Northwest from Alaska to British Columbia into Oregon), Spanish Cedar (although Native to South and Central America, it was planted in Florida). Every false cedar has some known health risks with the most common being respiratory due to toxicity of its pollen, oil, or other chemical compound.
Now you’re asking..
“So if there are all these documented health risks, how and why have cedar plank cooking and other methods of cedar wood cooking gain so much popularity?” I suppose the easiest answer is that cedar was used by the earliest settlers in the Pacific Northwest as a means of preserving, storing and cooking the seasonal fish. Think about the limitations of the day: they would be using resources that are available without thought to the items we ponder today like health, future risk, etc. This concept was examined from a different perspective many years later with the desire for flavor, appearance, and functionality.
We often make the mistake of jumping into something full throttle before asking some of the key questions to keep our bodies safe and healthy. Remember, there’s lots of documentation out there stating why you should not cook with softwood yet when it comes to cedar wood cooking, specifically, cedar plank cooking, we don’t seem to carry that issue forward. I don’t think I’ll ever understand why.
We love providing information to our readers and subscribers that is not in the open and letting you weigh the information for your own verdict. All types of questions are welcome and we encourage you to follow and subscribe to our social channels so you don’t miss anything. We look forward to providing you with tips, techniques, recipes, and the science for all things wood-fired cooked.
Kylee Harris on Coffee Smoked Foods– At one point, all foods had an element of smoke; everything was cooked over an open fire before gas and electric stoves came about. It’s thought that the smell and imparted taste of smoke is programmed into mankind as a result, which is why smoked foods are popular all over the globe. Meat, seafood, and even smoky desserts like fruit pies, are still flavored with a variety of wood smoke. Recently, professional and home cooks alike have begun to wonder about the hidden potential of another thing close to their hearts: coffee. Smoking food with a combination of wood and coffee beans could be the next big taste revolution.
Coffee Smoked Foods- Coffee Varieties for Smoking
Just as there is a variety of options when it comes to smoking food with wood, there are a few choices in coffee as well. For flavor profile, darker and richer bean varieties pair best with red meat, while more mild varieties are better sampled with poultry and seafood. There’s also the question of regular or decaffeinated types of coffee. No, smoking with coffee won’t caffeinate your food (though wouldn’t that be interesting), but there can be a difference in flavor here as well. Regular has a higher level of acidity and thus bitterness, while decaf is less so. Rule of thumb: if you like the bitter tang of a certain coffee, then you will probably like the flavors it lends to smoked food.
Coffee Smoked Foods- Beans, Grounds, and Pellets
Of course, flavor is one thing- this is open to individual tastes- but what about what works best for the actual smoking process? Ground coffee is great as a marinade or rub for meat, but it burns up too quickly to be very useful for smoking. Coffee beans are better for the process, as they can burn more slowly. A combination of wood chips with coffee beans (a 3:1 ratio) is a good balance, allowing the coffee beans to add their subtle flavors without becoming too smoky and overpowering. There’s also the option of coffee pellets, which are coffee grounds and saw dust pressed into compact pellets used as a fuel for both cooking and heating. These are said to have a much more subtle flavor when used for cooking and work particularly well, according to fans, for flavoring smoked corned beef.
Coffee Smoked Foods- Pre-Roasted vs. Green Coffee Beans
While both grounds and pellets have their place, most people prefer smoking food with whole coffee beans, which then poses the question: raw and green, or already roasted? The answer really depends on personal preference, once again. Green coffee beans will give off much more smoke, which can be a good thing if that’s the flavor you’d like to try. Pre roasted, on the other hand, will smoke less, but may need to be soaked in water first in order to be able to smolder for a longer time to produce a sustained smoking processes.
As you can see, there are quite a few choices you can make to customize your coffee-smoked food experience. Experimenting with flavors and methods is what really makes cooking the art form that it so clearly is. The options are plentiful, and the vision (or taste, as it is) is all up to you.
More related reading on our smoking & Grilling tips and technique see our directory on previous blogs!
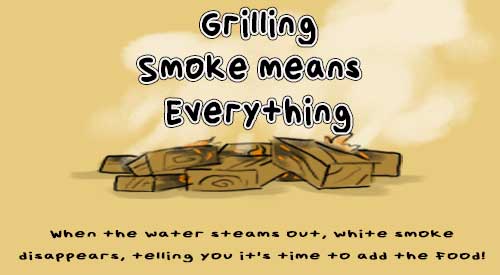
You smell it before you see it! The aroma of foods being cooked outdoors. When those foods involve cooking over wood – hardwood to be specific – well, it is a flavor experience that is in a league of its own.
Recently, our cartoon friends, Tom and Bert, had an exchange about what the color of smoke means.
Build an open pit cooking fire for grilling and ember cooking! Is easier than you may think follow our steps below!
OPEN PIT COOKING- BUILDING THE PERFECT FIRE
SmokinLicious® receives a lot of questions about wood-fired cooking and one of the most repetitive concerns the building of the fire for cooking. We’ve developed this series to address how to build the fire by equipment and technique. For Part I, we cover the open pit cooking fire.
Get Organized- Open Pit Cooking
The first step is to know where you will build the fire. Are you planning on using an outdoor fireplace, a fire pit, or will you construct a temporary fire location?
When using an existing fireplace located outdoors, you must ensure that the firebox is clean of previous ash and wood. The same is true for a open pit cooking fire pit. If you will set up a temporary location for the fire, consider what you will use for materials to secure the area. It is never recommended to use your patio, paved driveway or lawn because a hot fire is sure to damage them or, at the very least, mar their appearance (thin charcoal black coating the surface). Using large stones, interlocking bricks, or a metal fire ring work great at securing the area to contain your fire.
Once you’ve decided on the location, you’ll need to collect some supplies to make the cooking safe and fun.
▪ material to contain the fire like stones, bricks or a cast iron/wrought iron ring. You can use an outdoor fireplace or open pit cooking fire pit whether permanent or portable
▪ water, shovel, dirt, and/or fire extinguisher to deal with potential fire spread or wayward embers
▪Smokinlicious® smoking wood chips for quick lighting
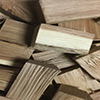
▪ small twigs or small pieces of hardwood to create a tepee around the wood chips (we like our Smokinlicious® smoking double or single filet chunks)
▪ larger hardwood pieces to create a 2nd tepee around the first (Smokinlicious®1/4 cut logs work great for that)
▪ rolled newspaper or fire starters
▪ have additional hardwood for producing more coals for cooking as needed
▪ a coal rake, fireplace tongs for moving and relocating wood pieces, spray bottle of water to tame flames near food, instant read thermometer (you can also use a traditional wrought-iron log holder to make the fire – the hot coals will fall through and then you rake them to the cooking side)
The Perfect Fire for Open Pit Cooking
Always take note of the day’s temperature, wind conditions/direction, and conditions of your wood (dry or wet, fresh cut or aged) before you start. You want to be sure you set up and start the fire where the wind direction won’t cause smoke to enter house windows or the dining area. Keep those locations upwind.
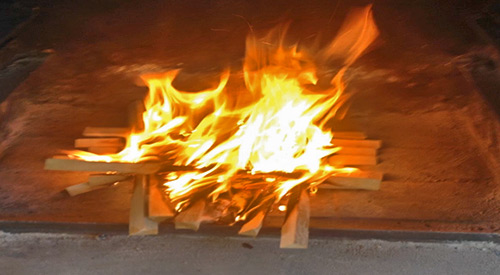
In your fire safe area, pile up a few handfuls of hardwood chips (you can use newspaper but I like to try to stay with wood in its natural state). Make a small tepee around the wood chips using small wood pieces (our single filet wood chunks work great) or twigs. Make a second tepee of larger wood pieces around the first one. You’ll see that you’re graduating from small wood pieces to larger as you build but you’re also ensuring good oxygen pockets to help feed the fire to the next level. This is what ensures even combustion and even coals. Now, light the wood chips at the center and allow everything to ignite. Don’t add any additional wood until you see the outside wood ablaze.
Fire for Fuel, Coals for Open Pit Cooking
The purpose of your shovel other than as protector of wayward fire, is to take those hot coals and move them to the cooking area. Remember, the fire area is not where you are going to cook. That location is nearby but not with the flames. You should never cook over direct flame as it will overcarbonize the foods and result in bitter tastes.
Ideally, you want to cook over coals that have a white colored ash over them. Now, here’s how to determine temperature of those coals: hold your hand over the coals the distance your foods will be. If you can only hold your hand for a count of 2 seconds before you need to pull it away, that is high heat. 3-4 seconds is medium-high, 5-6 seconds is medium and 7-8 seconds is low heat.
Bring on the Food!
Once your coals are at the perfect temperature for the foods you want to cook, it’s all about cooking! Remember, you can set up different heat areas to cook different foods. That’s what makes the experience with wood cooking, specifically with coals, so exhilarating.
We hope this article was full information you didn’t know. Leave us a comment and subscribe so you don’t miss anything concerning wood fired cooking, flavors, and the science behind the fire.
More Related reading on “What Wood for Smoking” and other great smoking and grilling tips and techniques
Caution- When selecting wood chips for smoking know the wood source!
THE DIFFERENCE BETWEEN $3.99 WOOD CHIPS FOR SMOKING AND THE SMOKINLICIOUS® BRAND
listen to our blog regarding wood chips for smoking
If you’ve ever looked at the wood chips for smoking products available at most discount retail stores, you’ll notice that they seem to have consistent pricing in the $3.99 or less bracket. Yet, you look at the SmokinLicious® brand and come up with a price that’s close to twice the cost. What’s the deal with the price difference?
There are many factors involved in determining the retail price of wood chips many of which I’m sure the average consumer hasn’t considered. What exactly are you paying for when you select a specific wood chip brand?
Let me give you some insight.
Wood Chips for Smoking- Let’s Start with the Raw Material
The raw material is by far the largest cost factor with selling wood chips for grilling, smoking, and cooking in general. I’ll make the comparison to cotton purchased by a t-shirt manufacturer. There are grades of cotton. Higher grades of cotton go into more expensive cotton clothing. Purchase a $5 t-shirt and you’re guaranteed a lower grade cotton was used. This means you likely won’t get more than a year of consistent wearing and washing out of that $5 t-shirt!
The same is true for wood chips. There are 8 different grades of wood or lumber for purposes such as cabinet making, flooring, construction, and pallets. Only one culinary wood company specifically purchases raw lumber material for cooking wood manufacture only. That would be SmokinLicious®.
Other companies will do one of three things; have a primary business in one of the areas listed above and use the waste product for producing the wood chips, or, purchase another company’s waste product to market as a wood chip grilling and smoking wood, or, have the company with waste product package a private label brand of grilling and smoking chips and deliver to a centralized distribution warehouse for the brand, something commonly done by equipment manufacturers who feel a need to offer a wood chip to go with the equipment.
Cleanliness of the Manufacturing Process
Another key factor in cost is the handling of the material during the manufacturing process. Now I understand that we are talking about wood and not a food item. However, if you are using a wood to add flavoring to food through smoke vapor from burning wood, then I see the wood as an ingredient. As with any ingredient, I would prefer to use something that is clean and pure since I will be eating this.
Since I’ve already pointed out that many companies use materials that are labeled as waste wood, you have no idea how the waste material was collected, stored, moved, and processed. You also don’t know what’s in that waste wood (treated lumber pieces, a mix of woods, some softwoods) or how old that material is which directly affects the moisture level. Remember, moisture is needed to smolder the wood and produce smoke vapor.
SmokinLicious® is the only culinary wood manufacturer that is Kosher certified, attesting to the steps taken to ensure the culinary products are clean, clean stored, and preserved.
Wood Chips for Smoking- Varieties and Availability
listen to our blog regarding wood chips for smoking
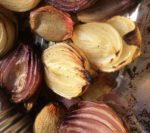
One vegetable that is available throughout the year is the onion. Although you’re likely accustomed to using this in recipes as an added natural flavor when you wood-fire the onion, something magical happens to its cell structure that turns these into the buttery, melt-in-your-mouth gems that you’ll want to use in even more recipes.
Onions are high in vitamin C, can aid in weight loss, and have reduced certain cancer risks, especially those associated with the digestive tract.
Whether you elect to do the standard yellow onion, the sweet red onion, or shallots, you will love how smoke vapor works to bring out the best in any variety.
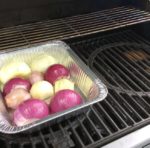
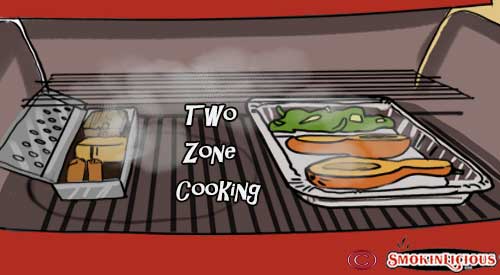
Wood Roasted Onions- Preparing for the Grill
Before preparing the onions for the grill, let’s get the grill started by lighting the burners on only half the grill. This is referred to as two zone cooking. On the lit burner side, I place 2 wood chunks – I’m using the Single Filet size from SmokinLicious® – directly on the heat shields of my hot burners. This will provide the wood flavoring to the onions. My burners are set to medium-low which usually produces a cooking temperature of about 300°F. Simply adjust your burner setting to reach this temperature.
For the onions, I simply cut the tops of, slice in half and remove the skins. I place the halves cut side down in a roasting pan and add about ¼ cup of oil to the pan. With my pan ready, I place it on the unlit side of the grill and close the lid. In about 75 minutes, these will slightly charred, tender, and juicy.
Tasting Notes: Although I used avocado oil since you are not grilling over direct heat, you can use other oils such as olive, almond, walnut, grapeseed, coconut, sesame, canola, etc. Remember, some varieties of onion are considered herbs so doing an assortment of types will give you an abundance of flavors.
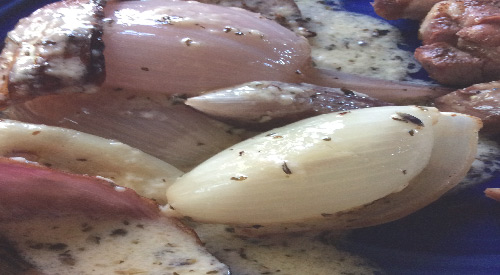
Wood Roasted Onions- The Longer the Wood Roast the More Flavor
You’ll find as these onions cook and absorb both the smoke vapor and oil, the scales of the onions will separate and caramelize. The results are tender, juicy and flavorful with a hint of woodsy from the charred edges.
I decided to make a simple sauce of butter, cheese, parsley, and pepper for my onion mix and served these alongside a pork steak, also cooked on the grill with a two-zone method.
The best part is onions are available year-round so I can do this method even in the dead of winter, as remember, the gas grill still functions even in the cold! For those who like to freeze produce, this freezes very well so grill a lot keep them so they’re ready for the winter days you don’t feel like lighting the grill. Just think what an onion soup will taste like when you wood-fire the onions first!
Tasting Notes: If using a charcoal grill, still use a two-zone cooking set up meaning charcoal on only one side of the grill. Be sure you only cook with hot coals, no flames. This type of grilling can have more challenges to steady temperature so make sure you check the onion pan more frequently.
There is misinformation out there that you may have been victim to. When cooking with hardwood, you may have been under the impression that only certain woods can be used with certain foods. For instance, hickory is reserved only for pork shoulder and brisket. Cherry for chicken, etc.
But that is hardly the truth.
Hardwood used for cooking must be viewed as another ingredient. As a key ingredient, it needs to be balanced with the food item and other ingredients used in preparation before grilling and smoking.
The intent today is to provide a guide on combinations of hardwood that work well for specific foods. Essentially, the ingredients of a rub, glaze, sauce or marinade will dictate what hardwoods will maximize all the flavors to become a finished masterpiece.
Combining Hardwoods- Hardwood Selection as a Compatible Ingredient
The goal when using hardwood is balance of the flavor outcome. You never want the hardwood to produce an ashy or burnt flavor. The essence of the wood should simply add to the beautiful flavor outcome for a memorable eating experience.
Here is SmokinLicious® rating on boldness of flavor for the hardwoods we offer:
When I design wood recipes for specific foods, I like to think about balancing out a medium or bolder flavor with one that is lighter. For lighter fare items like vegetables and fish, two wood combinations are generally used while longer cooked animal proteins can tolerate three hardwoods well.
In the chart that follows, reference is provided to various foods that benefit from exposure to the specified hardwoods. Use the color blocks indicated under each food group to guide you on combinations.Find the same color blocks in that group, and you have the balanced combination of hardwood. For instance, under Fruit, there are two red squares for an alder and cherry combination. Under the Fish column, there are 3 options: Alder and Maple represented by the pink square, Beech and Cherry represented by the orange square, and Ash and Maple represented by the gray square. These combinations are balanced by the essence they produce in the smoke vapor. Just use equal parts of each wood and remember, always start with a small quantity of hardwood as it does not take much to produce great flavor.
TIP: if you are using a spicy rub, default to combinations that includes mild to moderate flavor intensity. Using sweet ingredients, include a bolder hardwood flavor.
Our Guide for Combining Hardwoods
Experiment to find your favorite combinations of hardwood and soon you’ll have your own personal, detailed guide!
Do you have a favorite combination of hardwood? Leave us a comment and subscribe to get our latest tips, techniques, recipes and the science behind the fire and smoke, for all live fire cooking methods. That’s SmokinLicious!


 small twigs or small pieces of hardwood to create a tepee around the wood chips (we like our Smokinlicious® smoking
 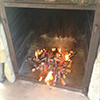 In your fire safe area, pile up a few handfuls of hardwood chips (you can use newspaper but I like to try to stay with wood in its natural state). Make a small tepee around the wood chips using small wood pieces (our single filet wood chunks work great) or twigs. Make a second tepee of larger wood pieces around the first one. You’ll see that you’re graduating from small wood pieces to larger as you build but you’re also ensuring good oxygen pockets to help feed the fire to the next level. This is what ensures even combustion and even coals. Now, light the wood chips at the center and allow everything to ignite. Don’t add any additional wood until you see the outside wood ablaze.
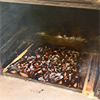 Once your coals are at the perfect temperature for the foods you want to cook, it’s all about cooking! Remember, you can set up different heat areas to cook different foods. That’s what makes the experience with wood cooking, specifically with coals, so exhilarating.